Swirled Easter Cake Recipe
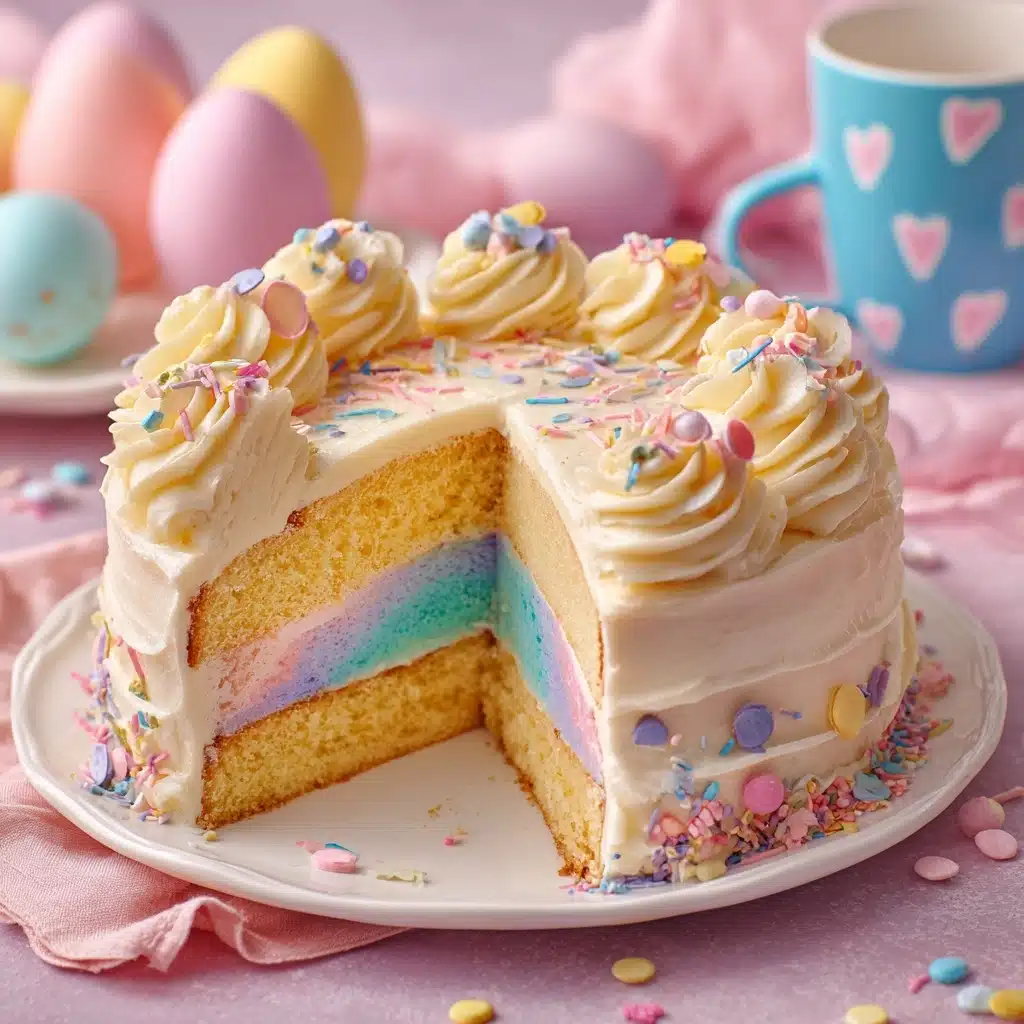
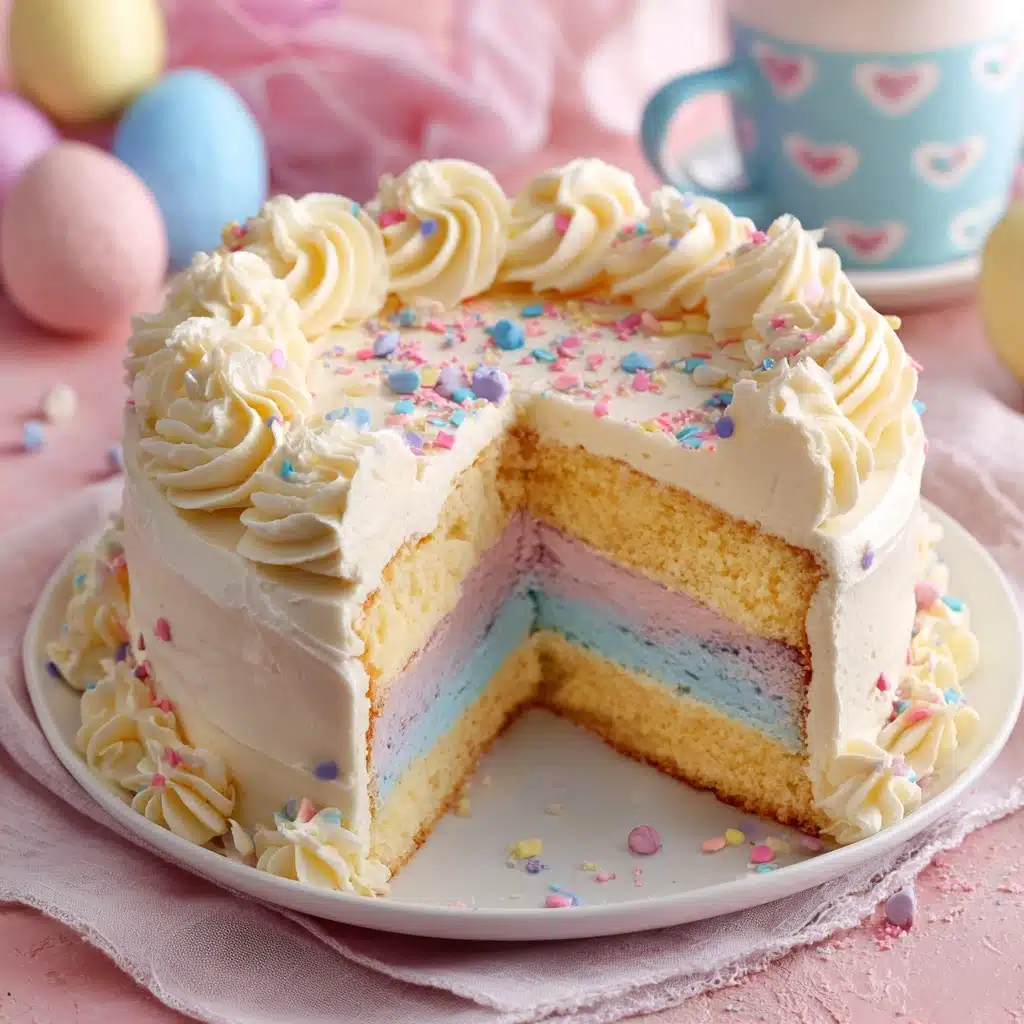
There’s nothing quite as festive as a Swirled Easter Cake to celebrate spring and make any gathering feel extra special. Imagine slicing into a cake that reveals a gorgeous pastel swirl inside—each piece is a surprise, and the colors are just as delightful as the tender, buttery crumb. This cake manages to be both a showstopper centerpiece and irresistibly delicious, thanks to its moist vanilla base and billowy buttercream. Whether you’re hosting brunch, Easter dinner, or just want to wow your loved ones, the Swirled Easter Cake brings flavor, color, and joy to your table.
Ingredients You’ll Need
The beauty of this Swirled Easter Cake lies in its combination of simple, familiar ingredients that come together to create something magical. Every component has its job—some add structure, some contribute flavor, and others provide those jaw-dropping colors that make this cake so iconic.
- All-purpose flour: Delivers the sturdy yet tender base that gives this cake its perfect crumb.
- Baking powder: Helps the cake rise for a light, fluffy texture that isn’t dense or heavy.
- Salt: A little goes a long way in balancing out sweetness and enhancing flavor.
- Unsalted butter (softened): Brings richness and moisture—make sure it’s at room temperature for easy blending.
- Granulated sugar: Creates sweetness and aids in the cake’s beautiful golden crust.
- Large eggs: Act as binders that provide structure and help produce an airy crumb.
- Vanilla extract: Adds warmth and depth to the cake’s vanilla flavor profile.
- Whole milk: Keeps the cake moist and soft while adding a light creaminess.
- Pastel gel food coloring (pink, yellow, blue, purple): Provides vibrant, swirled hues without watering down the batter.
- Buttercream frosting (homemade or store-bought): This creamy topping is a dream for spreading and decorating.
- Easter sprinkles: The perfect finishing touch for an extra pop of color and celebration.
How to Make Swirled Easter Cake
Step 1: Prep the Pans and Oven
Start by preheating your oven to 350°F (175°C). Grease two 9-inch round cake pans and place parchment circles at the bottom—this little step guarantees the cakes will release easily after baking. Give the sides a quick dusting of flour if you want extra insurance, especially since we’ll be swirling those beautiful batters.
Step 2: Combine Dry Ingredients
In a medium bowl, whisk together the flour, baking powder, and salt. This quick mix ensures an even rise and eliminates any potential clumps, so your Swirled Easter Cake is perfectly uniform in texture and taste every time.
Step 3: Cream Butter and Sugar
In a large bowl, beat the softened butter and sugar together with an electric mixer until pale, light, and fluffy—this usually takes about three minutes. Don’t rush this part; a properly creamed mixture helps trap air, making your cake lighter and more tender.
Step 4: Add Eggs and Vanilla
Add the eggs one at a time, fully blending after each addition. This keeps the batter smooth and prevents curdling. Once all the eggs are in, stir in the vanilla extract to enhance all those sweet, springy flavors.
Step 5: Alternate Dry Ingredients and Milk
Now, alternate adding the dry mixture and milk to your creamed base in three parts—beginning and ending with the dry ingredients. Gently mix after each addition, just until combined, to preserve your cake’s delicate texture and avoid excess gluten development.
Step 6: Tint the Batter
Divide the batter evenly into four bowls. Tint each one with a small amount of pastel gel food coloring—think blush pink, sunny yellow, soft blue, and pretty purple. A toothpick or skewer helps control the intensity, so add the coloring a little at a time, stirring gently for even shades.
Step 7: Swirl and Bake
Now comes the fun part! Drop spoonfuls of each colored batter randomly into the prepared cake pans. Once they’re all in, use a butter knife to gently swirl through the batter—go lightly so the colors mix in ribbons rather than blending together. Bake for 25–30 minutes or until a toothpick in the center comes out clean. Cool in the pans for 10 minutes, then turn out onto wire racks until completely cool.
Step 8: Frost and Decorate
Once the cakes are cool, frost generously with buttercream—spread it thickly for a plush, bakery-worthy look. Scatter Easter sprinkles across the top for that magical finishing touch that makes your Swirled Easter Cake completely irresistible and eye-catching on any dessert table.
How to Serve Swirled Easter Cake
Garnishes
This cake is a canvas for creative, cheerful garnishes. Easter-themed sprinkles add instant holiday charm, but you can also try pastel-colored sugar pearls, edible glitter, or even a sprinkle of toasted coconut for extra texture. For an elegant finish, tuck a few edible flowers or piped buttercream rosettes along the edge—each adds a personal, special touch to your Swirled Easter Cake.
Side Dishes
Pair your Swirled Easter Cake with a fresh fruit salad or light citrus sorbet to balance its sweetness. If you’re hosting a full brunch, slices of this cake belovedly follow savory dishes like quiche, deviled eggs, or ham, letting the cake shine as the grand finale without being overly heavy.
Creative Ways to Present
The visual excitement of this cake can be elevated with a dramatic cake stand or a cluster of colorful Easter eggs around the base. Cut thick slices to show off those stunning pastel swirls, or set out individual squares (using a 9×13-inch pan) for easy serving at parties. For extra pizzazz, serve each piece with a dollop of whipped cream or a scoop of vanilla ice cream.
Make Ahead and Storage
Storing Leftovers
After you’ve dazzled your guests, cover any leftover Swirled Easter Cake with plastic wrap or store in an airtight container at room temperature for up to two days. If your home is especially warm or humid, keep it in the fridge—it will stay moist and delicious for about four days, just bring it back to room temperature before serving for the best texture.
Freezing
This cake freezes beautifully! Wrap unfrosted layers tightly in plastic wrap and then foil, and freeze for up to two months. Thaw overnight in the refrigerator. You can also freeze frosted cake slices; just let them sit at room temperature until soft enough to enjoy.
Reheating
If your Swirled Easter Cake has been chilling in the fridge, a quick 10- to 15-second zap in the microwave will revive its softness without melting the buttercream. Avoid high heat to preserve the frosting’s shape and flavor.
FAQs
Can I use liquid food coloring instead of gel?
Gel food coloring is best for deep, vivid hues without changing the batter’s consistency. Liquid food coloring can work in a pinch, but you’ll need to use more, which may thin the batter and make your pastel swirls less vibrant.
Can I make Swirled Easter Cake in advance?
Absolutely! You can bake the cake layers up to two days ahead and wrap them tightly until you’re ready to frost and serve. This makes holiday meal prep so much easier.
What if I don’t have two round pans?
No problem—you can bake the batter in a single 9×13-inch cake pan for a sheet cake version. Just keep an eye on the baking time, as it may take a few minutes longer to cook through.
How can I make this cake dairy-free?
Swap the butter for a good plant-based alternative, and use a dairy-free milk like almond or soy. There are also plenty of dairy-free ready-made frostings available if you don’t want to make your own.
Can kids help with the swirling?
Kids love this part! Give them a spoon or a butter knife and let them help drop and swirl the colors—just be sure to supervise, as over-mixing can muddy the beautiful pastel effect. Their enthusiasm makes this Swirled Easter Cake even more memorable.
Final Thoughts
This Swirled Easter Cake delivers on both fun and flavor, and I can’t recommend it enough for your next spring celebration. Whether you’re a baker at heart or just looking to make memories with family and friends, this cake is guaranteed to get everyone talking (and reaching for seconds). Give it a try—you’ll see just how special a swirl of pastel can be!
Print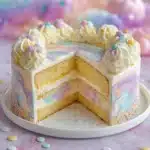
Swirled Easter Cake Recipe
- Total Time: 55 minutes
- Yield: 12 servings 1x
- Diet: Vegetarian
Description
This Swirled Easter Cake is a delightful and colorful dessert perfect for your holiday celebration. With a marbled effect created by vibrant pastel colors, this cake is as beautiful as it is delicious. Topped with creamy buttercream frosting and Easter sprinkles, it’s sure to be a showstopper at your table.
Ingredients
Dry Ingredients:
- 2½ cups all-purpose flour
- 2½ teaspoons baking powder
- ½ teaspoon salt
Wet Ingredients:
- 1 cup unsalted butter, softened
- 2 cups granulated sugar
- 4 large eggs
- 1 tablespoon vanilla extract
- 1 cup whole milk
Additional:
- Pastel gel food coloring (pink, yellow, blue, purple)
- 2 cups buttercream frosting (homemade or store-bought)
- Easter sprinkles for decoration
Instructions
- Preheat Oven: Preheat oven to 350°F (175°C) and prepare cake pans.
- Prepare Dry Ingredients: Whisk together flour, baking powder, and salt.
- Mix Wet Ingredients: Beat butter and sugar, add eggs and vanilla, then mix in dry ingredients and milk.
- Add Color: Divide batter and tint with pastel gel food coloring.
- Create Swirl Effect: Drop spoonfuls of each colored batter into pans and swirl gently.
- Bake: Bake for 25–30 minutes until a toothpick comes out clean.
- Cool and Frost: Cool cakes, then frost with buttercream and decorate with sprinkles.
Notes
- Avoid over-swirling the batter to maintain distinct colors.
- This cake can also be made in a 9×13-inch pan for easier serving.
- Prep Time: 25 minutes
- Cook Time: 30 minutes
- Category: Dessert
- Method: Baking
- Cuisine: American
Nutrition
- Serving Size: 1 slice
- Calories: 430
- Sugar: 38g
- Sodium: 200mg
- Fat: 21g
- Saturated Fat: 13g
- Unsaturated Fat: 7g
- Trans Fat: 0g
- Carbohydrates: 58g
- Fiber: 1g
- Protein: 5g
- Cholesterol: 100mg


