If you are looking for a dish that combines bold flavors with irresistible texture, this Sticky Sweet Chili Chicken Thighs Recipe is going to be your new favorite go-to. Imagine perfectly crispy, golden chicken thighs coated in a luscious, sticky glaze bursting with sweet chili goodness, balanced by hints of garlic and ginger. It’s the kind of comfort food that feels both special and accessible, ideal for a weeknight dinner or impressing guests without stress. Every bite brings a harmonious mix of sweet, savory, and tangy notes that keep you coming back for more.

Ingredients You’ll Need
To make these sticky sweet chili chicken thighs, you only need a handful of simple, everyday ingredients. Each one plays a vital role, whether it’s creating that crispy skin, infusing deep flavors, or forming the luscious sauce that clings perfectly to each piece.
- Bone-in, skin-on chicken thighs: The star of the dish, perfect for juicy meat and crisp skin.
- Olive oil: For searing the chicken to golden perfection with a subtle fruity note.
- Soy sauce: Adds deep umami savoriness and saltiness to the glaze.
- Honey: Brings natural sweetness that balances the chili heat beautifully.
- Sweet chili sauce: Provides the signature sticky texture and vibrant sweet-spicy kick.
- Rice vinegar: A touch of acidity to brighten the sauce and cut through the richness.
- Garlic, minced: Infuses aromatic depth and warmth.
- Ginger, grated: Adds a fresh, spicy undertone that wakes up the flavor profile.
- Cornstarch: Helps thicken the sauce, making it glossy and cling perfectly.
- Salt and black pepper: Essential seasonings to enhance the natural flavors.
- Sesame oil: A final drizzle brings a fragrant, nutty aroma to the dish.
- Green onions, sliced: For a fresh, crunchy garnish that adds color and brightness.
- Sesame seeds: Offer subtle texture and a toasty flavor burst.
How to Make Sticky Sweet Chili Chicken Thighs Recipe
Step 1: Prepare and Season the Chicken
Start by preheating your oven to 400°F (200°C). Pat your chicken thighs dry to ensure the skin crisps up nicely during cooking. Then, generously season both sides with salt and black pepper for that classic savory base flavor.
Step 2: Sear the Chicken
Heat olive oil in a large ovenproof skillet over medium-high heat. Lay the chicken skin-side down and sear without moving it for 5 to 7 minutes until the skin becomes golden brown and irresistibly crispy. Flip the pieces and cook for an additional 2 to 3 minutes to lock in the juices.
Step 3: Make the Sauce
While the chicken cooks, whisk together the soy sauce, honey, sweet chili sauce, rice vinegar, minced garlic, grated ginger, and cornstarch in a small bowl. This mixture combines sweet, tangy, and spicy elements that will transform the chicken into a sticky masterpiece.
Step 4: Combine and Bake
Remove the skillet from heat and pour the sauce evenly over the chicken thighs, making sure each piece is beautifully coated. Then, transfer the skillet to the oven and bake for 20 to 25 minutes. The goal is to cook the chicken through to an internal temperature of 165°F (74°C) while letting the sauce bubble and thicken further.
Step 5: Final Touches
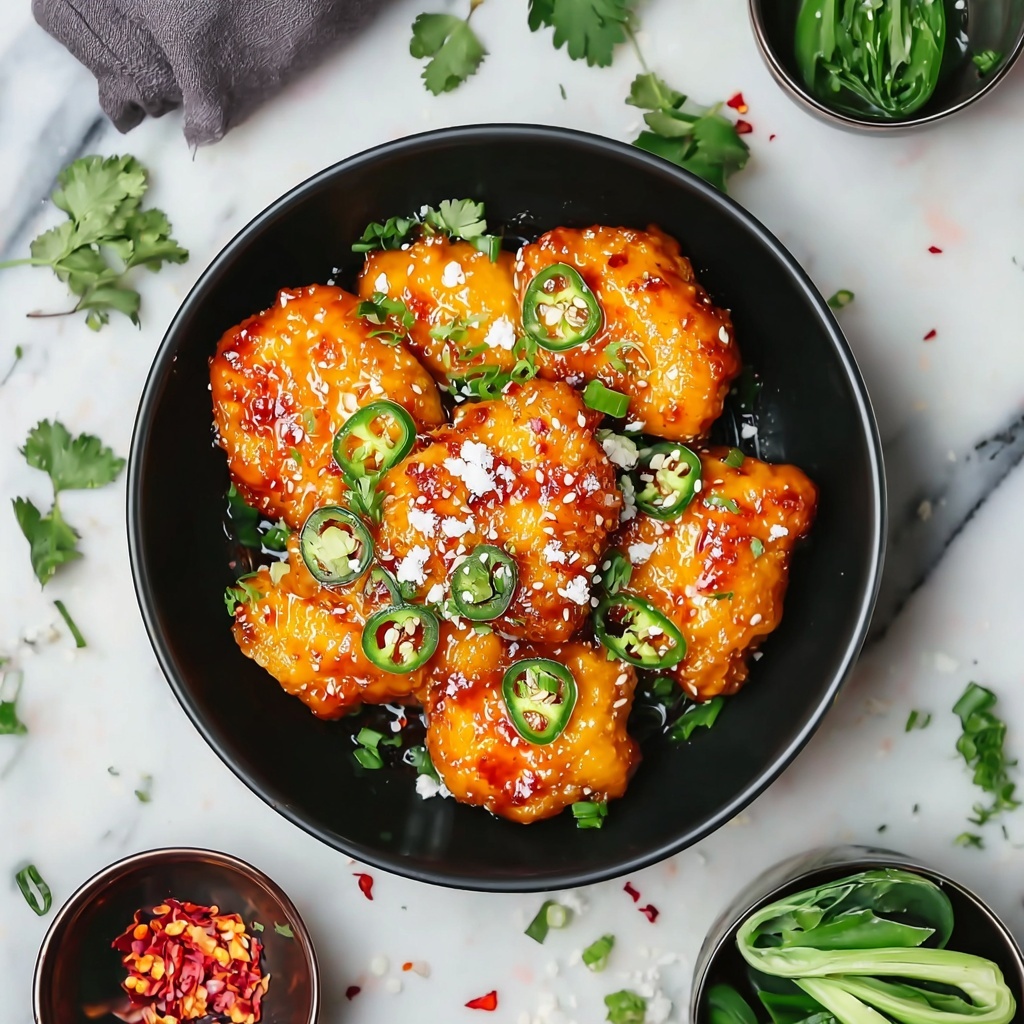
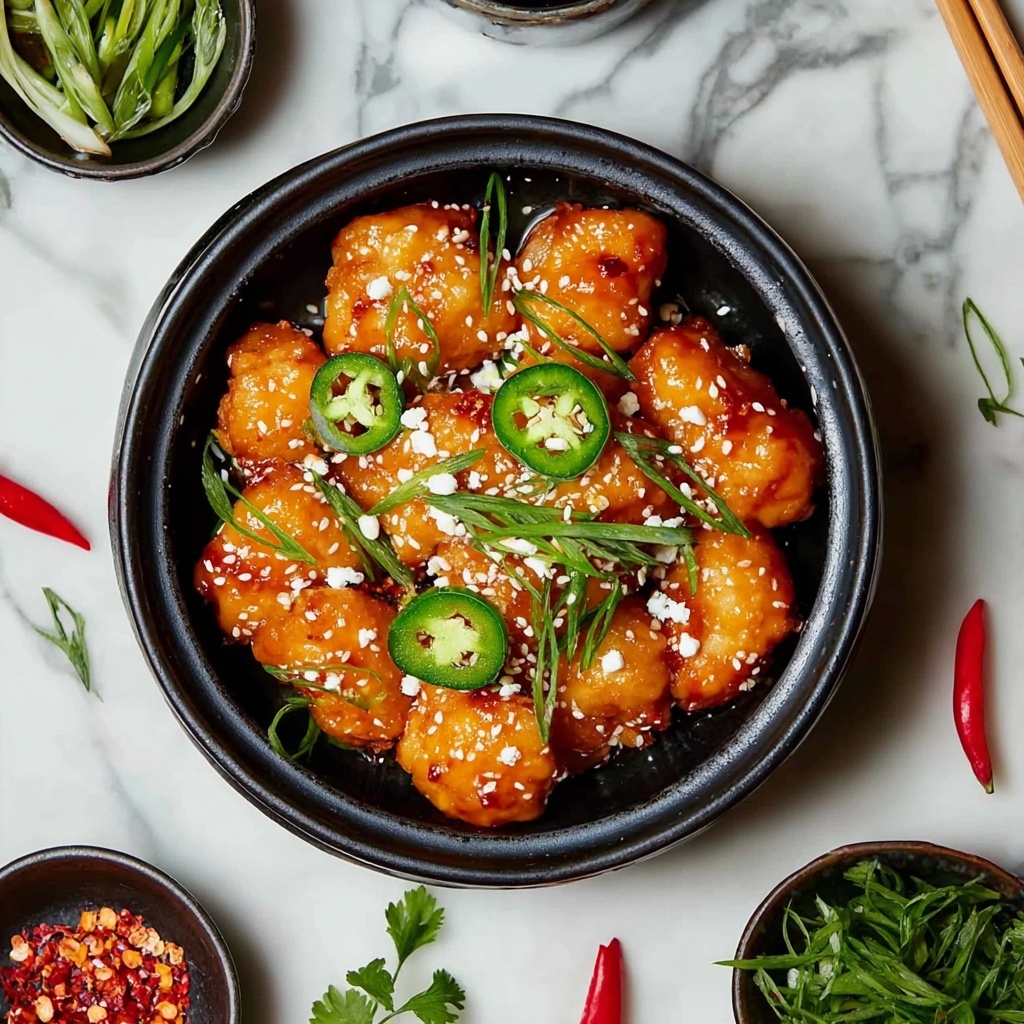
When the chicken is done, remove it from the oven and immediately drizzle sesame oil over the top. Sprinkle sliced green onions and toasted sesame seeds to add a burst of freshness, contrasting texture, and flavor complexity. Let the thighs rest a few minutes so the juices redistribute—this ensures every bite is juicy and flavorful.
How to Serve Sticky Sweet Chili Chicken Thighs Recipe
Garnishes
Simple garnishes can elevate the whole experience. Thinly sliced green onions add a crisp, slightly pungent bite that cuts through the richness, while toasted sesame seeds provide a beautiful nutty crunch. You can even toss in some chopped fresh cilantro or a sprinkle of red pepper flakes if you want a little extra zing.
Side Dishes
This dish shines alongside fluffy jasmine rice or steamed basmati to soak up every bit of that glorious sticky sauce. For a fresh balance, toss together a crunchy cucumber salad or some roasted vegetables like broccoli or bell peppers. The contrast of textures and flavors rounds out the meal perfectly.
Creative Ways to Present
For a fun twist, serve the sticky sweet chili chicken thighs wrapped in lettuce leaves with some extra sauce drizzled on top for a hands-on meal. Alternatively, slice the chicken and pile it over a hearty noodle salad with crunchy peanuts for added texture. Either way, presentation makes this dish feel as vibrant as its flavors.
Make Ahead and Storage
Storing Leftovers
Once cooled, store leftover chicken in an airtight container in the refrigerator for up to 3 days. The sauce tends to thicken even more, intensifying the flavor, so it tastes even better the next day.
Freezing
If you want to keep it longer, this Sticky Sweet Chili Chicken Thighs Recipe freezes beautifully. Place completely cooled chicken and sauce in a freezer-safe container or bag, and freeze for up to 3 months. Thaw overnight in the fridge before reheating.
Reheating
Reheat gently in a skillet over low heat or in the oven at 325°F (165°C) until warmed through. Adding a splash of water or broth can help loosen up the sauce if it becomes too thick after storage.
FAQs
Can I use boneless chicken thighs for this recipe?
Absolutely! Boneless chicken thighs will work well but typically cook faster and might not have quite the same crispy skin texture. Just adjust your cooking time accordingly and watch closely to avoid overcooking.
How spicy is the dish?
This Sticky Sweet Chili Chicken Thighs Recipe has a gentle kick from the sweet chili sauce, balanced by honey’s sweetness. If you prefer more heat, feel free to add chili flakes or use a spicier chili sauce.
Is this recipe gluten-free?
To keep it gluten-free, use tamari or a certified gluten-free soy sauce instead of regular soy sauce. All other ingredients are naturally gluten-free.
Can I prepare this recipe in advance?
You can prepare the sauce ahead of time and refrigerate it. When ready to cook, simply sear the chicken and bake it with the sauce. This can help speed up your cooking process on busy days.
What can I substitute for honey if I don’t have any?
Maple syrup or agave nectar make excellent substitutes and will provide that natural sweetness needed to balance the flavors in the sauce.
Final Thoughts
This Sticky Sweet Chili Chicken Thighs Recipe is such a joy to make and eat. It brings together comfort, spice, and a touch of elegance in a way that feels both exciting and easy. Once you try it, you’ll find it’s one of those dishes that becomes a staple for impressing friends or enjoying a cozy night in. So grab those chicken thighs and get ready for a sticky, sweet, and absolutely delicious dinner adventure.
Print
Sticky Sweet Chili Chicken Thighs Recipe
- Prep Time: 15 minutes
- Cook Time: 40 minutes
- Total Time: 55 minutes
- Yield: 4 servings
- Category: Main Course
- Method: Baking
- Cuisine: Asian
Description
This Sticky Sweet Chili Chicken Thighs recipe features crispy, oven-baked chicken skin with a luscious sticky sweet chili glaze. The chicken is first seared on the stovetop for a golden crust, then finished in the oven with a flavorful sauce of honey, soy, garlic, ginger, and sweet chili, garnished with fresh green onions and sesame seeds for texture and a burst of flavor.
Ingredients
Chicken and Seasoning
- 4 bone-in, skin-on chicken thighs
- 1/2 teaspoon salt
- 1/4 teaspoon black pepper
For Searing
- 2 tablespoons olive oil
Sauce
- 1 tablespoon soy sauce
- 2 tablespoons honey
- 3 tablespoons sweet chili sauce
- 1 tablespoon rice vinegar
- 2 cloves garlic, minced
- 1 teaspoon ginger, grated
- 1 tablespoon cornstarch
Finishing Touches
- 1 tablespoon sesame oil
- 2 green onions, sliced
- 1 tablespoon sesame seeds
Instructions
- Preheat Oven: Preheat your oven to 400°F (200°C) to prepare for baking the chicken later.
- Prepare Chicken: Pat the chicken thighs dry thoroughly with paper towels to ensure the skin crisps up nicely. Season both sides evenly with salt and black pepper.
- Sear Chicken: Heat the olive oil in a large ovenproof skillet over medium-high heat. Once hot, add the chicken thighs skin-side down and sear for 5-7 minutes until the skin is golden and crispy. Flip and cook the other side for another 2-3 minutes.
- Make Sauce: While the chicken is cooking, whisk together soy sauce, honey, sweet chili sauce, rice vinegar, minced garlic, grated ginger, and cornstarch in a small bowl until smooth.
- Add Sauce and Bake: Remove skillet from heat, pour the sauce mixture evenly over the chicken thighs. Transfer the skillet to the preheated oven and bake for 20-25 minutes, until the chicken reaches an internal temperature of 165°F (74°C).
- Garnish Preparation: While the chicken bakes, slice the green onions and set aside for garnish.
- Finish and Garnish: After baking, remove the skillet from the oven, drizzle sesame oil over the chicken, then sprinkle with sliced green onions and sesame seeds for added flavor and crunch.
- Rest and Serve: Let the chicken rest for a few minutes to allow the juices to redistribute before serving your delicious sticky sweet chili chicken thighs with your favorite sides.
Notes
- Searing the chicken skin first helps achieve extra crispy skin before baking.
- Ensure the chicken is cooked through to an internal temperature of 165°F (74°C) for safety.
- You can use boneless thighs but adjust baking time accordingly.
- For a spicier kick, add some chili flakes to the sauce.
- This dish pairs well with steamed rice or sautéed vegetables.


