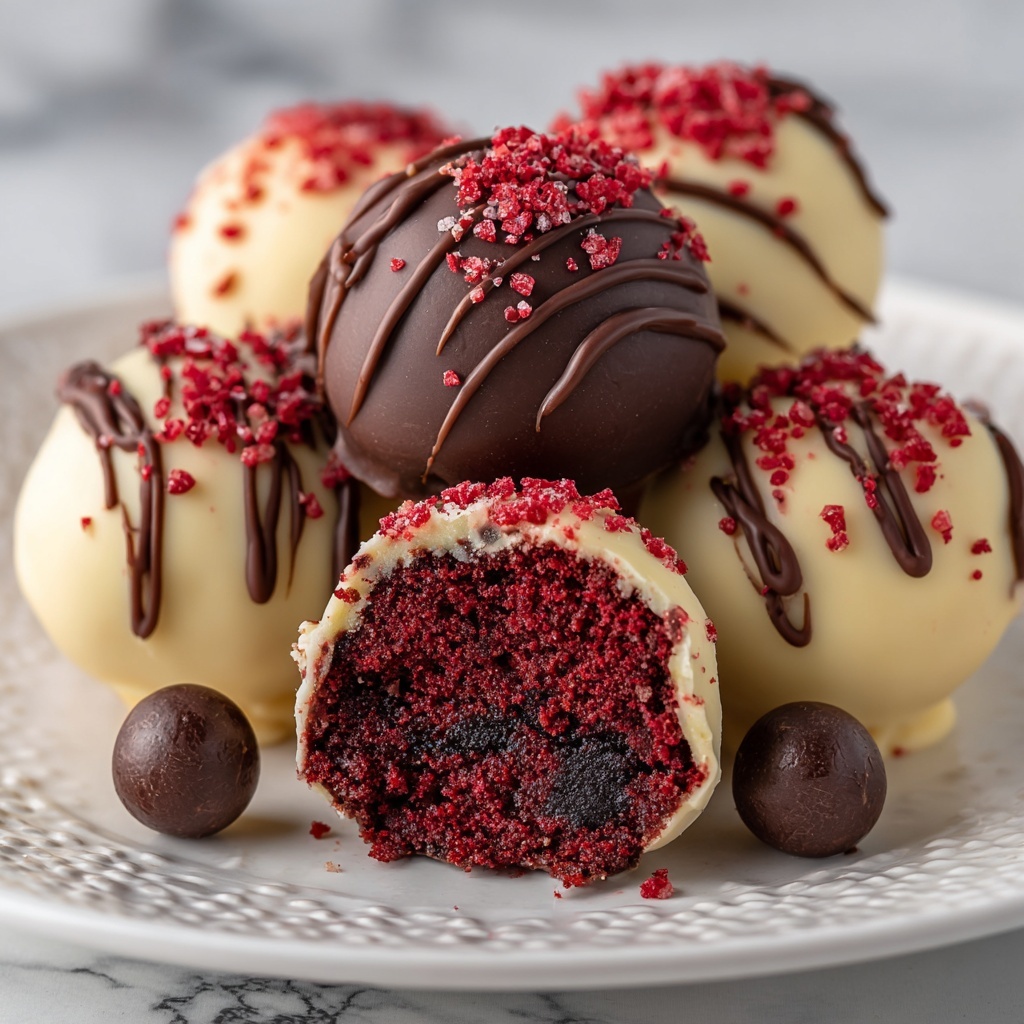
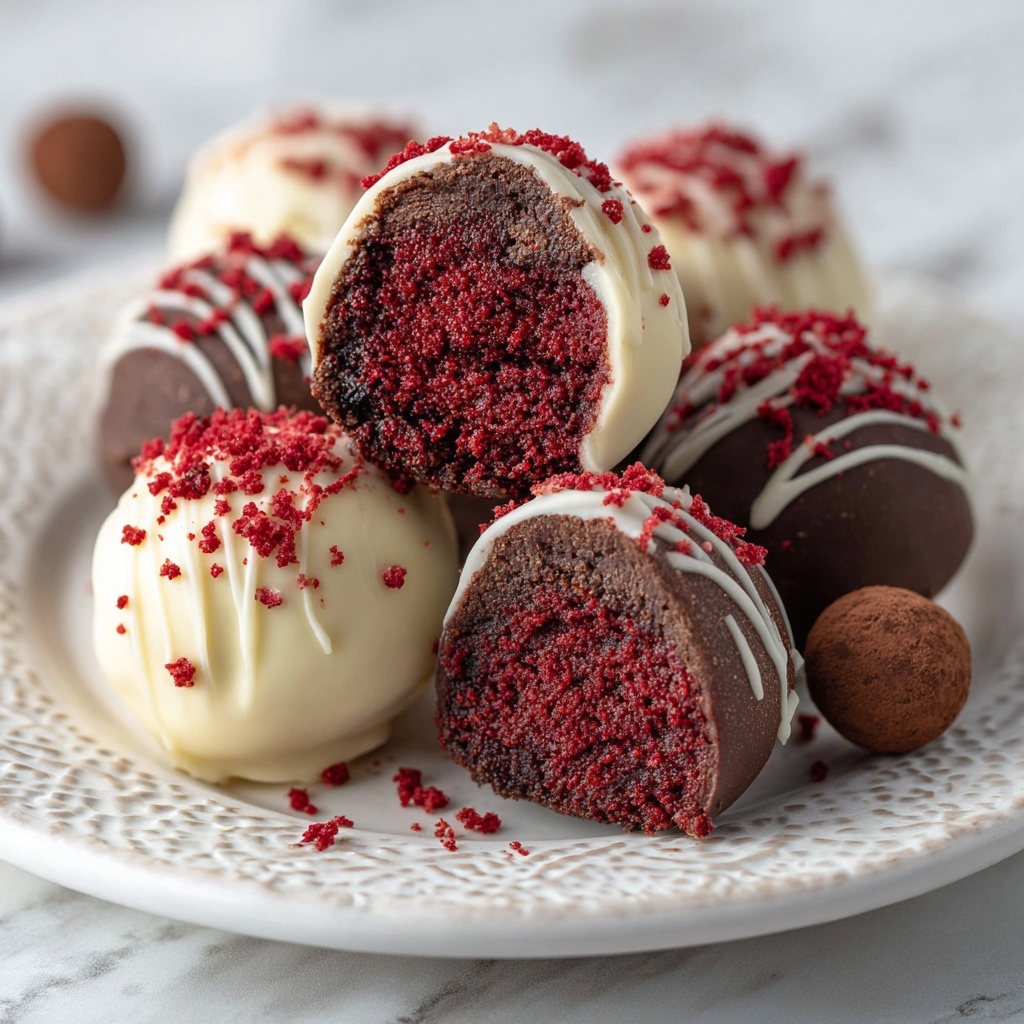
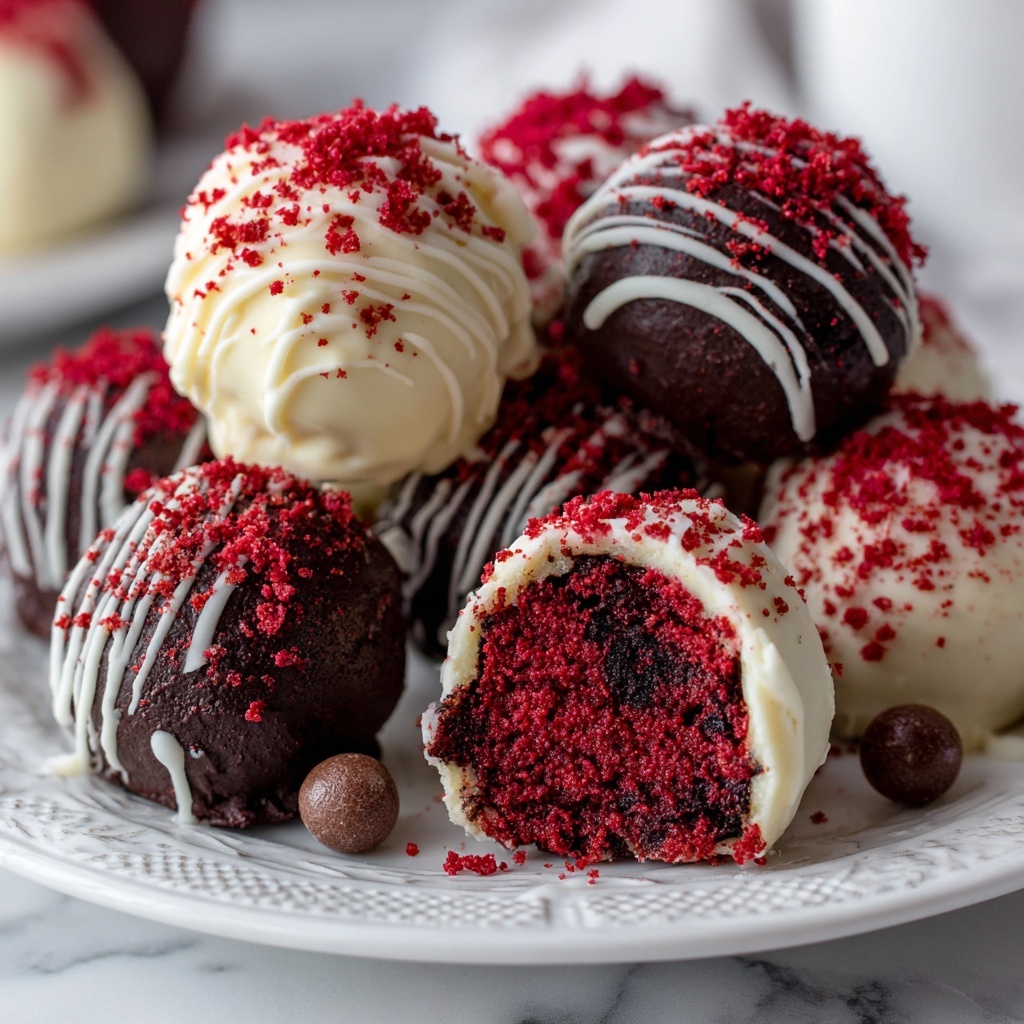
If you are searching for a delightful, bite-sized treat that packs the rich flavor and velvety texture of the classic dessert, you’ve got to try this Red Velvet Cake Balls Recipe. These little gems combine moist red velvet cake with creamy frosting, all encased in a smooth chocolate shell. Whether you’re preparing for a holiday party, a family gathering, or just a sweet snack craving, these cake balls deliver that perfect balance of sweetness and elegance in every bite. Once you make them, you’ll wonder how you ever enjoyed red velvet cake any other way.
Ingredients You’ll Need
Gathering the right ingredients is the first step toward making perfect red velvet cake balls. Each component plays a crucial role in creating that signature flavor, soft texture, and stunning appearance.
- Red velvet cake mix: Provides the iconic color and that moist, tender crumb that’s essential for these cake balls.
- Cream cheese frosting: Adds creamy richness that blends beautifully with the cake to bind the balls together.
- Chocolate or candy melts: The crunchy coating that seals in moisture while adding a touch of sweetness and a smooth finish.
How to Make Red Velvet Cake Balls Recipe
Step 1: Prepare the Cake
Start by baking your red velvet cake according to the package directions or your favorite homemade recipe. Be sure to let the cake cool completely; warm cake will make it hard to mix with the frosting and shape properly.
Step 2: Crumble the Cake
Once cooled, gently crumble the cake into a large bowl using your hands or a fork. Aim for fine crumbs that will easily combine with the frosting for a smooth mixture.
Step 3: Mix in the Cream Cheese Frosting
Add the cream cheese frosting to the crumbled cake. Using a spatula or your hands, mix thoroughly until the cake crumbs are evenly coated and the mixture comes together like dough but remains soft and pliable.
Step 4: Form Balls
Pinch off portions of the mixture and roll them into quarter-sized balls. Try to keep them uniform so they bake and set evenly. Place each ball on a baking sheet lined with wax paper to prevent sticking.
Step 5: Chill the Cake Balls
Pop the baking sheet into the refrigerator for at least one hour. This step firms up the cake balls, making them easier to dip and helping them hold their shape during coating.
Step 6: Melt the Chocolate or Candy Melts
While the cake balls chill, gently melt the chocolate or candy melts following the package instructions. A smooth, warm coating will make dipping easier and help create that flawless finish.
Step 7: Dip and Set
Once chilled, dip each cake ball fully into the melted coating using a fork or dipping tool. Let the excess drip off before placing them back onto the wax paper. Allow the coating to harden completely by either refrigerating or letting them sit at room temperature.
Step 8: Enjoy
Now for the best part — enjoy your beautifully coated red velvet cake balls! These bites are perfect for sharing, gifting, or indulging a little on your own.
How to Serve Red Velvet Cake Balls Recipe
Garnishes
Sprinkle your cake balls with festive toppings like crushed nuts, sprinkles, or edible glitter before the chocolate sets. These garnishes add a fun texture and a splash of color that makes them even more appealing.
Side Dishes
Serve these cake balls alongside a cup of freshly brewed coffee, a glass of cold milk, or even a warm cup of tea. The creamy, rich flavors pair beautifully with classic beverages, making your snack time feel like a cozy celebration.
Creative Ways to Present
Arrange your red velvet cake balls on a decorative platter with colorful cupcake liners or display them on sticks as bite-sized cake pops. You can even make a trifle with layered cake balls, whipped cream, and berries for a stunning dessert.
Make Ahead and Storage
Storing Leftovers
Keep leftover cake balls in an airtight container in the refrigerator. They will stay fresh and delicious for up to one week, making them a perfect make-ahead treat.
Freezing
You can freeze the cake balls after they have been coated. Place them on a baking sheet in a single layer and freeze until solid, then transfer them to a freezer-safe container or bag. They’ll keep well for up to three months.
Reheating
When ready to enjoy frozen cake balls, thaw them overnight in the refrigerator. Avoid microwaving as it can melt the coating unevenly. Serve chilled or at room temperature for best taste and texture.
FAQs
Can I use homemade red velvet cake instead of a cake mix?
Absolutely! Using homemade red velvet cake works wonderfully and gives you the freedom to adjust flavors or ingredients to suit your preferences.
What if I don’t have cream cheese frosting?
You can use buttercream frosting or even mascarpone frosting, but cream cheese frosting is preferred as it provides the signature tangy richness that complements red velvet perfectly.
Can I use white chocolate instead of traditional chocolate?
Yes, white chocolate or colored candy melts make a fantastic alternative, especially if you want to match the coating color with a festive theme.
How do I prevent the cake balls from falling apart?
The key is chilling them thoroughly so they firm up before dipping. Also, make sure not to add too much frosting; you want a batter-like consistency.
Are Red Velvet Cake Balls Recipe suitable for parties?
Definitely! These bite-sized treats are crowd-pleasers and perfect for events because they are easy to serve, eat, and share without any mess.
Final Thoughts
Making this Red Velvet Cake Balls Recipe is truly a joy, and the results are absolutely rewarding. The combination of classic red velvet flavor with a smooth, chocolate coating is simply irresistible. Whether you’re baking for a special occasion or just a sweet personal treat, these cake balls are sure to impress and delight everyone at the table. Give this recipe a try and get ready to fall in love bite by bite!
Print
Red Velvet Cake Balls Recipe
- Prep Time: 30 minutes
- Cook Time: 40 minutes
- Total Time: 2 hours
- Yield: 45 cake balls
- Category: Dessert
- Method: No-Cook
- Cuisine: American
Description
Delicious and easy-to-make Red Velvet Cake Balls featuring moist red velvet cake mixed with creamy frosting, dipped in rich chocolate coating. Perfect bite-sized treats for parties and special occasions.
Ingredients
Red Velvet Cake Balls Ingredients
- 1 box red velvet cake mix (or equivalent homemade red velvet cake)
- 1 can (16 oz) cream cheese frosting
- Chocolate or candy melts for coating (approximately 8 oz)
Instructions
- Prepare the Cake: Bake the red velvet cake according to the package instructions or your homemade recipe. Once baked, let the cake cool completely to ensure it crumbles easily without being too moist.
- Crumble the Cake: Break the cooled cake into fine crumbs inside a large mixing bowl, making it easier to blend with the frosting for a smooth consistency.
- Mix with Frosting: Add the entire can of cream cheese frosting to the cake crumbs. Stir and gently fold until the mixture is well combined and moldable.
- Form Balls: Using your hands or a small scoop, roll the mixture into quarter-sized balls. Arrange them evenly on a baking sheet lined with wax paper to prevent sticking.
- Chill: Refrigerate the cake balls for at least 1 hour. This step firms them up, making the balls easier to dip and less likely to lose shape.
- Melt Chocolate: Melt the chocolate or candy melts according to package directions, either in a microwave-safe bowl in short bursts or over a double boiler, stirring frequently until smooth.
- Dip and Coat: Using a fork or skewer, dip each chilled cake ball into the melted chocolate, ensuring it is fully coated. Lift and gently tap off any excess coating, then place back on the wax paper-lined sheet.
- Set and Harden: Allow the chocolate coating to harden completely at room temperature or in the refrigerator before serving or packaging your cake balls.
Notes
- For best results, use a high-quality cream cheese frosting for authentic flavor.
- Ensure cake is completely cooled before crumbling to avoid soggy balls.
- You can add sprinkles or drizzle contrasting chocolate on coated balls for decoration.
- Store finished cake balls in an airtight container in the refrigerator for up to 5 days.
- To make candy melts melt more smoothly, stir in a small amount of vegetable oil if necessary.


