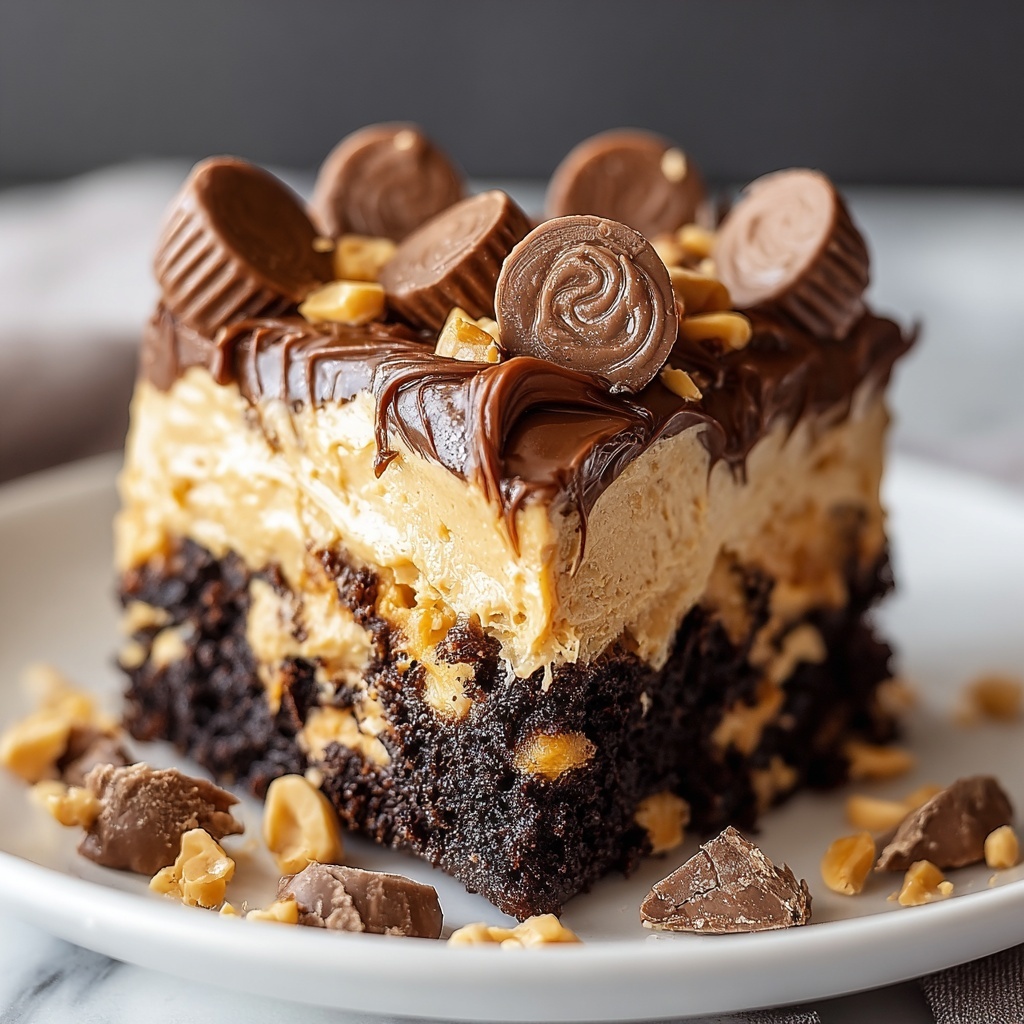
If you have a serious sweet tooth and an adoration for all things peanut butter and chocolate, then this Peanut Butter Cup Dump Cake Recipe is going to become your new best friend in the kitchen. It takes just a handful of simple ingredients and transforms them into a show-stopping dessert that’s gooey, rich, and bursting with the irresistible combo of peanut butter cups and chocolate cake. Imagine a dessert where melted butter and sweetened condensed milk create a luscious topping over a bed of chopped peanut butter cups and cake mix, all baked to perfection with a slightly golden crust and a tempting, gooey center. This is comfort food made easy, fast, and absolutely delicious.
Ingredients You’ll Need
These ingredients are the stars of this Peanut Butter Cup Dump Cake Recipe, each bringing something special to the table—from the smooth sweetness of sweetened condensed milk to the punch of flavor in peanut butter chips. None of them are complicated or hard to find, yet together they create a moist, decadent dessert everyone will rave about.
- Chocolate cake mix: The base of your dump cake that brings rich chocolate flavor and a fluffy texture.
- Mini peanut butter cups, chopped: These add gooey, melty pockets of peanut butter and chocolate that surprise with every bite.
- Peanut butter chips: Extra nuggets of creamy peanut butter goodness layered on top for texture and taste.
- Sweetened condensed milk: Adds irresistible sweetness and helps bind the ingredients while creating that rich, shiny topping.
- Butter, melted: Ensures the dry cake mix bakes into a moist, slightly crispy crust with a golden finish.
- Optional: Vanilla ice cream or whipped cream: Perfect for serving alongside, these toppings balance the richness with creaminess and coolness.
How to Make Peanut Butter Cup Dump Cake Recipe
Step 1: Preheat and Prep Your Pan
Start by preheating your oven to 350°F (175°C). Grease a 9×13-inch baking dish to make sure your cake doesn’t stick and comes out beautifully when it’s ready. This simple prep work sets the stage for the magic to come.
Step 2: Layer the Ingredients with Care
Evenly spread the chopped mini peanut butter cups across the bottom of your baking dish—these will become luscious pockets of gooey sweetness. Next, sprinkle the dry chocolate cake mix evenly on top, creating a dry yet textured layer. Finally, scatter peanut butter chips generously over the cake mix for bursts of creamy peanut butter in every bite.
Step 3: Add the Sweet and Buttery Touches
Now the secret to the moist and rich texture—drizzle the sweetened condensed milk evenly over the layered ingredients. Follow with melted butter poured uniformly on top. These liquids soak into the cake mix as it bakes, turning it into a moist satisfaction with a hint of crunch on top.
Step 4: Bake to Perfection
Place your baking dish in the oven and bake for 35 to 40 minutes. You’re looking for a top that’s just set and slightly golden—this contrast between the crispy top and gooey center is what makes this dump cake so irresistible. The chocolate and peanut butter meld together, creating a heavenly aroma that fills your kitchen.
Step 5: Cool Slightly, Then Indulge
After baking, let the cake cool just enough to firm up slightly but still remain warm and gooey inside. This resting phase enhances the flavors and makes it easier to serve. For extra indulgence, top each slice with vanilla ice cream or a fluffy dollop of whipped cream.
How to Serve Peanut Butter Cup Dump Cake Recipe
Garnishes
To elevate this Peanut Butter Cup Dump Cake Recipe even further, consider garnishing with additional chopped peanut butter cups or a sprinkle of crushed peanuts for added crunch and visual appeal. A drizzle of chocolate or caramel sauce also adds an extra layer of sweetness that guests will adore.
Side Dishes
While this dessert is a treat all on its own, pairing it with fresh berries or a tangy fruit salad helps balance out the richness. A small cup of black coffee or a glass of cold milk are classic side choices that perfectly complement the peanut butter and chocolate flavors.
Creative Ways to Present
Instead of serving in one big dish, try scooping the dump cake into individual mason jars or small dessert bowls to make each portion feel special. Top with a fresh mint leaf or edible flowers to add that touch of elegance. You can also layer it with whipped cream or ice cream in a parfait style for a fun twist.
Make Ahead and Storage
Storing Leftovers
This Peanut Butter Cup Dump Cake Recipe keeps beautifully, making it an excellent make-ahead dessert. Store leftover cake covered tightly with plastic wrap or in an airtight container in the refrigerator for up to 4 days. The flavors continue to deepen, and reheating briefly will bring back that gooey warmth.
Freezing
If you want to keep it longer, this cake freezes well. Wrap it tightly with foil or place it in a freezer-safe container, and freeze for up to 3 months. When ready to enjoy, thaw overnight in the refrigerator and warm gently before serving to revive its fresh-baked texture.
Reheating
To reheat, place individual portions in the microwave for about 30 seconds to a minute or warm the whole dish in the oven at 325°F for 10-15 minutes until heated through. Adding a scoop of ice cream after reheating makes it feel just as special as when freshly baked.
FAQs
Can I use regular peanut butter instead of peanut butter cups?
While you could add dollops of regular peanut butter, the charm of this Peanut Butter Cup Dump Cake Recipe lies in the chopped peanut butter cups that melt into sweet, gooey pockets. Using peanut butter alone won’t give you the same texture or chocolate-peanut butter surprise.
Is it possible to make this dessert gluten-free?
Absolutely! Simply replace the chocolate cake mix with a gluten-free version, and double-check that your other ingredients are gluten-free. The rest of the recipe remains the same, so gluten-free fans don’t have to miss out.
What if I don’t have sweetened condensed milk on hand?
Sweetened condensed milk provides sweetness and a creamy richness that’s hard to replace exactly. You might try a mixture of heavy cream and sugar as a substitute, but the texture and flavor could be slightly different. It’s worth keeping sweetened condensed milk stocked for recipes like this!
Can I prepare this dump cake in smaller portions?
Yes! You can make this recipe in smaller baking dishes or even individual ramekins. Just adjust the baking time as needed—smaller portions will bake faster, so keep a close eye on them to avoid overbaking.
How do I achieve that gooey center if I like it extra soft?
To get an extra gooey center in this Peanut Butter Cup Dump Cake Recipe, avoid overbaking and check the cake starting at 35 minutes. The top should be set but the center still soft and slightly fudgy. Cooling it just a little before serving helps maintain the gooey texture without the cake feeling undercooked.
Final Thoughts
This Peanut Butter Cup Dump Cake Recipe is one of those incredibly satisfying desserts that feels like a warm hug after a long day, with just the right balance of simplicity and decadent flavor. Whether it’s for a weeknight treat, a casual get-together, or a holiday indulgence, it’s so easy to whip up and impossible to resist. Do yourself a favor and try this recipe—it’s a quick way to bring smiles and sweet moments to your table.
Print
Peanut Butter Cup Dump Cake Recipe
- Prep Time: 10 minutes
- Cook Time: 35 minutes
- Total Time: 45 minutes
- Yield: 12 servings
- Category: Dessert
- Method: Baking
- Cuisine: American
Description
This Peanut Butter Cup Dump Cake is a rich and decadent dessert featuring layers of chopped peanut butter cups, chocolate cake mix, and peanut butter chips, all brought together with sweetened condensed milk and butter. Baked to perfection, the cake has a slightly gooey center and a golden top, making it an irresistible treat perfect for any occasion.
Ingredients
Chocolate Layer
- 1 box chocolate cake mix (about 15.25 oz)
- 1 cup peanut butter chips
- 1 cup mini peanut butter cups, chopped
Wet Ingredients
- 1 can (14 oz) sweetened condensed milk
- 1/2 cup (1 stick) butter, melted
Optional Toppings
- Vanilla ice cream or whipped cream for serving
Instructions
- Preheat and Prep: Preheat your oven to 350°F (175°C). Grease a 9×13-inch baking dish well to prevent sticking.
- Layer the Ingredients: Evenly spread the chopped mini peanut butter cups on the bottom of the prepared baking dish. Sprinkle the dry chocolate cake mix evenly over the peanut butter cups, followed by scattering the peanut butter chips evenly on top of the cake mix layer.
- Add the Liquids: Drizzle the entire can of sweetened condensed milk evenly over all the dry ingredients to moisten them. Then, pour the melted butter evenly over the top, ensuring full coverage.
- Bake: Place the baking dish in the preheated oven and bake for 35 to 40 minutes, or until the top is set and turns slightly golden brown. The center should remain gooey to maintain the dump cake’s signature texture.
- Cool and Serve: Allow the cake to cool for about 10 minutes to slightly set before serving. For an extra indulgent dessert experience, serve warm with a scoop of vanilla ice cream or a dollop of whipped cream.
Notes
- You can substitute mini peanut butter cups with regular sized ones chopped into smaller pieces if mini packs are unavailable.
- For a less sweet version, try reducing the amount of sweetened condensed milk slightly.
- Make sure the butter is fully melted to spread evenly over the top layer.
- Do not overbake; the gooey center is key to the texture.
- This cake keeps well covered at room temperature for up to 2 days or refrigerated for up to 5 days.


