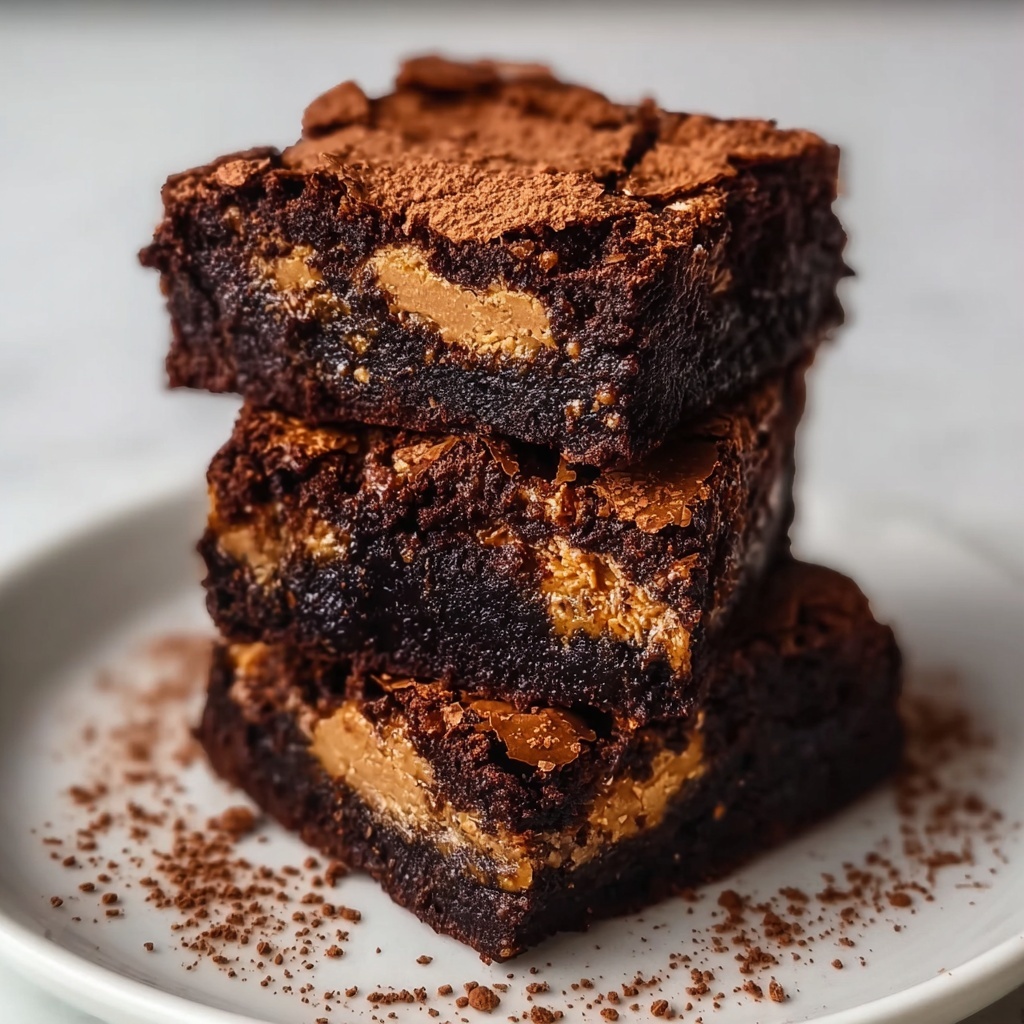
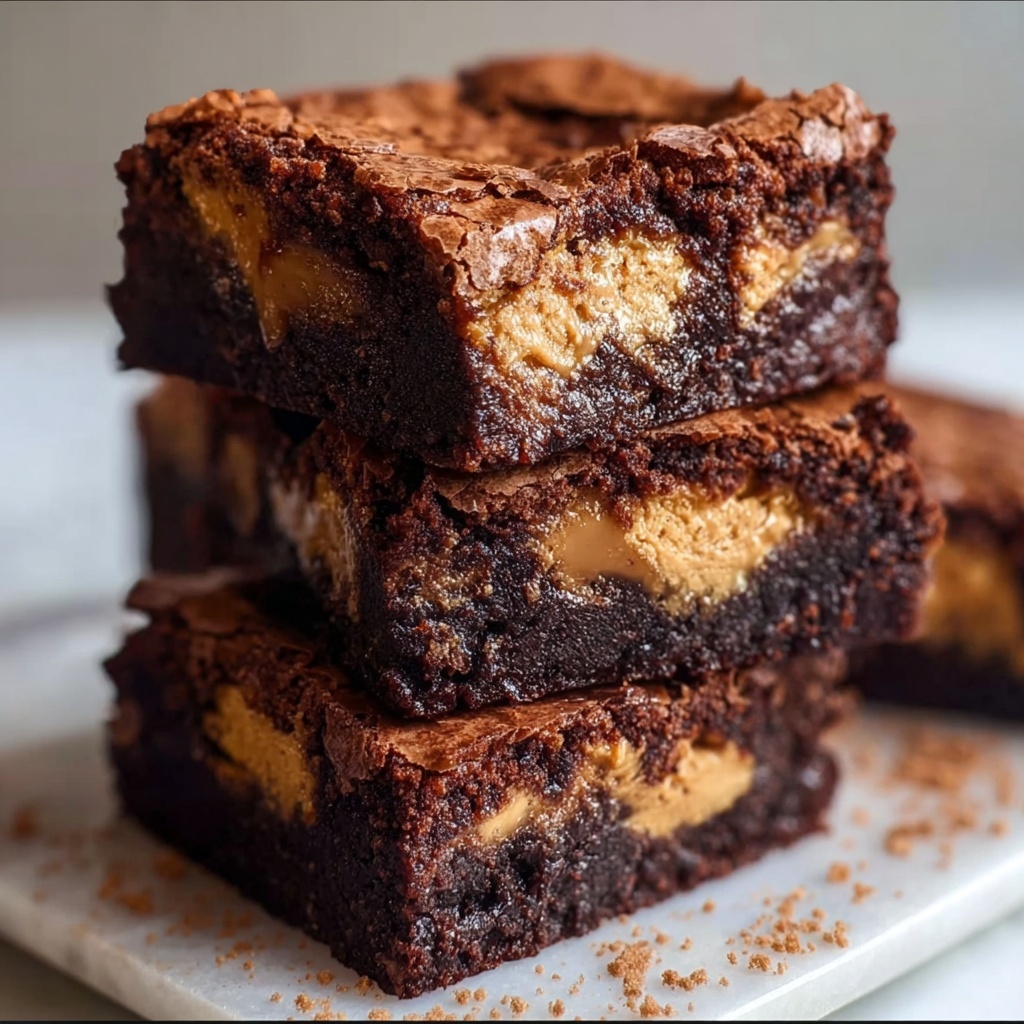
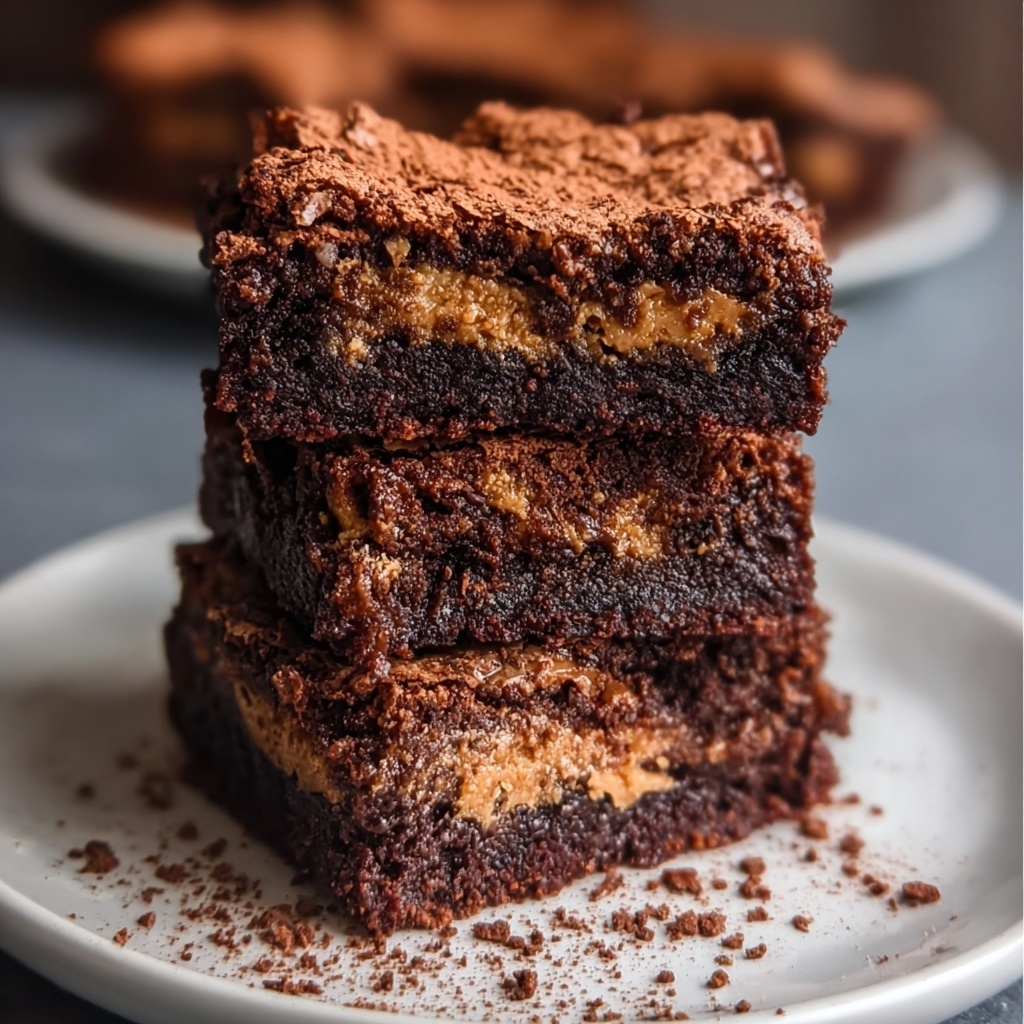
If you’re craving a dessert that instantly transports you back to those sweet childhood moments, the Peanut Butter Cup Brownies: 5 Nostalgic Comfort Bites Recipe is your new go-to. These brownies deliver a decadent blend of rich chocolate and creamy peanut butter cup surprises in every bite. Imagine fudgy, melt-in-your-mouth brownie layers studded with pieces of your favorite peanut butter candy—a combination so comforting, it’s like a warm hug on a plate. Whether you’re baking for family, friends, or just yourself, this recipe captures all the nostalgia and joy packed into each delightful square.
Ingredients You’ll Need
Gathering the right ingredients for this recipe is a breeze, and each one plays a crucial role in delivering that perfect brownie texture and flavor. From silky butter that binds moisture to the punch of cocoa for deep chocolate richness, every component is essential to get that gooey, fudgy magic just right.
- 1 cup unsalted butter: Provides a creamy base and keeps the brownies moist without overpowering the chocolate.
- 2 cups granulated sugar: Adds the perfect sweetness and helps create a tender crumb.
- 4 large eggs: Act as a natural binder and help give the brownies their chewy texture.
- 1 teaspoon vanilla extract: Enhances and rounds out the chocolate and peanut butter flavors.
- 1 cup all-purpose flour: Gives structure while keeping the brownies soft and dense.
- 1 cup cocoa powder: Delivers that deep chocolate intensity key to brownie lovers’ hearts.
- 1/2 teaspoon salt: Balances the sweetness and intensifies the overall flavor.
- 1 cup peanut butter cups, chopped: The star of the show—bursting with nostalgic peanut butter and chocolate goodness throughout.
How to Make Peanut Butter Cup Brownies: 5 Nostalgic Comfort Bites Recipe
Step 1: Preheat and Prepare Your Pan
Start strong by heating your oven to 350°F (175°C). Grease a 9×13-inch baking pan thoroughly to ensure none of those precious brownies stick, making cleanup easy and the slices picture-perfect.
Step 2: Melt the Butter
Gently melt the unsalted butter in a saucepan over medium heat just until smooth. This step is crucial because warm butter mixes effortlessly with the sugar to create a luscious, glossy batter.
Step 3: Mix in Sugar, Eggs, and Vanilla
Remove the butter from heat and immediately stir in your granulated sugar, one egg at a time, then the vanilla extract. This sequence helps create the rich, fudgy texture that makes these brownies so addictive.
Step 4: Add the Dry Ingredients
Next, sift together the flour, cocoa powder, and salt, then gradually fold them into the wet mixture. Stir just enough to blend the ingredients—the less you mix here, the more tender your brownies will be.
Step 5: Fold in the Chopped Peanut Butter Cups
Here’s where the nostalgia really kicks in—toss your chopped peanut butter cups gently into the batter. Their sweet, melty pockets throughout the brownies create a sensational flavor and texture contrast.
Step 6: Bake to Perfection
Pour the batter evenly into your prepared pan and slide it into the oven. Bake for 25 to 30 minutes, checking with a toothpick near the end—it should come out mostly clean but with a few moist crumbs, guaranteeing that fudgy center.
Step 7: Cool and Cut
Once baked, let your brownies cool fully in the pan on a wire rack before slicing into 12 generous squares. This resting period allows them to set beautifully, making each bite a rich, indulgent delight.
How to Serve Peanut Butter Cup Brownies: 5 Nostalgic Comfort Bites Recipe
Garnishes
To elevate these classic treats, sprinkle a little flaky sea salt on top before serving or drizzle with melted chocolate for an extra touch of elegance. Crushed peanut butter cups or chopped peanuts can add a delightful crunch to each warm brownie square.
Side Dishes
Looking to turn your brownies into a stunning dessert experience? Serve alongside a scoop of vanilla ice cream or a dollop of whipped cream to balance the richness. Fresh berries also add a burst of vibrant color and a hint of tartness that complements the peanut butter and chocolate perfectly.
Creative Ways to Present
Try stacking these brownies in a dessert parfait glass layered with peanut butter mousse or chocolate pudding for a fun twist. Alternatively, cut smaller bite-sized pieces, skewer them on toothpicks, and create a playful brownie pop sampler for your next gathering.
Make Ahead and Storage
Storing Leftovers
Once completely cooled, store your brownies in an airtight container at room temperature for up to four days to maintain that fresh-baked softness and flavor. Layer parchment paper between if stacking to prevent sticking.
Freezing
Want to save some for later? Wrap individual brownie squares tightly in plastic wrap, place them in a freezer-safe bag, and freeze for up to three months. Thaw them overnight in the fridge or at room temperature before enjoying.
Reheating
For that warm, just-baked feel, reheat brownies in the microwave for about 15 seconds or pop them briefly in a preheated oven at 300°F until warm but not dried out. This brings back that gooey peanut butter cup dream in every serving.
FAQs
Can I use crunchy peanut butter instead of peanut butter cups?
While crunchy peanut butter adds texture, it won’t deliver the same melty chocolate and peanut butter cup pockets that make this recipe so special. For the true nostalgic experience, we recommend sticking with chopped peanut butter cups.
Is it possible to make these brownies gluten-free?
Absolutely! Swap the all-purpose flour for a gluten-free baking blend that measures cup-for-cup like regular flour. Just be sure the cocoa powder and other ingredients are also gluten-free.
Can I double the recipe for a larger batch?
Yes, you can easily double the ingredients and bake in a larger pan or two separate pans. Keep an eye on the baking time since thicker batter might require a few extra minutes in the oven.
What’s the best way to chop peanut butter cups?
Use a sharp knife to chop peanut butter cups into roughly uniform pieces. Aim for both small bits that melt into the batter and bigger chunks that provide delightful pockets of peanut butter and chocolate.
How fudgy are these brownies?
They are wonderfully fudgy with just the right balance of chewiness and moistness, thanks to the melted butter and cocoa powder. The peanut butter cups add creamy bursts that enhance the luscious brownie texture.
Final Thoughts
Making the Peanut Butter Cup Brownies: 5 Nostalgic Comfort Bites Recipe is like wrapping yourself in a cozy blanket of childhood memories and pure chocolate-peanut butter bliss. These brownies are simple to whip up yet impress with every bite, making them perfect for sharing or sneaking one when no one’s looking. Go ahead, give this recipe a try—your taste buds and heart will thank you.
Print
Peanut Butter Cup Brownies: 5 Nostalgic Comfort Bites Recipe
- Prep Time: 15 minutes
- Cook Time: 30 minutes
- Total Time: 45 minutes
- Yield: 12 servings
- Category: Dessert
- Method: Baking
- Cuisine: American
Description
Indulge in these rich and fudgy Peanut Butter Cup Brownies that perfectly blend chocolate and peanut butter flavors, delivering a nostalgic and comforting treat. Easy to make and irresistible to share, these brownies bring a delightful twist to a classic dessert, perfect for any occasion.
Ingredients
Brownie Batter
- 1 cup unsalted butter
- 2 cups granulated sugar
- 4 large eggs
- 1 teaspoon vanilla extract
- 1 cup all-purpose flour
- 1 cup cocoa powder
- 1/2 teaspoon salt
Mix-ins
- 1 cup peanut butter cups, chopped
Instructions
- Preheat the oven: Preheat your oven to 350°F (175°C) to ensure it is ready for baking the brownies evenly.
- Prepare the pan: Grease a 9×13 inch baking pan thoroughly to prevent the brownies from sticking after baking.
- Melt the butter: In a saucepan over medium heat, melt the unsalted butter until completely liquid.
- Combine wet ingredients: Remove the melted butter from heat and immediately stir in the granulated sugar, followed by the eggs and vanilla extract, ensuring the mixture is smooth and well combined.
- Add dry ingredients: Sift in the all-purpose flour, cocoa powder, and salt into the wet mixture and mix until you achieve a smooth, consistent batter without lumps.
- Incorporate peanut butter cups: Gently fold the chopped peanut butter cups into the batter, evenly distributing the chunks throughout.
- Transfer to pan: Pour the prepared batter into the greased baking pan, spreading it evenly for uniform baking.
- Bake: Bake in the preheated oven for 25-30 minutes, or until a toothpick inserted into the center comes out clean, indicating the brownies are perfectly done.
- Cool and serve: Allow the brownies to cool completely in the pan before cutting them into squares for serving, ensuring neat pieces and enhanced flavor.
Notes
- For extra gooey brownies, slightly underbake by reducing baking time by 2-3 minutes.
- Use high-quality cocoa powder for a richer chocolate flavor.
- Peanut butter cups can be substituted with chopped peanuts or peanut butter chips for different textures.
- Store leftovers in an airtight container at room temperature for up to 3 days or refrigerate for up to a week.
- Allow brownies to cool completely to set properly before slicing.

