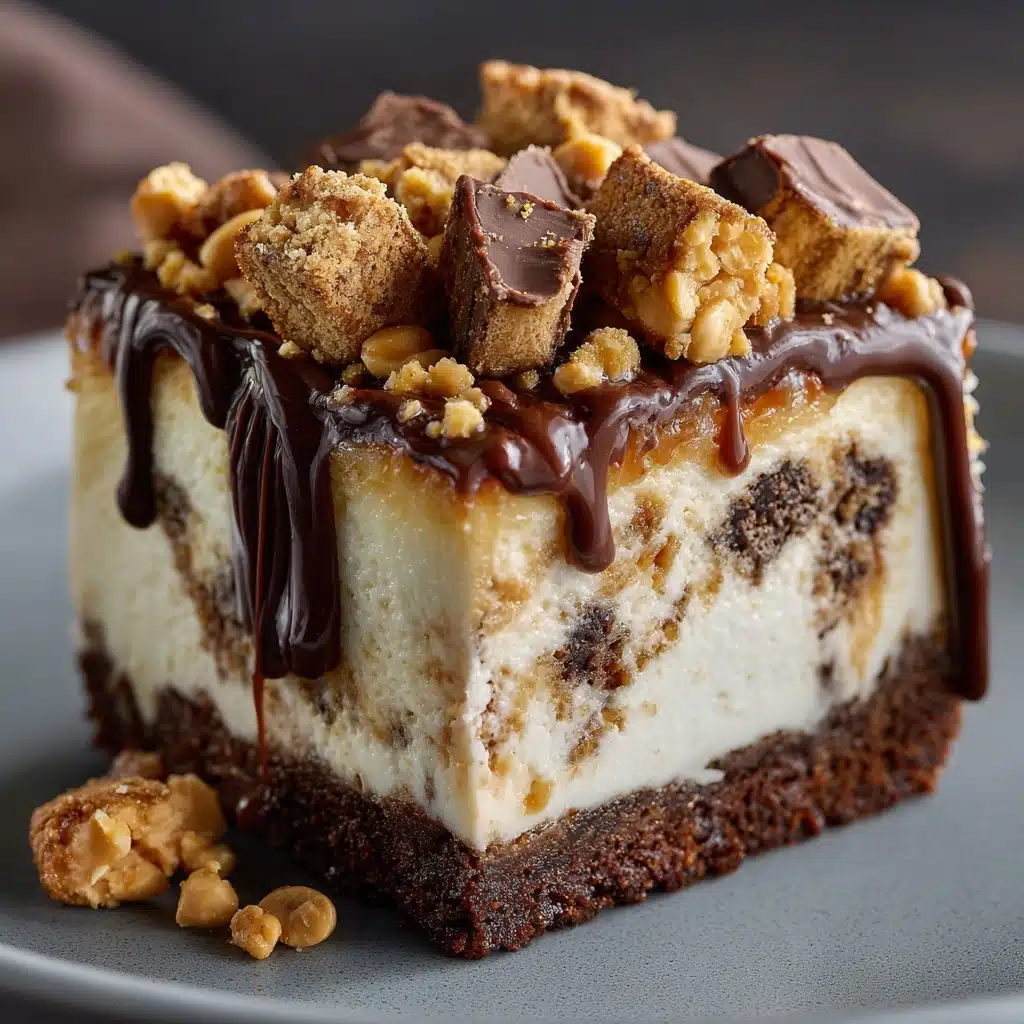
Irresistible Butterfinger Candy Bar Poke Cake Recipe
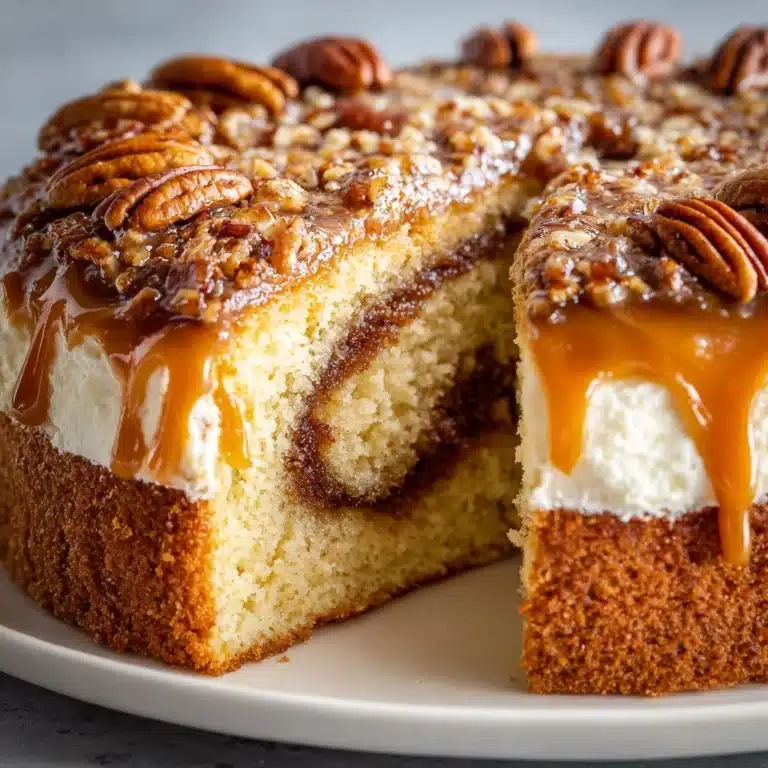
Get ready to fall in love with the Irresistible Butterfinger Candy Bar Poke Cake Recipe! This dessert is the ultimate fusion of moist chocolate cake, luscious caramel, and crispy, peanut-buttery Butterfinger pieces, all crowned with a cloud of whipped topping. It’s the kind of show-stopping treat that looks impressive but is secretly so simple to pull together, making it perfect for birthday parties, potlucks, or just a night when you want to spoil yourself. If you’re craving a cake that’s decadent, playful, and guaranteed to disappear fast, this is the one!
Ingredients You’ll Need
The magic of this cake is in its easy-to-find ingredients—each one is chosen for a reason! From the rich chocolate cake base to the creamy caramel and crunchy Butterfinger topping, every layer brings flavor and fun.
- Chocolate cake mix: The foundation for our cake, providing rich cocoa flavor and a tender crumb with hardly any effort.
- Eggs, oil, water (per cake mix instructions): These simple additions activate your boxed mix and help achieve the perfect cake texture.
- Sweetened condensed milk: Adds incredible moisture and a sweet, creamy note that soaks right into every bite.
- Caramel topping: Swirled with the condensed milk, it creates pockets of gooey, buttery goodness inside the cake.
- Whipped topping (thawed): A light, fluffy layer that balances out all the richness and makes the cake extra dreamy.
- Butterfinger candy bars (crushed): The star of the show! These give every forkful a satisfying crunch and signature peanut-buttery bite.
- Extra caramel drizzle (optional): For those who believe there’s no such thing as too much caramel, this finishing touch is a must.
How to Make Irresistible Butterfinger Candy Bar Poke Cake Recipe
Step 1: Bake the Chocolate Cake
Start by preparing your chocolate cake mix according to the box instructions, using a 9×13-inch baking dish. The beauty here is how effortlessly the cake comes together—just mix, pour, and bake. This creates the perfect canvas for all the gooey toppings to come.
Step 2: Poke Holes in the Cake
Once the cake comes out of the oven, let it cool for about five minutes. While it’s still warm, grab the handle of a wooden spoon and poke holes all over the surface. Don’t be shy! This step is key because it lets all the sweet, creamy filling soak right into the cake.
Step 3: Mix and Pour the Caramel Filling
In a small bowl, stir together the sweetened condensed milk and caramel topping until smooth and blended. Slowly pour this mixture over the warm cake, aiming to fill every hole and crevice. Give the cake time to cool completely so the filling seeps in and the flavors meld.
Step 4: Spread the Whipped Topping
Once your cake is completely cool, gently spread the thawed whipped topping evenly over the surface. It’s like adding a fluffy, sweet blanket over your already decadent cake, making each bite lighter and even more delicious.
Step 5: Add the Butterfinger Crunch
Take your crushed Butterfinger candy bars and scatter them generously over the top of the whipped topping. Every bit brings a delightful crunch and that unmistakable Butterfinger flavor. If you’re feeling extra, a drizzle of caramel over the top takes things right over the edge!
Step 6: Chill and Serve
To let all those flavors really come together, refrigerate the cake for at least two hours. This also makes slicing and serving a breeze. Once thoroughly chilled, slice it up and get ready for the compliments!
How to Serve Irresistible Butterfinger Candy Bar Poke Cake Recipe

Garnishes
For a show-stopping finish, sprinkle extra crushed Butterfinger pieces and a generous drizzle of caramel sauce on each slice just before serving. If you want to jazz it up even more, a few chocolate curls or a pinch of sea salt can add a gourmet touch that’ll have everyone reaching for seconds.
Side Dishes
This luscious cake pairs perfectly with a scoop of vanilla or peanut butter ice cream, which complements the chocolate and caramel beautifully. For a lighter option, offer fresh berries or a simple fruit salad to cut through the sweetness and add a pop of color to your dessert table.
Creative Ways to Present
Serve individual squares in cupcake liners for a fun party treat, or layer cubes of the cake in parfait glasses with extra whipped topping and Butterfinger crumbles for a stunning dessert parfait. You can even cut the cake into bite-sized pieces and skewer them as “cake pops” for a playful twist at gatherings.
Make Ahead and Storage
Storing Leftovers
Cover any leftover Irresistible Butterfinger Candy Bar Poke Cake Recipe tightly with plastic wrap or an airtight lid and refrigerate. It will stay moist and delicious for up to four days—if it lasts that long! The flavors continue to blend, making the cake even more decadent on day two.
Freezing
If you’d like to make this dessert ahead or save some for later, freeze individual slices wrapped in plastic wrap and placed in a freezer-safe container. When you’re ready to enjoy, let them thaw in the refrigerator overnight. While the whipped topping may lose a tiny bit of its fluff, the taste remains fantastic!
Reheating
No need to reheat this cake—it’s meant to be enjoyed cold, straight from the fridge! If you’ve just thawed a frozen slice, give it about 20 minutes at room temperature to soften slightly for the best texture and flavor.
FAQs
Can I use a homemade chocolate cake instead of a boxed mix?
Absolutely! If you have a favorite homemade chocolate cake recipe, feel free to use it as your base. Just make sure to bake it in a 9×13-inch pan and proceed with the poking and toppings as directed for the Irresistible Butterfinger Candy Bar Poke Cake Recipe.
What’s the best way to crush Butterfinger bars?
Place the unwrapped Butterfinger bars in a zip-top bag and gently crush them with a rolling pin or the bottom of a heavy glass. You want a mix of fine crumbs and chunky bits for the perfect texture on top of your cake.
Can I make this cake a day ahead?
Yes, and it’s actually even better that way! Making the Irresistible Butterfinger Candy Bar Poke Cake Recipe a day ahead gives the flavors more time to meld, and the cake becomes extra moist and flavorful after resting in the fridge overnight.
Is there a way to make this dessert gluten-free?
Simply swap out the regular chocolate cake mix for your favorite gluten-free chocolate cake mix and follow the rest of the instructions as written. Check your caramel and whipped topping labels just to be sure they’re gluten-free as well.
Can I use a different candy bar for topping?
While Butterfinger bars give this cake its signature crunch and flavor, you can absolutely experiment! Try Snickers, Heath bars, or even peanut butter cups for a fun twist on the Irresistible Butterfinger Candy Bar Poke Cake Recipe.
Final Thoughts
If you’re looking for a dessert that’s equal parts easy, fun, and completely crave-worthy, give the Irresistible Butterfinger Candy Bar Poke Cake Recipe a try. It’s a guaranteed crowd-pleaser that will win over even the toughest dessert critics, and you’ll love every sweet, crunchy, chocolatey bite!
Print
Irresistible Butterfinger Candy Bar Poke Cake Recipe
- Total Time: 2 hours 45 minutes
- Yield: 12 servings 1x
- Diet: Vegetarian
Description
This irresistible Butterfinger Candy Bar Poke Cake combines rich chocolate cake with a luscious caramel and sweetened condensed milk soak, topped with whipped cream and crushed Butterfinger candy bars. Perfect for chocolate and caramel lovers, it’s an easy-to-make dessert that’s both decadent and fun to serve.
Ingredients
Cake
- 1 box chocolate cake mix plus ingredients listed on the box (usually eggs, oil, and water)
Soaking Mixture
- 1 can (14 ounces) sweetened condensed milk
- 1 jar (12 ounces) caramel topping
Topping
- 1 container (8 ounces) whipped topping, thawed
- 4 regular-size Butterfinger candy bars, crushed
- Optional: extra caramel drizzle for topping
Instructions
- Prepare Cake: Prepare the chocolate cake according to the package directions in a 9×13-inch baking dish. Bake as directed, then remove from the oven and let cool for 5 minutes.
- Poke Holes: Using the handle of a wooden spoon, poke holes evenly over the surface of the warm cake to allow the soaking mixture to penetrate deeply.
- Mix Soaking Mixture: In a small bowl, stir together the sweetened condensed milk and caramel topping until smooth and well combined.
- Soak Cake: Pour the caramel and condensed milk mixture evenly over the warm cake, ensuring it seeps into all the holes for maximum flavor.
- Cool Cake: Allow the cake to cool completely to room temperature to let the flavors meld and the cake set.
- Add Topping: Spread the whipped topping evenly over the cooled cake surface, creating a creamy layer.
- Sprinkle Candy: Generously sprinkle the crushed Butterfinger candy bars over the whipped topping for crunch and chocolate-caramel flavor.
- Chill: Refrigerate the cake for at least 2 hours to allow the flavors to meld and the cake to fully set.
- Serve: Just before serving, drizzle with extra caramel sauce if desired to enhance the caramel flavor and presentation.
Notes
- For a richer flavor, use a devil’s food or fudge chocolate cake mix instead of regular chocolate mix.
- This cake can be made a day ahead and stored covered in the refrigerator to save time and intensify flavors.
- Make sure the cake is completely cooled before spreading the whipped topping to avoid melting it.
- Use full-size Butterfinger candy bars for the best texture contrast in the topping.
- Adjust the amount of caramel drizzle to suit your taste preference when serving.
- Prep Time: 15 minutes
- Cook Time: 30 minutes
- Category: Dessert
- Method: Baking, No-Bake Assembly
- Cuisine: American
Nutrition
- Serving Size: 1 slice
- Calories: 420
- Sugar: 42 g
- Sodium: 420 mg
- Fat: 20 g
- Saturated Fat: 9 g
- Unsaturated Fat: 10 g
- Trans Fat: 0 g
- Carbohydrates: 58 g
- Fiber: 2 g
- Protein: 5 g
- Cholesterol: 40 mg


