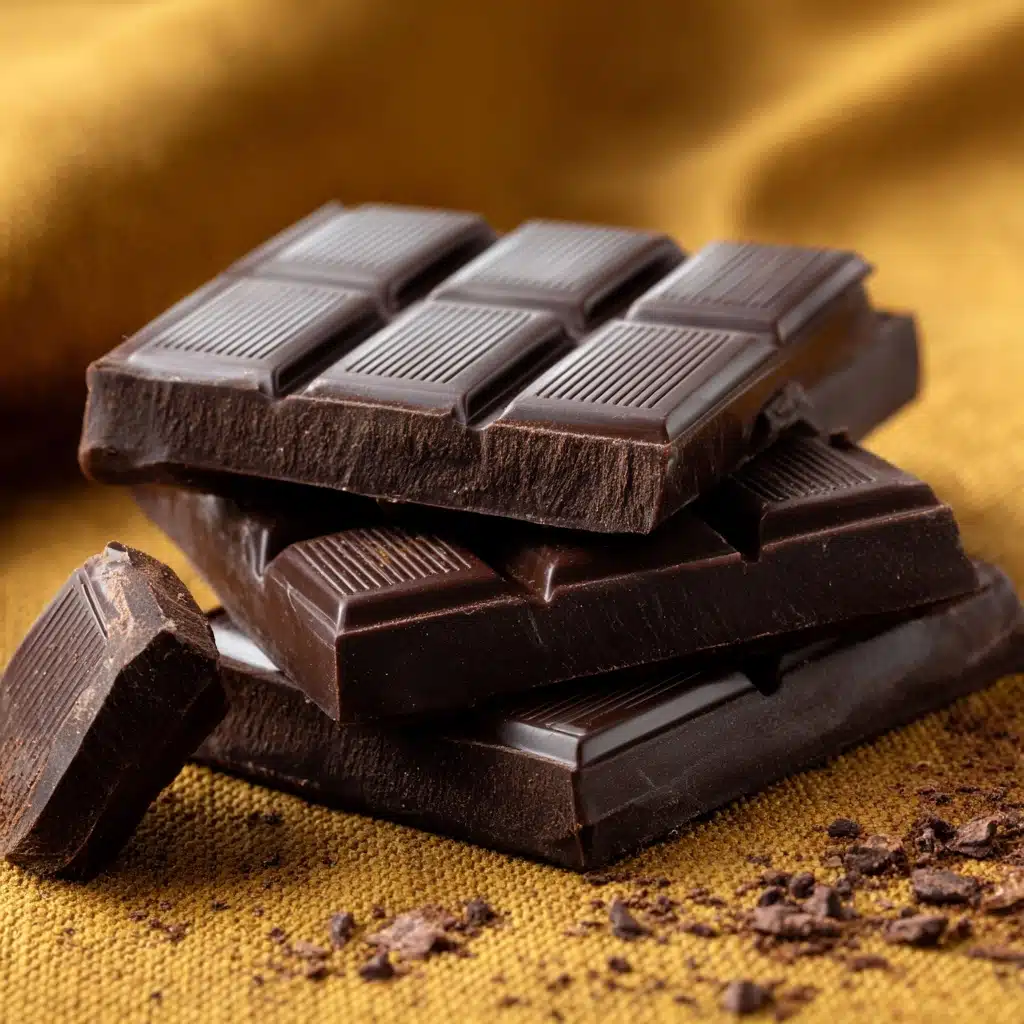
Homemade Chocolate Bars Recipe
If you crave rich, velvety chocolate that you can actually feel good about, this is absolutely your moment! These Homemade Chocolate Bars are not only supremely satisfying and lusciously smooth, but they’re also the kind of treat you can whip up in barely any time. The magic lies in just a handful of real, clean ingredients—plus the joy of customizing the bars exactly to your taste. There’s nothing quite like breaking off a piece of your own chocolate creation, and even better, you control every delicious detail.
Ingredients You’ll Need
Gathering the ingredients for these Homemade Chocolate Bars couldn’t be easier. Each one brings something special, from bold flavor to wonderful texture, and together they transform into chocolate perfection with barely any effort at all.
- Coconut Oil: Gives the chocolate its dreamy smoothness and melt-in-your-mouth texture; unrefined adds coconut flavor, refined keeps it neutral.
- Unsweetened Cocoa Powder: Delivers a deep, pure chocolate flavor while keeping things dairy-free and refined sugar-free.
- Maple Syrup or Honey: Naturally sweetens the chocolate with lovely notes of caramel or floral honey, depending on your pick.
- Vanilla Extract: Adds beautiful depth and rounds out the chocolate flavors with a touch of warmth.
- Pinch of Salt: Just a little makes all the rich flavors pop and tempers the sweetness perfectly.
- Optional Mix-Ins: Chopped nuts, shredded coconut, or dried fruit bring color, crunch, and bursts of flavor—plus endless opportunities to personalize your bars.
How to Make Homemade Chocolate Bars
Step 1: Melt the Coconut Oil
Start by adding the coconut oil to a small saucepan and gently heating it over low heat. Watch closely as it melts to a clear liquid—it happens quickly! Keeping the heat low prevents any loss of nutrients or flavor, so your final chocolate bars will turn out absolutely luscious.
Step 2: Whisk in the Cocoa and Sweetener
Remove the warm, melted coconut oil from the heat and immediately whisk in the cocoa powder, making sure there are no lumps. Pour in the maple syrup or honey and add a splash of vanilla extract, then sprinkle in just a pinch of salt. Keep whisking until everything is silky smooth and beautifully glossy.
Step 3: Mix in Your Favorite Add-Ins
This is when Homemade Chocolate Bars really become your own! Fold in a choice of add-ins like chopped nuts for crunch, shredded coconut for a tropical vibe, or bits of dried fruit for a chewy burst of sweetness. Don’t be shy—mix-ins bring personality and fun to every bite!
Step 4: Pour and Set the Chocolate
Carefully pour the chocolate mixture into a food-grade silicone chocolate mold, or simply line a loaf pan with parchment and pour it in. Gently tap the pan on the counter to coax out any air bubbles and smooth the surface for that picture-perfect finish. Pop it in the refrigerator or freezer for 30–60 minutes until fully set and firm to the touch.
Step 5: Unmold and Enjoy!
Once firm, remove the bars from the molds (or lift the whole slab from the pan and slice into pieces). Relish the melt-in-your-mouth texture and marvel at your delicious handiwork. Homemade Chocolate Bars are at their prime when kept slightly chilled, making every bite a perfect balance of richness and snap.
How to Serve Homemade Chocolate Bars

Garnishes
Take your Homemade Chocolate Bars to the next level by finishing them with a sprinkle of flaky sea salt, a dusting of extra cocoa powder, or a scattering of edible dried rose petals. These simple touches can make your bars look as stunning as they taste, adding both elegance and a little hint of flavor intrigue.
Side Dishes
Pair your chocolate bars with a bright bowl of fresh berries or a few slices of juicy citrus to balance the richness. If you’re feeling fancy, serve alongside a hot cup of coffee, a glass of almond milk, or even a scoop of coconut milk ice cream for the ultimate treat-yourself moment.
Creative Ways to Present
Wrap each bar in parchment and tie with twine for a thoughtful (and irresistible) homemade gift. Or, chop them into bite-sized pieces and tuck into a DIY snack board or dessert platter. Arrange them alongside other homemade sweets for a gorgeous spread that will have everyone asking for your secret recipe!
Make Ahead and Storage
Storing Leftovers
For fresh, snappy texture, keep leftover Homemade Chocolate Bars in an airtight container in the refrigerator. They’ll stay perfectly firm and delicious for up to two weeks—although, let’s be honest, they probably won’t last that long!
Freezing
If you want to make a big batch in advance (or just ration for future cravings), you can freeze your chocolate bars. Place them in a single layer with parchment between bars in a freezer-safe container. They’ll keep beautifully for up to three months and are just as tasty straight from the freezer.
Reheating
Homemade Chocolate Bars are best enjoyed cold or at cool room temperature, so no need to reheat. If they get a little too chilled and hard, let them sit at room temperature for a few minutes for that ultra-creamy bite.
FAQs
Can I use any type Dessert
Absolutely! Maple syrup and honey both work fantastically in Homemade Chocolate Bars, but you can also try agave or even date syrup for your preferred flavor and dietary needs. Just keep it liquid for best mixing results.
Can I make this recipe completely sugar-free?
Yes! Use your favorite sugar-free liquid sweetener, like monk fruit syrup, and double-check the cocoa powder is unsweetened. The results will still be smooth, rich, and chocolatey with the same easy process.
What if I don’t have a silicone mold?
No mold? No problem! Simply line a standard loaf pan with parchment paper, pour in your chocolate, and once set, slice into bars or chunks. It’s rustic and just as delicious!
Do these melt at room temperature?
Since they’re made with coconut oil, Homemade Chocolate Bars can soften or melt at warm room temperature. That’s why they’re best enjoyed straight from the fridge—although nobody complains about a fudgy chocolatey bite!
Can I double the recipe?
Definitely! This recipe doubles (or even triples) with ease if you want to stock up or share with friends and family. Just use a larger pan or multiple molds, and adjust the chilling time as needed.
Final Thoughts
If you’ve never made Homemade Chocolate Bars before, now is truly the time—one batch and you’ll see just how rewarding (and delicious) it is. Give it a try, have fun with the endless customizations, and get ready to wow yourself and your favorite people with the very best chocolate you’ve ever had from your own kitchen!
Print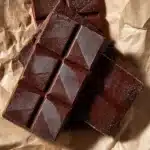
Homemade Chocolate Bars Recipe
- Total Time: 1 hour (includes chilling)
- Yield: 8 small bars 1x
- Diet: Vegan
Description
Indulge in the rich, velvety goodness of these homemade chocolate bars. Made with wholesome ingredients and customizable mix-ins, these bars are a delightful treat for any chocolate lover.
Ingredients
Main Ingredients:
- 1/2 cup coconut oil
- 1/2 cup unsweetened cocoa powder
- 1/4 cup maple syrup or honey
- 1 teaspoon vanilla extract
- Pinch of salt
Optional Mix-ins:
- 2 tablespoons chopped nuts
- Shredded coconut
- Dried fruit
Instructions
- Melt Coconut Oil: In a small saucepan over low heat, melt the coconut oil.
- Mix Ingredients: Remove from heat and whisk in cocoa powder, maple syrup or honey, vanilla extract, and salt until smooth.
- Add Mix-ins: Stir in any desired mix-ins like nuts, coconut, or dried fruit.
- Pour and Set: Pour the mixture into a mold or pan, tap gently to remove air bubbles, and refrigerate or freeze until set.
- Serve: Once firm, remove from mold or slice into bars. Store in the refrigerator for best texture.
Notes
- You can customize with your favorite add-ins like crushed almonds, sea salt flakes, or puffed quinoa.
- Use food-grade silicone molds for easy shaping and release.
- Prep Time: 10 minutes
- Cook Time: 5 minutes
- Category: Dessert
- Method: No-Bake
- Cuisine: American
Nutrition
- Serving Size: 1 bar
- Calories: 150
- Sugar: 8g
- Sodium: 20mg
- Fat: 13g
- Saturated Fat: 11g
- Unsaturated Fat: 2g
- Trans Fat: 0g
- Carbohydrates: 11g
- Fiber: 3g
- Protein: 1g
- Cholesterol: 0mg

