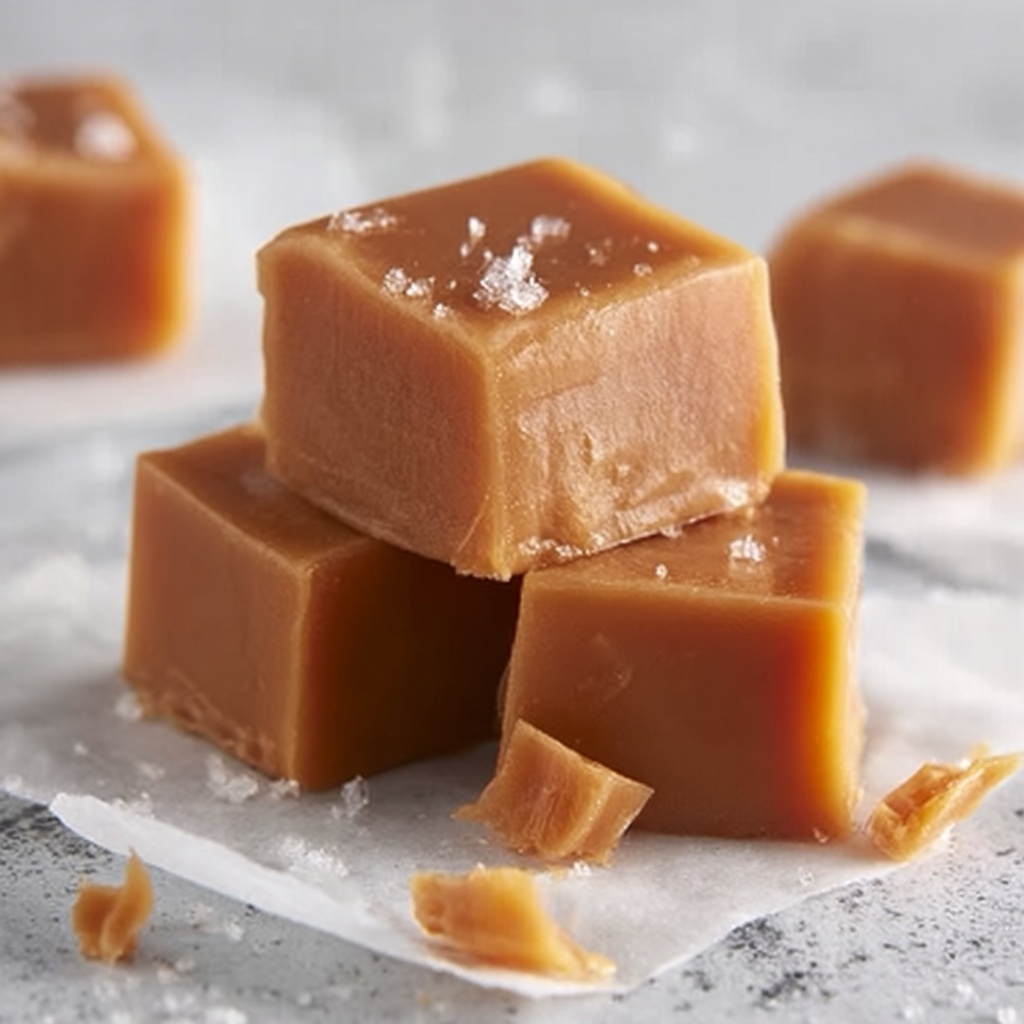
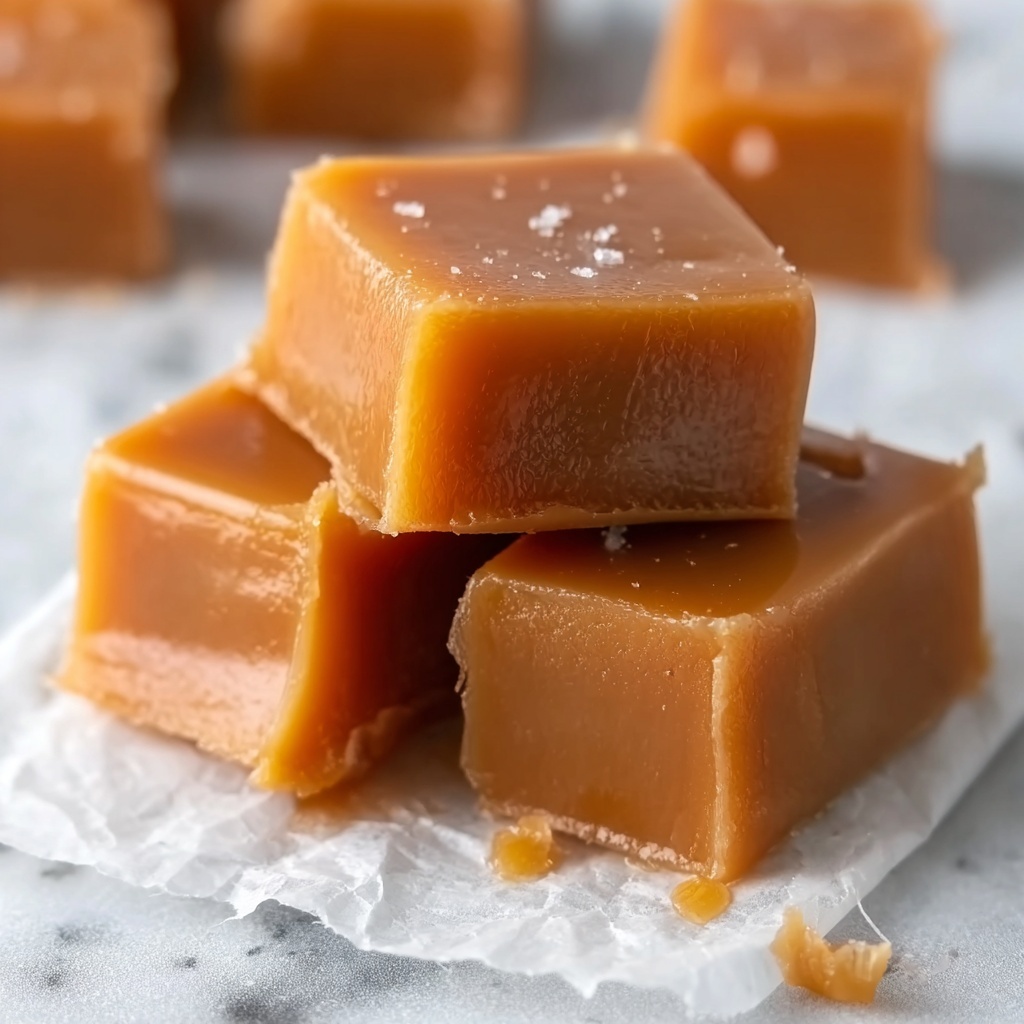
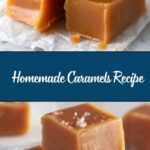
If you’ve ever wished you could capture that rich, buttery, melt-in-your-mouth candy experience at home, then this Homemade Caramels Recipe is your new best friend. Crafted from simple pantry staples, these caramels combine deep, golden sweetness with a smooth, tender texture that feels like a warm hug in every bite. Whether you’re gifting them, sharing at parties, or keeping them all to yourself, these homemade caramels offer a perfect balance of creamy indulgence and just the right amount of chewiness that will have everyone coming back for more.
Ingredients You’ll Need
Getting ready to make these luscious caramels is a breeze because the ingredients are straightforward but absolutely crucial in building that signature flavor and texture. Each one plays a role in creating the perfect balance of creamy, sweet, and buttery goodness.
- Unsalted butter (1 cup): Adds richness and helps create that silky smooth texture without any extra salt overpowering the flavor.
- Granulated sugar (2 1/2 cups): The sweetness backbone that caramelizes to give caramels their golden color and classic taste.
- Light corn syrup (1 1/4 cups): Prevents sugar crystals from forming, ensuring your caramels stay smooth and creamy.
- Salt (1/2 teaspoon): Just a pinch to enhance all the sweet notes and balance the flavors beautifully.
- Heavy cream (2 cups): Makes the caramels luxurious and creamy, adding moisture that’s absolutely essential for chewiness.
- Vanilla extract (1 teaspoon): Adds a warm aromatic layer that makes the flavors pop and feel homemade in the best way.
How to Make Homemade Caramels Recipe
Step 1: Prepare Your Pan
Line an 8×8-inch baking pan with parchment paper, leaving some overhang on the sides for easy removal later. This simple step makes sure the caramels come out perfectly without sticking or breaking apart.
Step 2: Melt the Butter
In a large, heavy-bottomed saucepan, melt 1 cup of unsalted butter over medium heat. The butter’s creamy fat will be the foundation that blends the sugar with the cream for that luscious caramel texture.
Step 3: Combine Sugar, Corn Syrup, and Salt
To the melted butter, add the granulated sugar, light corn syrup, and salt. Stir gently until well combined but be careful not to splash as the sugar starts to dissolve.
Step 4: Slowly Add the Heavy Cream
Gradually pour in the heavy cream while continuously stirring. This keeps the mixture smooth and prevents clumping. Bring everything to a rolling boil over medium heat, stirring frequently to avoid any scorching on the bottom of your pan.
Step 5: Cook the Mixture to the Right Temperature
Keep stirring and cooking until the caramel reaches 245°F (118°C) on a candy thermometer. This is the perfect temperature for that chewy yet tender caramel texture. Stir constantly during this stage to ensure the sugars don’t burn or crystallize.
Step 6: Add the Vanilla Extract
Once it hits the perfect temperature, remove the pan from heat and stir in 1 teaspoon of vanilla extract. This little splash of vanilla deepens the flavor, giving your caramels a cozy, homemade touch that’s absolutely irresistible.
Step 7: Pour and Cool
Carefully pour the hot caramel mixture into your prepared baking pan. It will be thick and glossy—exactly what you want! Let the caramel cool at room temperature for 3-4 hours until it’s fully set and ready to cut into bite-sized pieces.
Step 8: Cut and Wrap
Once firm, use the parchment paper edges to gently lift the caramel slab from the pan. Slice into small squares or rectangles with a sharp knife. Wrapping each piece individually in wax paper makes them perfect for sharing or storing.
How to Serve Homemade Caramels Recipe

Garnishes
You can easily dress up your homemade caramels with a sprinkle of flaky sea salt on top before they set for a delightful salty-sweet contrast. Another lovely touch is drizzling them with a bit of melted dark chocolate for an elegant finish that’s sure to impress.
Side Dishes
Caramels shine on their own as sweet treats, but if you want to turn them into a special dessert offering, serve alongside a scoop of vanilla bean ice cream or a cup of strong coffee. Their creamy chew complements the cold and bitter components perfectly.
Creative Ways to Present
Wrap your Homemade Caramels Recipe squares in colorful wax paper and place them in decorative tins as thoughtful gifts. You can also stack them on a dessert tray with other candies or place them inside cute glass jars tied with ribbon for a charming presentation at holiday gatherings.
Make Ahead and Storage
Storing Leftovers
These caramels keep beautifully at room temperature when stored in an airtight container, ideally wrapped in wax paper to prevent sticking. They can last up to two weeks, maintaining their delicious texture and flavor.
Freezing
If you want to make your Homemade Caramels Recipe way ahead of time, freeze them in a single layer on a baking sheet and then transfer to a freezer bag. Frozen caramels keep for up to three months and thaw quickly at room temperature.
Reheating
Caramels are best enjoyed at room temperature, but if you’d like them a little softer, warm them gently between your hands or room-temperature for about 10 minutes. Avoid microwaving as it can alter texture unevenly.
FAQs
Can I use salted butter instead of unsalted?
It’s best to use unsalted butter so you have full control over the salt level. Using salted butter might make your caramels too salty, throwing off the perfect balance.
What can I substitute for light corn syrup?
If you don’t have light corn syrup, you can use golden syrup or even honey, though the texture and flavor will change slightly. Corn syrup is ideal because it prevents sugar crystallization.
Why do I need a candy thermometer?
The candy thermometer ensures your caramel reaches the precise temperature for perfect chewiness. Without it, you risk undercooking or burning, which affects texture and flavor.
How do I prevent the caramel from sticking to the pan?
Using a heavy-bottomed saucepan and stirring constantly helps prevent sticking. Also, lining your pan with parchment paper makes removing the cooked caramel easy and mess-free.
Can I add flavors other than vanilla?
Absolutely! While vanilla is classic, you can experiment with almond extract, bourbon, or even a pinch of cinnamon to customize your Homemade Caramels Recipe to your taste.
Final Thoughts
Once you get the hang of this Homemade Caramels Recipe, you’ll wonder why you ever bought store-bought caramels. The time and love you put into creating these from scratch pays off with every sweet, buttery bite. So, grab your ingredients, invite some friends over, and make a batch that’s destined to become a new favorite tradition.
Print
Homemade Caramels Recipe
- Prep Time: 15 minutes
- Cook Time: 20 minutes
- Total Time: 3 hours 40 minutes
- Yield: 64 servings
- Category: Candy
- Method: Stovetop
- Cuisine: American
Description
This Homemade Caramels recipe yields rich, buttery treats with a smooth, creamy texture perfect for gifting or indulging. Made with simple ingredients like butter, sugar, corn syrup, heavy cream, and vanilla, these caramels are cooked precisely to the perfect temperature to ensure a chewy yet soft consistency. The recipe requires stovetop cooking and a little patience to let the caramels set, resulting in classic, melt-in-your-mouth candies.
Ingredients
Ingredients
- 1 cup unsalted butter
- 2 1/2 cups granulated sugar
- 1 1/4 cups light corn syrup
- 1/2 teaspoon salt
- 2 cups heavy cream
- 1 teaspoon vanilla extract
Instructions
- Prepare the Pan: Line an 8×8-inch baking pan with parchment paper, leaving an overhang on the sides to allow easy removal of the caramels after they set.
- Melt Butter: In a large, heavy-bottomed saucepan, melt the butter over medium heat to provide a rich base for the caramel.
- Add Sugar Mixture: Add the granulated sugar, light corn syrup, and salt to the melted butter, stirring continuously until fully combined to ensure smooth dissolution and prevent crystallization.
- Incorporate Cream and Boil: Gradually stir in the heavy cream, then bring the mixture to a boil over medium heat, stirring frequently to avoid scorching and encourage a uniform temperature.
- Cook to Temperature: Continue cooking the mixture, stirring constantly to prevent burning, until it reaches 245°F (118°C) on a candy thermometer, which is the firm-ball stage ideal for chewy caramels.
- Add Vanilla: Remove the saucepan from heat and stir in the vanilla extract thoroughly to enhance the flavor profile of the caramel.
- Pour and Set: Carefully pour the hot caramel into the prepared baking pan, spreading evenly. Allow it to cool at room temperature for 3 to 4 hours, or until fully set and firm to the touch.
- Cut and Wrap: Lift the set caramel slab out of the pan using the parchment paper overhang. Cut into small squares or rectangles with a sharp knife, and individually wrap each piece in wax paper to prevent sticking and maintain freshness.
Notes
- Use a reliable candy thermometer to accurately measure the temperature and get the perfect caramel texture.
- Stirring constantly during cooking helps prevent the caramel from burning and keeps the texture smooth.
- Allow caramels to set completely before cutting to ensure clean edges and avoid sticky messes.
- Store wrapped caramels in an airtight container at room temperature for up to two weeks.
- You can add a pinch of baking soda after removing from heat for a lighter, lighter-textured caramel if preferred.