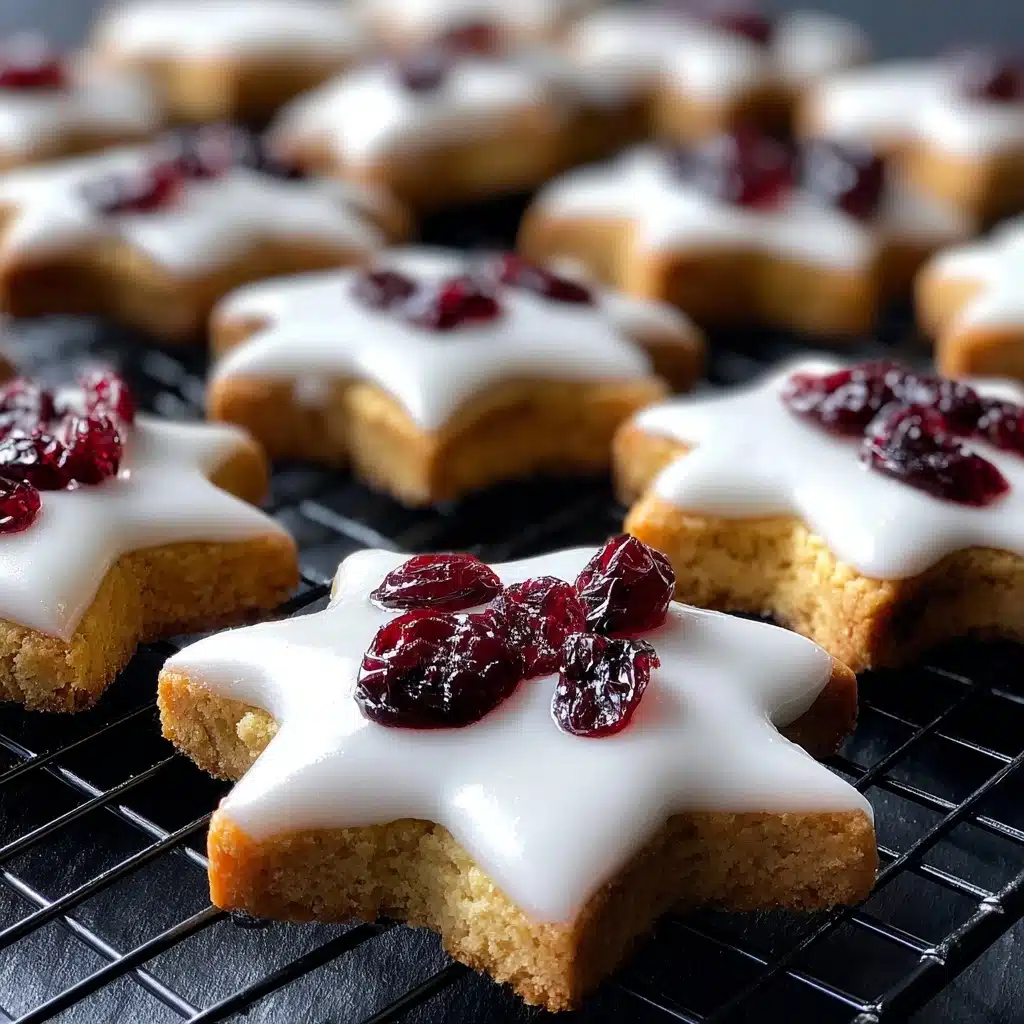
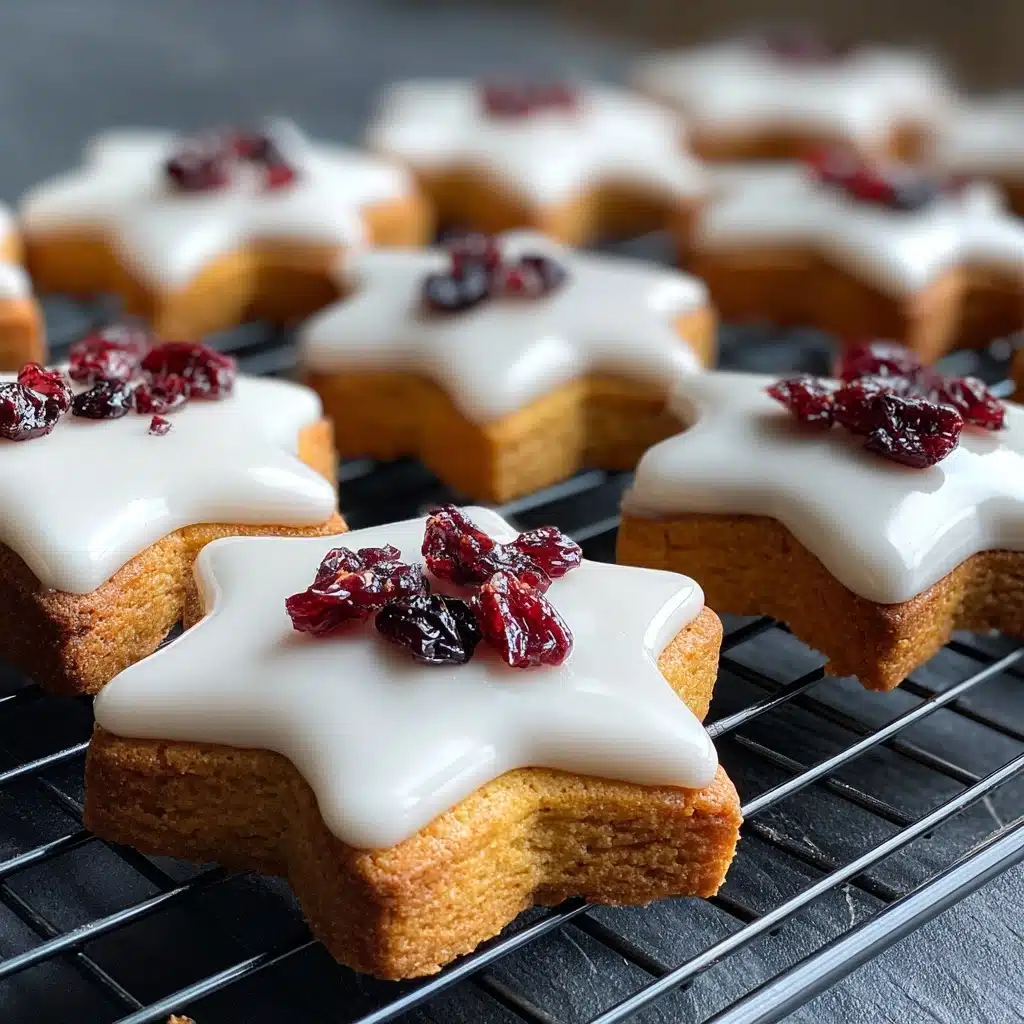
Festive Star-Shaped Cookies Recipe
Let’s talk about the magic of Festive Star-Shaped Cookies! There’s something absolutely irresistible about the sparkle of sugar, buttery crispness, and that classic holiday vanilla-almond aroma wafting from the oven. These charming cookies are destined to be the highlight of your dessert tray, beloved by kids and adults alike, and perfect for sharing or gifting. When you’re craving a sweet treat that’s both timeless and playful, nothing quite compares to biting into one of these beautiful, joyfully decorated Festive Star-Shaped Cookies.
Ingredients You’ll Need
The beauty of these cookies is how delightfully simple yet essential each ingredient is. Every addition has a purpose, from structure and tenderness to rich flavor and perfect color. Here’s what you’ll need for a batch of unforgettable Festive Star-Shaped Cookies:
- All-purpose flour: The backbone of the dough, giving the cookies their sturdy yet tender bite.
- Baking powder: Just a touch ensures lightness and subtle lift, keeping the cookies from turning dense.
- Salt: A small amount, but it amplifies all the flavors and balances sweetness perfectly.
- Unsalted butter, softened: The secret to that melt-in-your-mouth texture and deep, buttery flavor.
- Granulated sugar: Adds sweetness and encourages those golden, tender edges.
- Large egg: Holds the dough together and adds a touch of richness.
- Vanilla extract: Classic warmth and aroma—it’s the soul of holiday cookies.
- Almond extract (optional): Just a hint provides a wonderfully nutty background note—highly recommended if you love a little extra depth!
- Decorative sugar or royal icing: For that show-stopping finish—get creative with colors and patterns.
- Flour for rolling: Prevents sticking and ensures your star shapes come out sharp and distinct.
How to Make Festive Star-Shaped Cookies
Step 1: Mix the Dry Ingredients
Start by whisking together your flour, baking powder, and salt in a medium bowl. This quick step makes sure everything is evenly distributed, so your cookies bake up with just the right amount of rise and flavor in every bite.
Step 2: Cream Butter and Sugar
Grab a large mixing bowl and beat your softened butter with granulated sugar. Give it a good three or four minutes—long enough to turn it fluffy and pale, which means lots of tiny air pockets will make the cookies light and delicious.
Step 3: Add Egg and Extracts
Crack in your large egg, pour in the vanilla extract, and almond extract if you like that extra festive aroma. Beat until everything is creamy and smooth; this creates the base flavor profile for every cookie.
Step 4: Combine Dry and Wet Mixtures
Slowly add the dry ingredients to the wet, mixing gently until a soft dough forms. This step is key—don’t overwork it or your Festive Star-Shaped Cookies might get tough instead of tender and light.
Step 5: Chill the Dough
Divide that lovely dough in half, shape each piece into a disc, wrap in plastic wrap, and refrigerate for at least one hour. Chilling helps the dough firm up, so your star shapes stay sharp and the cookies hold their structure as they bake.
Step 6: Roll and Cut Out Stars
Preheat your oven to 350°F and line baking sheets with parchment. Lightly flour your surface, then roll out one dough disc to a 1/4-inch thickness. Use your favorite star-shaped cookie cutter to stamp out cookies, placing them about an inch apart on the baking sheets.
Step 7: Bake to Perfection
Bake the cookies for 8 to 10 minutes—just until the edges are hinting at golden. That tiny moment before browning gives the cookies their delicate, buttery snap without over-baking. Let them cool a few minutes, then move to wire racks to finish cooling.
Step 8: Decorate!
Once the cookies are completely cooled, it’s time for the real fun. Make them sparkle with decorative sugar, design with royal icing, or go wild with edible glitter and sprinkles. This last step is where your personality shines in every Festive Star-Shaped Cookie.
How to Serve Festive Star-Shaped Cookies
Garnishes
A dusting of powdered sugar, a drizzle of royal icing, or a sprinkle of colorful sanding sugar transforms each star into a tiny work of art. For an extra-special touch, try adding edible silver pearls or a little gold shimmer, making every cookie absolutely magical.
Side Dishes
Pair your cookies with mugs of hot cocoa, rich coffee, or spiced cider—each sip enhances the cookie’s buttery, vanilla notes. For a party tray, serve them alongside fruit preserves, whipped cream, or a scoop of vanilla ice cream for a playful dessert combination.
Creative Ways to Present
Arrange your Festive Star-Shaped Cookies in a starburst pattern on a large platter, package them in clear cellophane bags tied with holiday ribbon, or poke a small hole in one point and string up as edible ornaments. These cookies also make heartwarming gifts in decorative tins or boxes.
Make Ahead and Storage
Storing Leftovers
To keep your Festive Star-Shaped Cookies tasting fresh, store them in an airtight container at room temperature. They’ll stay deliciously crisp and flavorful for up to a week, ready for snacking, gifting, or adding to lunch boxes.
Freezing
These cookies are freezer-friendly both before and after baking. Freeze unbaked star cutouts on a lined tray before transferring to a freezer bag, or freeze baked (and undecorated) cookies stacked between layers of parchment. They’ll keep beautifully for up to two months.
Reheating
If you love that just-baked taste, pop frozen baked cookies onto a baking sheet and warm them in a 300°F oven for 3 to 5 minutes. They’ll emerge with renewed crispness and aroma, almost as if they just came out of the oven!
FAQs
Can I decorate the cookies before baking?
Absolutely! If you’re using decorative sugars or nonpareils, sprinkle them on before baking. If you’re planning to use royal icing or detailed designs, wait until the cookies are cooled after baking for the best results.
How do I get perfectly crispy edges on my Festive Star-Shaped Cookies?
For crisper cookies, simply bake an extra minute or two until the edges turn rich golden. Watch them closely—the difference between perfectly crisp and overdone is just a minute!
Can I use gluten-free flour?
Yes, a good 1-to-1 gluten-free baking blend works well in this recipe. The cookies may be a bit more delicate, so handle them gently, especially when rolling and cutting.
What’s the best way to roll out the dough evenly?
Use rolling pin guides or two kitchen dowels of the same thickness placed on either side of your dough to guarantee an even 1/4-inch. Chilling the dough thoroughly makes this step a breeze, preventing sticking and misshapen cookies.
Do I have to chill the dough?
Chilling is highly recommended for sharp, clean star shapes and easy handling. If you’re pressed for time, even a quick 30-minute chill in the freezer can help firm things up for cutting.
Final Thoughts
Baking a batch of Festive Star-Shaped Cookies is a surefire way to fill your kitchen (and your heart) with joy. Whether you’re sharing with friends, gifting to neighbors, or simply indulging in a creative afternoon, these cookies promise to become a beloved tradition. So grab your favorite sprinkles and let your imagination shine—these stars are waiting to brighten your holiday!
Print
Festive Star-Shaped Cookies Recipe
- Total Time: 1 hour 30 minutes
- Yield: 30 cookies 1x
- Diet: Vegetarian
Description
These Festive Star-Shaped Cookies are a delightful holiday treat, perfect for Christmas celebrations or any festive occasion. These buttery, vanilla-scented cookies are easy to make and fun to decorate, making them a favorite for both baking novices and seasoned pros.
Ingredients
Dough:
- 2 1/2 cups all-purpose flour
- 1/2 teaspoon baking powder
- 1/4 teaspoon salt
- 3/4 cup unsalted butter, softened
- 3/4 cup granulated sugar
- 1 large egg
- 1 teaspoon vanilla extract
- 1/2 teaspoon almond extract (optional)
- Flour for rolling
Decorating:
- Decorative sugar or royal icing for decorating
Instructions
- Prepare the Dough: In a medium bowl, whisk together the flour, baking powder, and salt. In a large mixing bowl, beat the softened butter and sugar until light and fluffy. Add the egg, vanilla extract, and almond extract if using, and mix until combined. Gradually add the dry ingredients to the wet mixture and mix until a soft dough forms.
- Chill the Dough: Divide the dough into two discs, wrap in plastic, and chill for at least 1 hour.
- Roll and Cut: Preheat the oven to 350°F and line baking sheets with parchment paper. On a lightly floured surface, roll out one disc of dough to about 1/4-inch thickness. Use a star-shaped cookie cutter to cut out cookies and place them on the prepared baking sheets about 1 inch apart.
- Bake and Decorate: Bake for 8–10 minutes, or until the edges are just beginning to turn golden. Let cool on the baking sheet for a few minutes, then transfer to a wire rack to cool completely. Decorate with icing or sprinkles once fully cooled.
Notes
- Chilling the dough helps the cookies keep their shape.
- You can freeze unbaked cutouts for up to 2 months—just bake from frozen, adding an extra minute or two to the baking time.
- For crispier cookies, bake a minute longer.
- Prep Time: 20 minutes (plus 1 hour chill time)
- Cook Time: 10 minutes
- Category: Dessert
- Method: Baking
- Cuisine: American
Nutrition
- Serving Size: 1 cookie
- Calories: 110
- Sugar: 6g
- Sodium: 40mg
- Fat: 5g
- Saturated Fat: 3g
- Unsaturated Fat: 2g
- Trans Fat: 0g
- Carbohydrates: 14g
- Fiber: 0g
- Protein: 1g
- Cholesterol: 15mg

