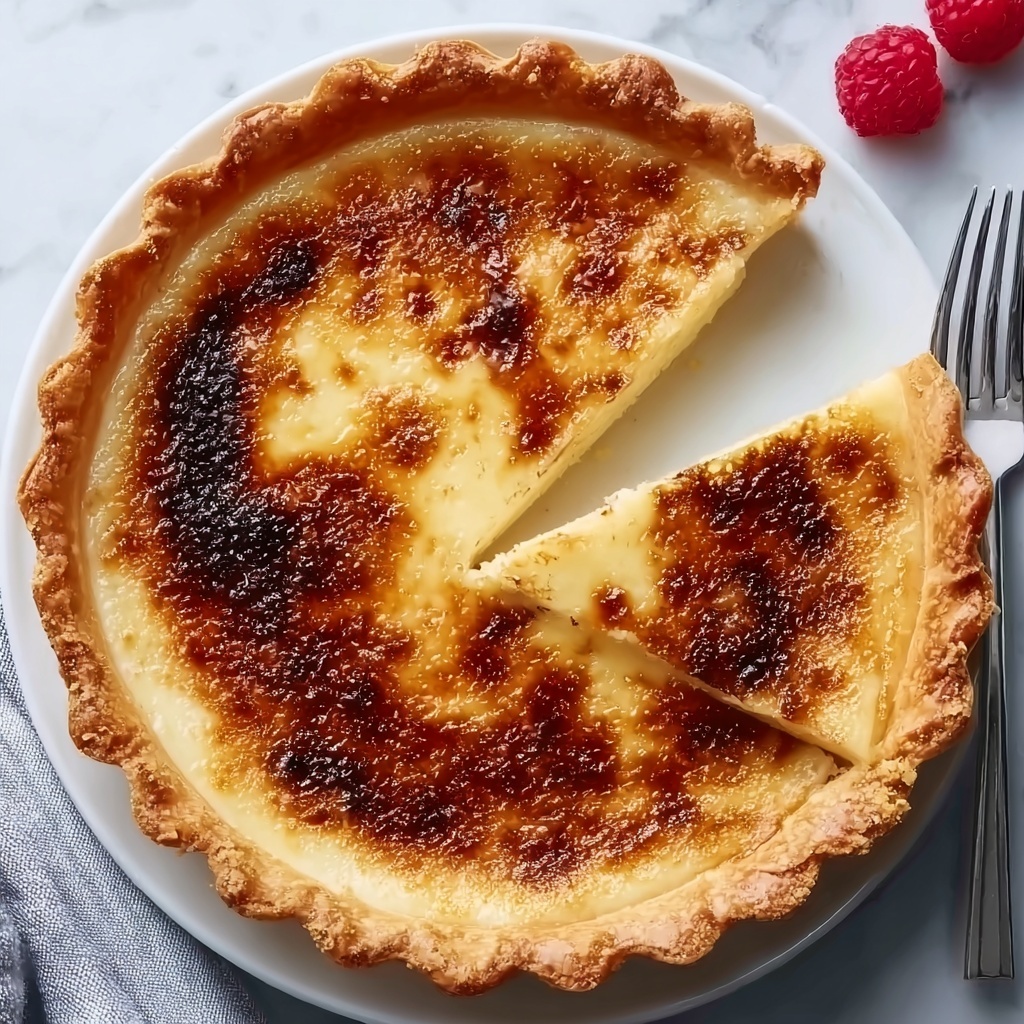
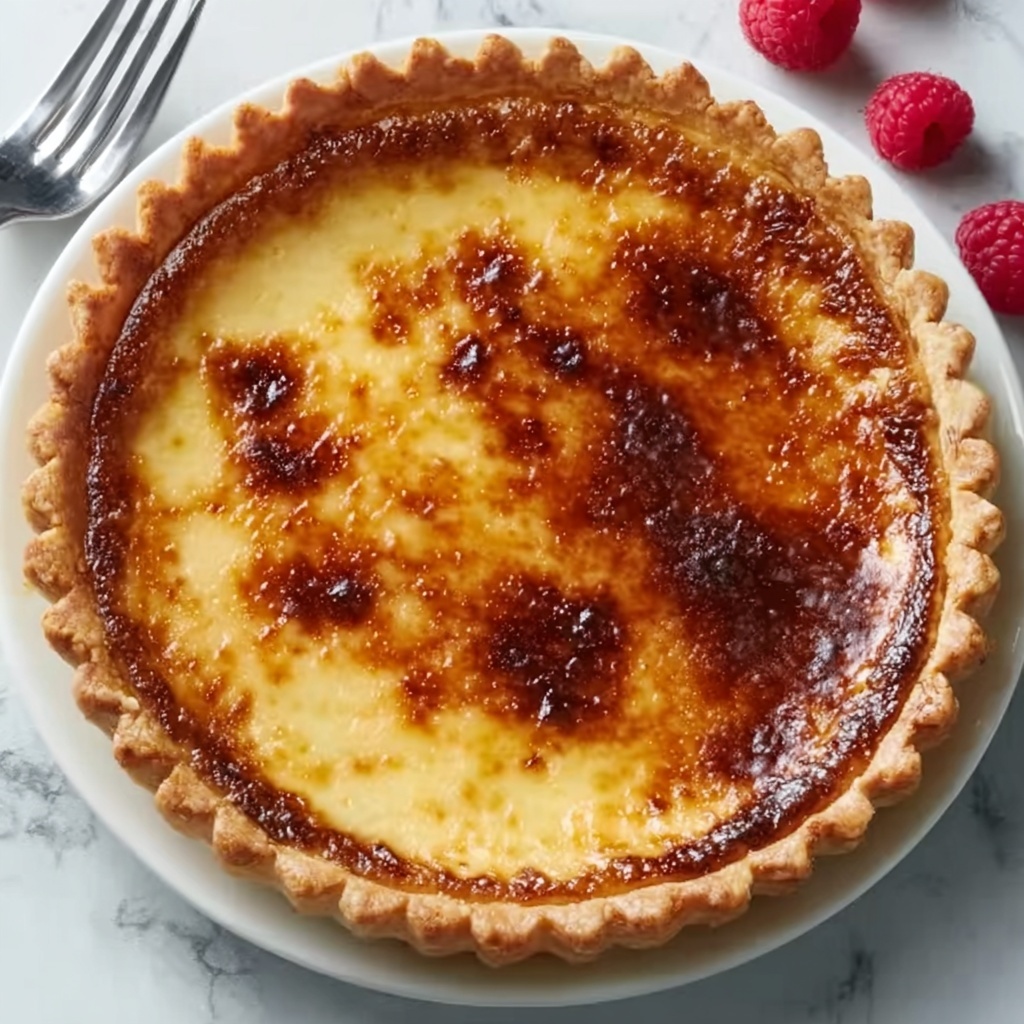
There is nothing quite like the luxurious charm of a Creme Brulee Pie Recipe to elevate any dessert occasion. This delightful fusion brings the silky, vanilla-infused custard of classic crème brûlée into the comforting, flaky embrace of a pie crust, crowned with a perfectly caramelized sugar topping. It’s a showstopper that feels both elegant and homey, delivering a rich, creamy texture balanced with a satisfyingly crisp crack of caramelized sugar. Whether you’re serving guests or indulging in a solo treat, this Creme Brulee Pie Recipe promises a memorable experience with every bite.
Ingredients You’ll Need
Gathering the right ingredients is all about simplicity with purpose. Each item plays a crucial role, from the creamy base to the crunchy topping, crafting a harmonious blend of flavors and textures.
- 1 pre-baked pie crust: Provides a crisp and buttery foundation that holds the luscious custard beautifully.
- 2 cups heavy cream: Essential for creating a rich and velvety custard that’s deeply satisfying.
- 1 cup whole milk: Lightens the cream while maintaining a creamy consistency and smooth mouthfeel.
- 1 vanilla bean, split and scraped (or 2 teaspoons vanilla extract): Infuses the custard with authentic warm vanilla flavor that defines the dish.
- 5 large egg yolks: The key thickening agent that adds color and richness to the custard.
- 1/2 cup sugar: Sweetens the filling and balances the creaminess perfectly.
- 1 tablespoon cornstarch: Ensures the custard sets firmly without cracking, creating that silky smooth texture.
- 1/4 cup brown sugar (for the topping): Caramelizes to a golden, crisp layer that delivers the iconic, crackling top.
How to Make Creme Brulee Pie Recipe
Step 1: Preheat and Prepare
Start by preheating your oven to 350°F (175°C). Having the oven ready ensures a seamless transition once your pie filling is prepared. Meanwhile, keep your pre-baked pie crust out so it’s at the ready for the luscious custard you’re about to pour in.
Step 2: Infuse the Cream
In a saucepan, combine the heavy cream, whole milk, and the seeds and pod of your split vanilla bean (or vanilla extract). Heat this mixture over medium heat until it just starts to simmer, then remove from heat. Allow the vanilla to steep for about 10 minutes to fully infuse that fragrant flavor into the cream.
Step 3: Whisk the Custard Base
While the cream infuses, whisk together the egg yolks, sugar, and cornstarch in a bowl until smooth. Slowly temper this mixture by gradually whisking in the warm cream blend. This step keeps the eggs from scrambling and sets the stage for a silky custard.
Step 4: Cook the Custard
Return the combined mixture to the saucepan and cook it gently over low heat, stirring constantly. Patiently stir until the custard thickens enough to coat the back of a spoon. This slow cooking is what guarantees that smooth, rich texture that makes this Creme Brulee Pie Recipe unforgettable.
Step 5: Bake the Pie
Pour the thickened custard into your pre-baked pie crust, spreading it evenly. Bake it for 25-30 minutes, until the custard is set but still slightly jiggly in the center. This precise baking time ensures a perfect balance of creaminess and structure.
Step 6: Chill Thoroughly
Once baked, let the pie cool to room temperature. Then refrigerate it for at least 4 hours, or overnight if possible. This chilling step is crucial—it lets the custard firm up and flavors meld wonderfully.
Step 7: Caramelize the Topping
Right before serving, sprinkle an even layer of brown sugar on the pie surface. Use a kitchen torch to caramelize the sugar until it forms that signature crackly, golden crust. This step adds not only texture but pays homage to the authentic crème brûlée experience in a pie form.
How to Serve Creme Brulee Pie Recipe

Garnishes
Simple garnishes like fresh berries or a sprig of mint bring a pop of color and a fresh contrast to the rich pie. For an elegant touch, a light dusting of powdered sugar or a swirl of whipped cream can elevate the presentation while complementing the creamy center.
Side Dishes
This pie pairs beautifully with light, refreshing sides to balance its richness. A crisp green salad with citrus vinaigrette or a bowl of seasonal fruit can be an excellent counterpoint. For a pure dessert affair, serve alongside a small scoop of vanilla bean ice cream for a freeze-and-flame contrast.
Creative Ways to Present
Consider serving individual slices on clear glass plates to showcase the beautiful layers and glossy caramel topping. Alternatively, slice into generous wedges and drizzle with a raspberry coulis to add a fruity tang. Hosting a dinner? Serve mini versions in tart pans for delightful single servings that wow guests.
Make Ahead and Storage
Storing Leftovers
Leftover Creme Brulee Pie Recipe keeps wonderfully in the fridge for up to 3 days. Cover the pie loosely with plastic wrap or store in an airtight container to prevent it from absorbing other flavors. The custard maintains its luscious texture, while the caramelized topping might soften slightly.
Freezing
Freezing is possible but not ideal for the caramelized topping, which tends to lose its crispness. To freeze, wrap the pie tightly in plastic wrap and then foil, freezing for up to one month. Thaw overnight in the refrigerator before serving. You can re-caramelize the sugar topping just before serving to regain the signature crunch.
Reheating
This pie is best enjoyed chilled, but if you prefer it slightly warm, leave it at room temperature for about 20-30 minutes before serving. Avoid microwaving, as it may alter the texture of the custard and melt the sugar topping prematurely. The warm custard without the crunchy caramel top is a different but still delightful experience.
FAQs
Can I use store-bought vanilla extract instead of a vanilla bean?
Absolutely! While a vanilla bean offers an incredible aroma and flecks of vanilla that look beautiful in the custard, 2 teaspoons of good-quality vanilla extract works well and is a convenient alternative.
Is it necessary to pre-bake the pie crust?
Yes, pre-baking ensures the crust stays crisp and doesn’t become soggy once the custard is added. It provides the ideal texture contrast necessary for this pie.
What should I do if I don’t have a kitchen torch for caramelizing?
If a kitchen torch is unavailable, you can place the pie briefly under a hot broiler, watching carefully to avoid burning. Be sure to evenly sprinkle the brown sugar just before broiling for a proper caramelization.
Why is cornstarch included in the custard filling?
Cornstarch helps thicken the pie filling to a smooth, custard-like texture that holds its shape well without curdling. It’s the key to a perfect set that’s creamy yet sliceable.
How long can I refrigerate the pie before serving?
The pie benefits from chilling for at least 4 hours and can be refrigerated up to 3 days. This resting time allows the flavors to blend and the custard to develop its silky texture.
Final Thoughts
There’s something truly special about sharing a Creme Brulee Pie Recipe that transforms simple ingredients into a stunning dessert centerpiece. It’s a perfect union of creamy, crunchy, and comforting elements that never fails to impress. Dive into making this pie and discover your new favorite way to enjoy the classic flavors of crème brûlée in a fresh, delightful form.
Print
Creme Brulee Pie Recipe
- Prep Time: 20 minutes
- Cook Time: 40 minutes
- Total Time: 5 hours 0 minutes
- Yield: 8 servings
- Category: Dessert
- Method: Baking
- Cuisine: French-American
Description
This Creme Brulee Pie combines the creamy, rich custard of traditional crème brûlée with the convenience and deliciousness of a pie. Featuring a pre-baked pie crust filled with a vanilla-infused custard, baked until set, and topped with a perfectly caramelized brown sugar crust, this dessert offers a delightful texture contrast and impressive presentation, ideal for special occasions or a decadent treat.
Ingredients
Pie Crust
- 1 pre-baked pie crust
Custard Filling
- 2 cups heavy cream
- 1 cup whole milk
- 1 vanilla bean, split and scraped (or 2 teaspoons vanilla extract)
- 5 large egg yolks
- 1/2 cup sugar
- 1 tablespoon cornstarch
Topping
- 1/4 cup brown sugar
Instructions
- Preheat the oven. Set your oven to 350°F (175°C) to warm up while you prepare the filling and pie crust.
- Infuse the cream and milk. In a saucepan, combine the heavy cream, whole milk, and the split and scraped vanilla bean (or vanilla extract). Heat this mixture over medium heat just until it begins to simmer, then remove from heat and let it steep for 10 minutes to fully develop the vanilla flavor.
- Prepare the custard base. In a separate bowl, whisk together the egg yolks, sugar, and cornstarch until smooth and pale. Gradually pour in the warm cream mixture while continuously whisking to temper the eggs and combine ingredients evenly.
- Thicken the custard. Return the combined mixture to the saucepan and cook over low heat. Stir constantly to prevent curdling and ensure the custard thickens evenly. Remove from heat once it coats the back of a spoon.
- Fill the pie crust and bake. Pour the thickened custard filling into the pre-baked pie crust. Bake in the preheated oven for about 25 to 30 minutes, or until the custard is just set but still slightly jiggly in the center.
- Cool and chill. Allow the pie to cool down to room temperature, then refrigerate it for at least 4 hours to fully set the custard and develop the flavors.
- Caramelize the topping. Before serving, evenly sprinkle brown sugar over the pie’s surface. Using a kitchen torch, caramelize the sugar until it is golden brown and crisp, creating the signature brûlée crust. Serve immediately for the best texture contrast.
Notes
- Using a pre-baked pie crust saves time and ensures a crisp base that won’t get soggy.
- For a more intense vanilla flavor, split and scrape a vanilla bean instead of using extract.
- If you don’t have a kitchen torch, you can broil the pie in your oven for a few minutes, watching closely to avoid burning.
- Ensure constant stirring when thickening the custard to prevent curdling and to achieve a silky texture.
- Allow the pie ample chilling time; overnight refrigeration is ideal for best slicing results.


