Cream Horns Recipe
There’s just something so nostalgic and special about Cream Horns—they’re the kind of bakery treat that instantly puts a smile on your face! Flaky puff pastry spirals filled with clouds of vanilla-scented whipped cream make a gorgeous, celebratory dessert (or a cheeky afternoon snack with coffee). The best part? You don’t need to be a pastry chef or have fancy equipment to make them at home. Cream Horns are impressive yet wonderfully approachable, making them a perfect recipe to share and enjoy with people you love.

Ingredients You’ll Need
-
Puff Pastry:
- 1 sheet frozen puff pastry, thawed
Whipped Cream Filling:
- 1 cup heavy whipping cream
- 3 tablespoons powdered sugar
- 1 teaspoon vanilla extract
For Assembly:
- 1 egg (for egg wash)
- 2 tablespoons granulated sugar (for sprinkling)
- powdered sugar for dusting (optional)
How to Make Cream Horns
Step 1: Prepare Your Equipment
Start by preheating your oven to 400°F. Get your metal cream horn molds ready (or simply make cones from parchment paper if you don’t have molds). Lightly greasing them helps the baked pastry slide off easily once it cools, so don’t skip this small step—it’ll save you from frustration later on!
Step 2: Shape the Puff Pastry
Roll out your sheet of thawed puff pastry on a lightly floured surface until it’s nice and smooth. Use a sharp knife or a pizza cutter to slice the pastry into 1-inch-wide strips. When you wrap each strip around the mold, start at the pointed end and gently overlap as you go, giving each horn that classic spiral look. Arrange the wrapped molds seam-side down on a parchment-lined baking sheet to help them hold their shape while baking.
Step 3: Brush and Sprinkle
Beat the egg thoroughly and use a pastry brush to give each pastry spiral a generous coating. This not only adds a beautiful sheen, it also helps the granulated sugar stick to the pastry. Sprinkle a pinch of sugar over each horn for just the right amount of caramelized crunch as they bake.
Step 4: Bake to Perfection
Bake the horns for 15 to 18 minutes, or until puffed and deeply golden. Resist the urge to open the oven door too often—let the pastry do its magic! Once they’re done, cool them just enough to handle, then carefully ease them off the molds. Let them cool completely before filling to keep that whipped cream in perfect shape.
Step 5: Make the Whipped Cream Filling
While your pastry horns cool, whip up your filling. Add the heavy cream, powdered sugar, and vanilla extract to a mixing bowl. Whip until stiff peaks form—this means the cream holds its shape beautifully when you lift the beaters. Transfer your whipped cream into a piping bag fitted with a star or round tip for picture-perfect results.
Step 6: Fill and Finish
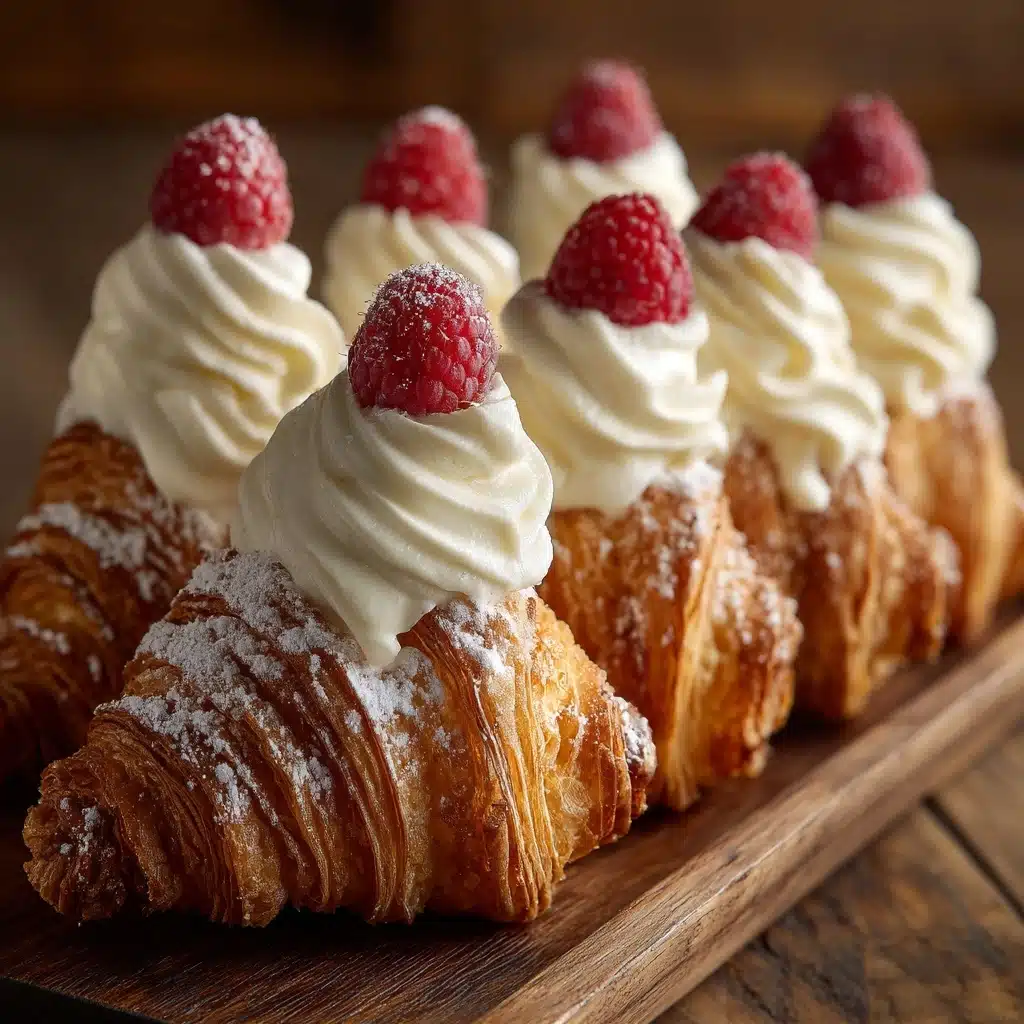
Pipe the whipped cream generously into each horn, from top to tip. If you want the ultimate finishing touch, sift a little extra powdered sugar over the top. Serve your Cream Horns immediately or tuck them in the refrigerator until you’re ready to dazzle your family and friends.
How to Serve Cream Horns
Garnishes
Garnishing Cream Horns is half the fun! A dusting of powdered sugar looks like a gentle snowfall, and a few fresh berries tucked beside each horn add a pop of color. Even a drizzle of melted chocolate or scatter of finely chopped pistachios brings extra elegance to your dessert plate.
Side Dishes
Although Cream Horns can easily stand alone as a star dessert, they pair wonderfully with a bowl of mixed berries, a scoop of vanilla ice cream, or a few crisp cookies. If you’re serving them for an afternoon tea, offer them alongside espresso or herbal tea for a truly special treat.
Creative Ways to Present
For a show-stopping display, arrange your Cream Horns in a pyramid on a pretty cake stand, or pop them into individual cupcake wrappers for easy pick-up at a party. You can even decorate the platter with edible flowers or tiny sprigs of mint for a truly bakery-chic presentation.
Make Ahead and Storage
Storing Leftovers
If you somehow manage to have extra Cream Horns, store them in an airtight container in the refrigerator. They’re at their best within 24 hours, as the pastry will soften over time from the moisture in the whipped cream. Still, even slightly softened, they’re irresistibly delicious!
Freezing
Want to get ahead? You can freeze unfilled baked horns in a zip-close bag for up to two months. When you’re ready to serve, thaw at room temperature and fill with fresh whipped cream. Avoid freezing filled horns, as whipped cream changes texture when frozen and thawed.
Reheating
If your baked pastry horns need a little crisping up, pop the empty (unfilled) horns into a 350°F oven for a few minutes. Let them cool fully before filling. Filled Cream Horns are best served fresh and don’t require reheating.
FAQs
Do I need special molds to make Cream Horns?
Traditional metal cream horn molds make things easy, but you can absolutely DIY with rolled parchment cones in a pinch. They might not be quite as precise, but the results are still beautiful and delicious!
Can I use store-bought whipped topping instead of homemade whipped cream?
You can, but freshly whipped cream gives a much richer flavor and fluffier texture. If you’re short on time, it’s a convenient substitute, but nothing beats homemade!
What other fillings can I try?
This recipe is all about versatility. Swap in pastry cream, vanilla or chocolate custard, or even mascarpone sweetened with a touch of honey for a delightful twist on classic Cream Horns.
How do I keep the pastry crispy?
Let the baked horns cool completely before filling and only fill them shortly before serving. Storing filled horns for too long can make the pastry go soft as it absorbs the moisture from the cream.
Can I make these ahead for a party?
Yes! Bake the horns a day ahead and store them (unfilled) in an airtight container. Fill right before serving for the best texture and freshest presentation.
Final Thoughts
I hope you’re feeling inspired and excited to try making Cream Horns at home—they’re a true delight to create and share. Once you take that first bite of crispy pastry and luscious whipped cream, you’ll understand why this recipe is such a favorite. Give it a try, and treat yourself and your loved ones to a little bakery magic, right from your own kitchen!
Print
Cream Horns Recipe
- Total Time: 43 minutes
- Yield: 6 cream horns 1x
- Diet: Vegetarian
Description
Indulge in these delightful Cream Horns filled with sweet whipped cream, encased in flaky puff pastry. A European-inspired treat that’s perfect for dessert or a sweet snack.
Ingredients
Puff Pastry:
- 1 sheet frozen puff pastry, thawed
Whipped Cream Filling:
- 1 cup heavy whipping cream
- 3 tablespoons powdered sugar
- 1 teaspoon vanilla extract
For Assembly:
- 1 egg (for egg wash)
- 2 tablespoons granulated sugar (for sprinkling)
- powdered sugar for dusting (optional)
Instructions
- Preheat and Prepare: Preheat the oven to 400°F. Grease cream horn molds or make cone shapes with parchment paper.
- Prepare Pastry: Roll out puff pastry, cut into strips, and wrap around molds. Brush with egg wash, sprinkle with sugar, and bake until golden.
- Make Filling: Whip cream, powdered sugar, and vanilla until stiff peaks form.
- Fill Cream Horns: Pipe whipped cream into cooled pastry shells.
- Serve: Dust with powdered sugar if desired. Serve or refrigerate until ready.
Notes
- You can use different fillings like pastry cream, custard, or sweetened mascarpone.
- Chilling the molds before wrapping the dough helps retain the shape.
- Prep Time: 25 minutes
- Cook Time: 18 minutes
- Category: Dessert
- Method: Baking
- Cuisine: European
Nutrition
- Serving Size: 1 cream horn
- Calories: 290
- Sugar: 10 g
- Sodium: 115 mg
- Fat: 21 g
- Saturated Fat: 13 g
- Unsaturated Fat: 6 g
- Trans Fat: 0 g
- Carbohydrates: 20 g
- Fiber: 0 g
- Protein: 2 g
- Cholesterol: 50 mg
