
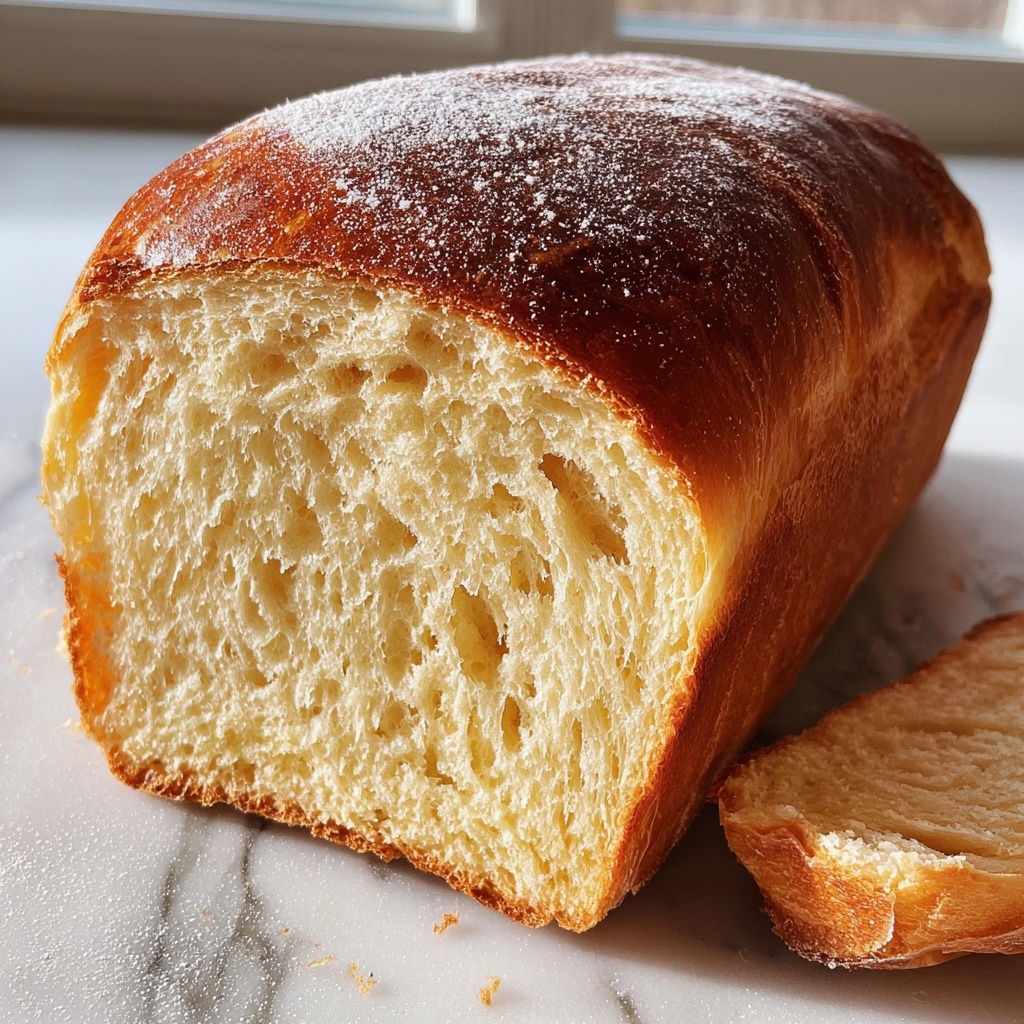
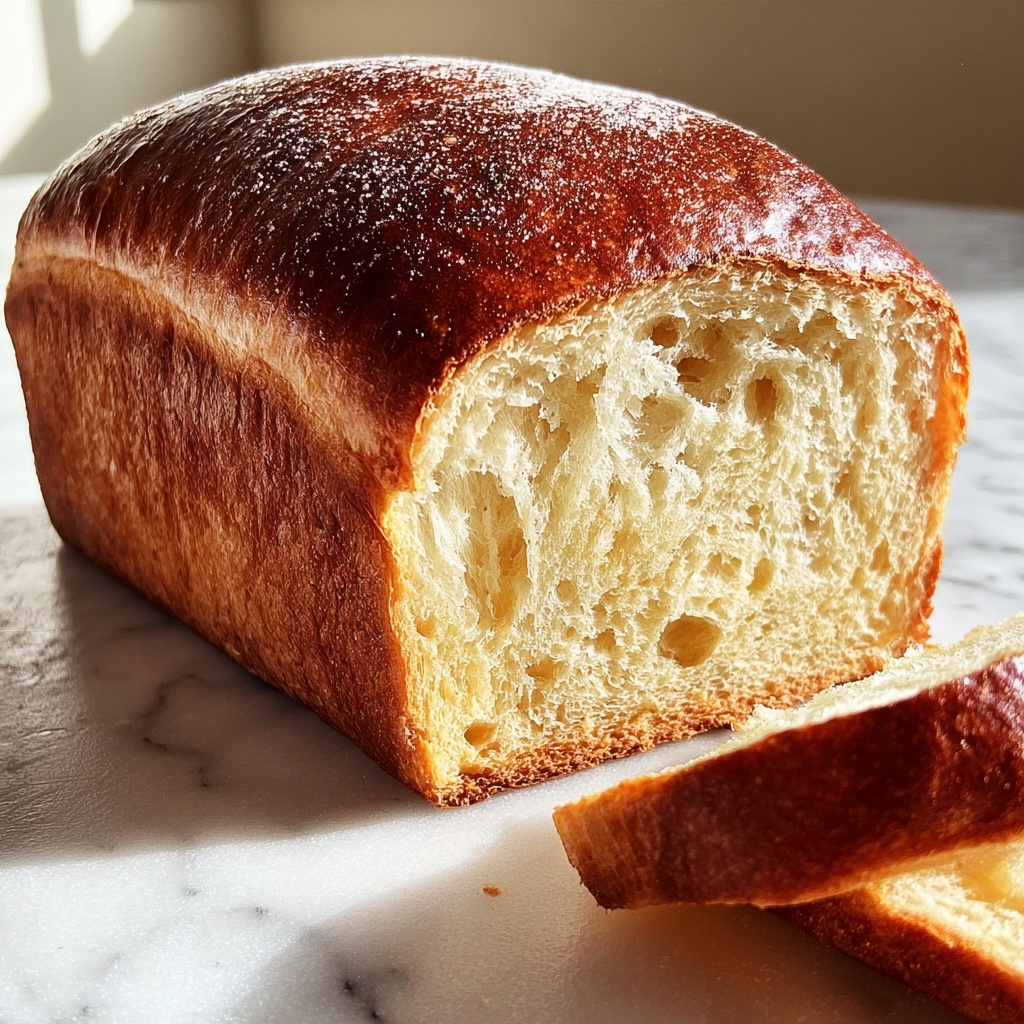
If you’ve ever longed for that warm, soft loaf of bread straight from grandma’s kitchen, you’re in for a treat with this Comforting Amish White Bread Recipe: 7 Steps to Homemade Joy Recipe. It’s the kind of homemade bread that fills your home with an incredible aroma while producing a crust that’s perfectly golden and a light, pillowy crumb you’ll want to savor slice after slice. This recipe brings back the charm of traditional Amish baking — simple ingredients, straightforward steps, and a truly satisfying result that feels like a big, comforting hug with every bite.
Ingredients You’ll Need
Each ingredient in this recipe plays a starring role in creating the perfect Amish white bread. They’re simple, everyday pantry essentials, but together they develop that iconic texture, rich flavor, and inviting appearance that make this bread a beloved classic.
- 4 cups all-purpose flour: The foundation of the bread, providing structure and softness.
- 1 packet active dry yeast: The magic that helps the dough rise and become airy.
- 1 cup warm water: Activates the yeast and hydrates the flour for dough development.
- 1/4 cup sugar: Adds subtle sweetness and feeds the yeast for a lively rise.
- 1 tablespoon salt: Balances flavor and strengthens the gluten structure.
- 1/4 cup vegetable oil: Keeps the bread moist and tender with a soft crumb.
How to Make Comforting Amish White Bread Recipe: 7 Steps to Homemade Joy Recipe
Step 1: Activate the Yeast
Start by dissolving the active dry yeast in warm water — about 110°F is perfect — to wake it up gently. This step ensures your dough will rise beautifully with that classic airy texture.
Step 2: Add Sugar, Salt, and Oil
Once the yeast mixture is bubbling slightly, stir in the sugar, salt, and vegetable oil. The sugar fuels the yeast, the salt adds a punch of flavor, and the oil brings that tender crumb every loaf dreams of.
Step 3: Mix in the Flour
Gradually add the all-purpose flour to the wet ingredients, mixing as you go until a sticky but manageable dough forms. The gradual addition helps control the dough’s consistency perfectly.
Step 4: Knead the Dough
Turn your dough out onto a floured surface and knead it for about 10 minutes. This is where the dough transforms, developing the gluten network that will give your bread its chewy, satisfying texture.
Step 5: First Rise
Place the dough in a greased bowl and cover it to create a warm, cozy environment. Let it rise until it has doubled in size — usually about an hour. This step is essential for achieving the soft, fluffy bread you love.
Step 6: Shape the Loaf
After the dough has risen, gently punch it down to release the air and then shape it into a tidy loaf. This step prepares your bread for its final rise and baking.
Step 7: Final Rise and Bake
Put your shaped dough into a greased loaf pan and cover again. Let it rise for another 30 minutes to puff up the loaf perfectly. Then, bake at 350°F (175°C) for about 30 minutes or until the crust turns a gorgeous golden brown. Your kitchen will smell incredible!
How to Serve Comforting Amish White Bread Recipe: 7 Steps to Homemade Joy Recipe
Garnishes
While this bread shines on its own, you can add a pat of creamy butter or a drizzle of honey atop a warm slice to elevate the experience. A sprinkle of sea salt or herbs on buttered slices creates a simple yet delightful finish.
Side Dishes
This Amish white bread pairs wonderfully with hearty soups, homemade stews, or fresh salads. Its subtle sweetness and soft texture balance savory dishes beautifully, making it a versatile companion at any meal.
Creative Ways to Present
Try making open-faced sandwiches with colorful veggies, rustic bruschetta, or even French toast for breakfast. The bread’s tender but sturdy crumb holds up well to a variety of toppings and preparations, letting you get creative in the kitchen.
Make Ahead and Storage
Storing Leftovers
Wrap your leftover bread tightly in plastic wrap or store it in an airtight container to keep it from drying out. It will stay fresh for about 2 to 3 days at room temperature — perfect for quick snacks or sandwiches.
Freezing
If you want to enjoy this comforting Amish white bread recipe: 7 steps to homemade joy recipe over time, slice it first and freeze the loaf or individual slices in zip-top bags. This way, you can pull out only what you need and toast it straight from the freezer.
Reheating
To bring back that just-baked warmth and softness, reheat slices in a toaster or warm the whole loaf wrapped in foil in the oven. A light mist of water on the crust before reheating can also help restore moisture.
FAQs
Can I use bread flour instead of all-purpose flour?
Yes, bread flour will give your loaf a slightly chewier texture due to its higher protein content, but all-purpose flour works perfectly well and keeps the crumb tender.
How can I tell if my yeast is still good?
If the yeast bubbles up and foams when dissolved in warm water with a pinch of sugar, it’s alive and ready to use. If it remains flat, it’s best to get a new packet for a successful rise.
Why did my bread turn out dense?
Dense bread usually means the dough didn’t rise enough — either the yeast wasn’t active, the dough was too cold, or it needed more time. Make sure to give your dough enough time to double in size before baking.
Can I add extras like herbs or seeds?
Absolutely! Feel free to mix in herbs like rosemary or thyme, or sprinkle seeds such as sesame or poppy on top before baking for a flavorful twist on this comforting Amish white bread recipe: 7 steps to homemade joy recipe.
Is this recipe suitable for beginners?
Definitely yes! The straightforward steps and simple ingredients make this recipe a great introduction to bread baking, with a rewarding result that’s well worth the effort.
Final Thoughts
This Comforting Amish White Bread Recipe: 7 Steps to Homemade Joy Recipe is more than just bread — it’s a chance to slow down, connect with tradition, and fill your home with warmth. I hope you’ll give it a try and experience firsthand the joy of baking a loaf that’s tender, fragrant, and full of heart. Your kitchen (and your taste buds) will thank you!
Print
Comforting Amish White Bread Recipe: 7 Steps to Homemade Joy Recipe
- Prep Time: 20 minutes
- Cook Time: 30 minutes
- Total Time: 1 hour 50 minutes
- Yield: 1 loaf (about 12 slices)
- Category: Bread
- Method: Baking
- Cuisine: American
Description
This Comforting Amish White Bread recipe delivers a soft, fluffy homemade loaf perfect for sandwiches or toast. Simple ingredients and straightforward steps make it an ideal bread for beginners and those craving classic, fresh-baked bread.
Ingredients
Dry Ingredients
- 4 cups all-purpose flour
- 1 packet active dry yeast (about 2 1/4 teaspoons)
- 1/4 cup sugar
- 1 tablespoon salt
Wet Ingredients
- 1 cup warm water (about 110°F/43°C)
- 1/4 cup vegetable oil
Instructions
- Dissolve yeast: In a medium-sized bowl, dissolve the active dry yeast in warm water. Let it sit for about 5 minutes until it becomes frothy, indicating the yeast is active.
- Add sugar, salt, and oil: Stir in the sugar, salt, and vegetable oil to the yeast mixture until well combined.
- Combine flour: Gradually add the all-purpose flour into the wet mixture, mixing continuously until a soft dough starts to form.
- Knead dough: Turn the dough out onto a floured surface and knead it vigorously for about 10 minutes until smooth and elastic, which helps develop the gluten for better texture.
- First rise: Place the kneaded dough in a greased bowl, cover it with a clean kitchen towel or plastic wrap, and allow it to rise in a warm place for about 1 hour or until it doubles in size.
- Punch down dough: After the dough has risen, punch it down gently to release gases from fermentation.
- Shape the loaf: Shape the dough into a loaf and place it into a greased 9×5-inch loaf pan.
- Second rise: Cover the pan and let the dough rise again for 30 minutes until it puffs up.
- Bake the bread: Preheat your oven to 350°F (175°C) and bake the loaf for 30 minutes, or until the crust turns golden brown and the bread sounds hollow when tapped.
Notes
- Ensure the water is warm, not hot, to avoid killing the yeast.
- For a softer crust, brush the top of the loaf with melted butter right after baking.
- Let the bread cool completely before slicing for the best texture.
- You can store leftover bread in an airtight container at room temperature for up to 3 days or freeze for longer storage.


