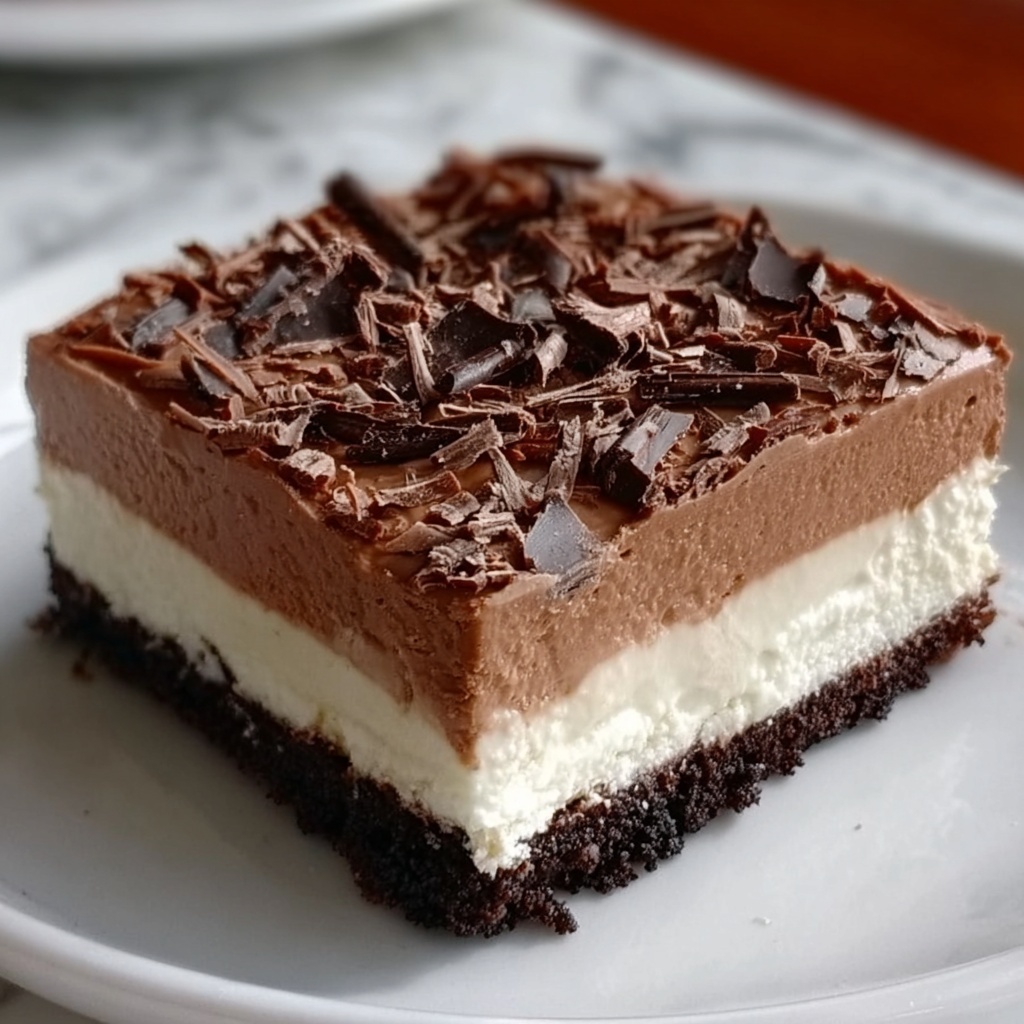
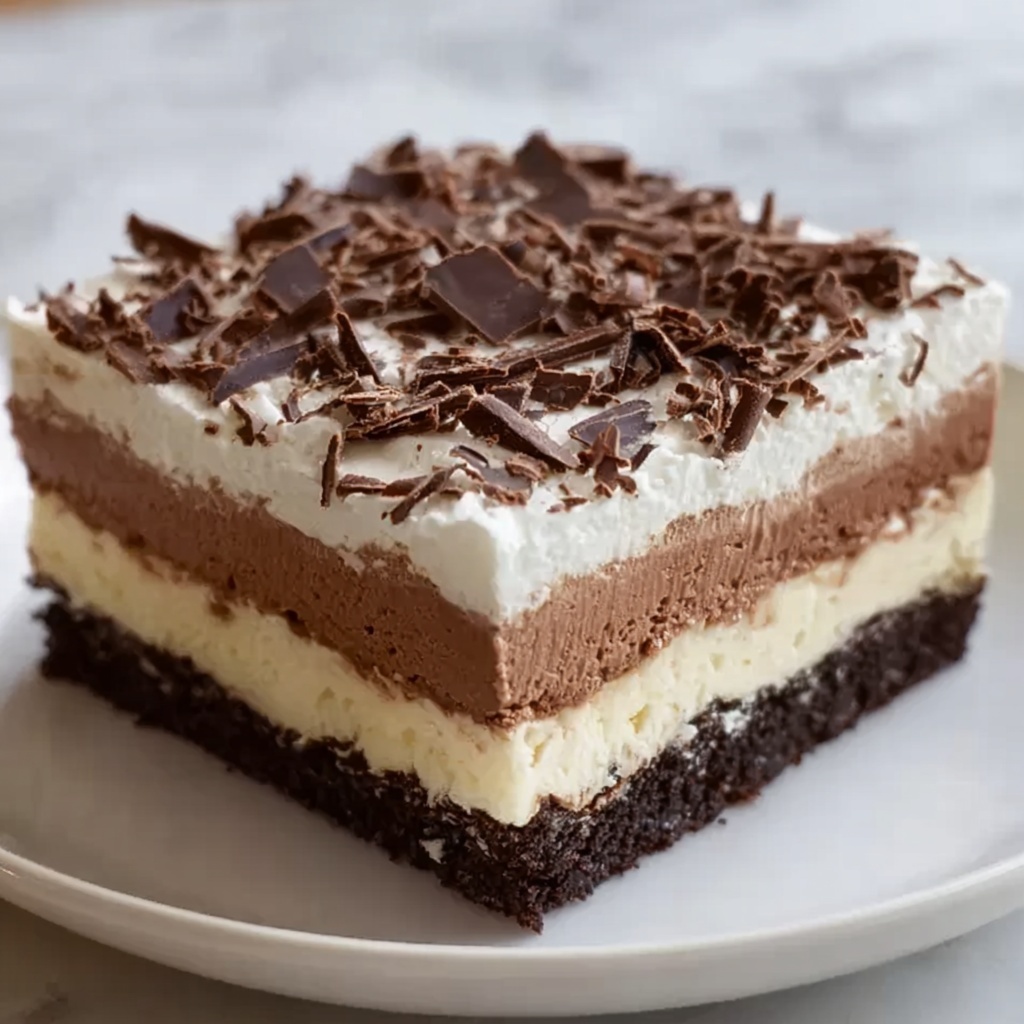
If you’re a fan of desserts that are irresistibly rich, creamy, and wonderfully easy to make, you are going to fall head over heels for this Brownie Refrigerator Cake Recipe. This layered masterpiece boasts a fudgy brownie base topped with luscious cream cheese and a dreamy pudding layer, all crowned with fluffy whipped topping and a delightful chocolate garnish. It’s the perfect crowd-pleaser that comes together effortlessly and needs just a bit of patience in the fridge to achieve its full, melt-in-your-mouth glory. Trust me, once you try this, it will quickly become a staple for family gatherings or that sweet indulgence you deserve any day of the week.
Ingredients You’ll Need
What I love about this Brownie Refrigerator Cake Recipe is how simple the ingredients are, yet how each one plays a crucial role in building a dessert that’s creamy, chocolatey, and beautifully textured. From the basic brownie mix to the combination of cream cheese and pudding, every component works in harmony to create something truly special.
- Brownie mix: The foundation of the cake, it provides that rich chocolatey base with minimal effort.
- Extra-large egg: Ensures the brownie batter binds perfectly for the best texture.
- Cream cheese (8 oz., softened): Adds a tangy creaminess that balances the sweetness wonderfully.
- Powdered sugar (1 cup): Sweetens the cream cheese layer without any grittiness.
- Whipped topping (two 8 oz. containers): Provides airy lightness and smoothness in both the cream cheese and pudding layers.
- Instant chocolate pudding (3 oz.): Delivers deep chocolate flavor and a silky texture.
- Instant vanilla pudding (3 oz.): Gives a creamy contrast and rounds out the pudding layer.
- Milk (3 ½ cups): Needed to whisk up the pudding layers perfectly thick and velvety.
- Hershey bar (grated) or chocolate syrup: For a visually appealing and scrumptious final garnish.
How to Make Brownie Refrigerator Cake Recipe
Step 1: Prepare the Brownie Base
Start by baking the brownie mix as per the package instructions, remembering to use that extra-large egg for a perfect texture. Pour the batter into a 9×13-inch pan and let it bake until it’s just set and effortlessly fudgy. Cooling the brownies completely before layering is key to keeping the delicate layers intact and mixing just right.
Step 2: Make the Cream Cheese Layer
While the brownies cool, beat softened cream cheese and powdered sugar until silky smooth. This step ensures no lumps will spoil the velvety experience. Gently fold in one container of whipped topping to add fluffy lightness, transforming this layer into a dreamy complement that’s not too heavy but still wonderfully rich. Spread this carefully over the cooled brownies for that luscious second layer.
Step 3: Prepare the Pudding Layer
In a large bowl, whisk together the instant chocolate pudding, vanilla pudding, and milk until the mixture thickens to a smooth, satisfying consistency. Let it rest for about five minutes to fully set before spooning it over the cream cheese layer. This combo creates a beautifully balanced pudding layer with contrasting chocolate and vanilla notes that keep each bite exciting.
Step 4: Final Layer and Garnish
Spread the second container of whipped topping evenly over the pudding layer, creating a cloud-like finish. Then generously sprinkle freshly grated Hershey’s chocolate on top or drizzle it with luscious chocolate syrup. This finishing touch brings texture, shine, and a hint of extra chocolate goodness that everyone will notice and love.
Step 5: Chill and Serve
Cover your creation and refrigerate it for at least four hours, though I highly recommend overnight for maximum decadence. This chilling time allows all those layers to meld and firm up just enough for clean, stunning slices. Serve chilled, and watch your family or guests swoon over every forkful.
How to Serve Brownie Refrigerator Cake Recipe

Garnishes
While the grated chocolate or syrup topping is perfect as is, you can get creative by adding fresh raspberries or a few mint leaves for a pop of color and refreshing contrast. A light dusting of cocoa powder or a sprinkle of crushed nuts gives an extra layer of texture that elevates the presentation beautifully.
Side Dishes
This dessert pairs wonderfully with a scoop of vanilla bean ice cream or a dollop of fresh whipped cream to add even more indulgence. If you want to balance the richness, serve alongside a simple berry compote or a crisp cup of black coffee to cleanse the palate between bites.
Creative Ways to Present
For a stunning buffet display, make the recipe in individual glass parfait cups to showcase each layer. If you’re entertaining, slice the cake into neat squares and arrange on a platter with edible flowers or drizzled caramel for an elegant touch. You can even dust some gold leaf or edible glitter for special occasions — this Brownie Refrigerator Cake Recipe lends itself beautifully to your creative flair.
Make Ahead and Storage
Storing Leftovers
Once assembled and chilled, cover the cake tightly with plastic wrap or a cake dome and keep it refrigerated. It stays fresh and flavorful for up to 4 days, making it a great make-ahead dessert that only gets better with time.
Freezing
Although best enjoyed fresh, you can freeze leftovers by cutting the cake into portions and wrapping each piece individually in plastic wrap and foil. Freeze for up to 2 months. Thaw overnight in the refrigerator before serving to retain that perfect texture.
Reheating
This type of refrigerator cake is meant to be served chilled, so reheating isn’t recommended as it can affect the pudding and whipped topping layers. Simply keep portions refrigerated until ready to enjoy for the best flavor and texture.
FAQs
Can I use homemade brownies instead of box mix?
Absolutely! If you prefer, homemade brownies can add an extra personal touch and flavor depth. Just make sure to bake and cool them completely before layering with the other ingredients.
What if I don’t have instant pudding mix?
You can substitute with homemade pudding, but it may require chilling time to set properly. Using instant mix is easiest and produces that classic creamy texture that’s perfect for this recipe.
Can I make this dessert vegan or dairy-free?
With some ingredient swaps like dairy-free cream cheese, whipped topping, and pudding mixes, you can make a vegan or dairy-free version. Just be sure to follow brands that cater to those dietary needs and adjust as necessary for texture.
How long should I chill the cake before serving?
A minimum of 4 hours is recommended, but overnight refrigeration really lets all the flavors and layers meld into a perfectly firm yet creamy delight.
Can I add other flavors or layers?
Definitely! You might try mixing different pudding flavors or adding a layer of fresh fruit like sliced strawberries or bananas. The beauty of the Brownie Refrigerator Cake Recipe is its adaptability to your favorites.
Final Thoughts
There’s something truly magical about a dessert that requires minimal effort but delivers astonishing flavor and texture, and this Brownie Refrigerator Cake Recipe hits that sweet spot beautifully. Whether it’s for a holiday, a potluck, or just because, this cake is sure to brighten up any occasion and become a beloved favorite. So go ahead, gather these simple ingredients and spoil yourself and your loved ones with every decadent bite!
Print
Brownie Refrigerator Cake Recipe
- Prep Time: 15 minutes
- Cook Time: 40 minutes
- Total Time: 4 hours 55 minutes
- Yield: 12 servings
- Category: Dessert
- Method: Baking
- Cuisine: American
Description
This Brownie Refrigerator Cake is a decadent no-bake dessert that layers a rich brownie base with a smooth cream cheese layer, topped by a luscious pudding mixture and finished with whipped topping and chocolate garnish. Perfect for chilling ahead, this treat combines ease and indulgence for 12 servings of creamy, chocolatey delight.
Ingredients
Brownie Layer
- 1 box brownie mix (prepared according to package instructions)
- 1 extra-large egg (or as required by brownie mix)
Cream Cheese Layer
- 1 (8 oz.) package cream cheese, softened
- 1 cup powdered sugar
- 1 (8 oz.) container whipped topping
Pudding Layer
- 1 (3 oz.) package instant chocolate pudding
- 1 (3 oz.) package instant vanilla pudding
- 3 ½ cups milk
- 1 (8 oz.) container whipped topping
Topping
- 1 Hershey bar (grated) or chocolate syrup for drizzling
Instructions
- Prepare the Brownie Base: Preheat your oven according to the brownie mix package instructions. Bake the brownie mix in a 9×13-inch pan, using one extra-large egg (or as required by the mix). Once baked, allow the brownies to cool completely before proceeding.
- Make the Cream Cheese Layer: Beat the softened cream cheese with powdered sugar until the mixture is smooth and creamy. Gently fold in one 8 oz. container of whipped topping to retain the airy texture. Evenly spread this mixture over the cooled brownie layer.
- Prepare the Pudding Layer: In a large bowl, whisk together the instant chocolate pudding mix, instant vanilla pudding mix, and 3 ½ cups of milk until the pudding thickens. Let the pudding set for 5 minutes to fully thicken. Spread the pudding evenly over the cream cheese layer.
- Final Layer & Garnish: Spread the second 8 oz. container of whipped topping over the pudding layer for a light, airy top. Garnish by sprinkling grated Hershey’s chocolate over the top or drizzle with chocolate syrup to your preference.
- Chill & Serve: Cover the assembled cake and refrigerate for at least 4 hours, though overnight chilling is best to allow all layers to set properly. Slice into 12 pieces and serve chilled for a refreshing dessert experience.
Notes
- Ensure the brownie layer is completely cooled before adding the cream cheese layer to prevent melting.
- For a quicker set pudding layer, use chilled milk but avoid making the pudding too cold before whisking to prevent lumps.
- Substitute the Hershey bar with chocolate chips or fudge sauce if preferred for garnish.
- This cake is best served chilled and stored in the refrigerator to maintain texture and freshness.
- Use full-fat cream cheese and whipped topping for the creamiest texture.


