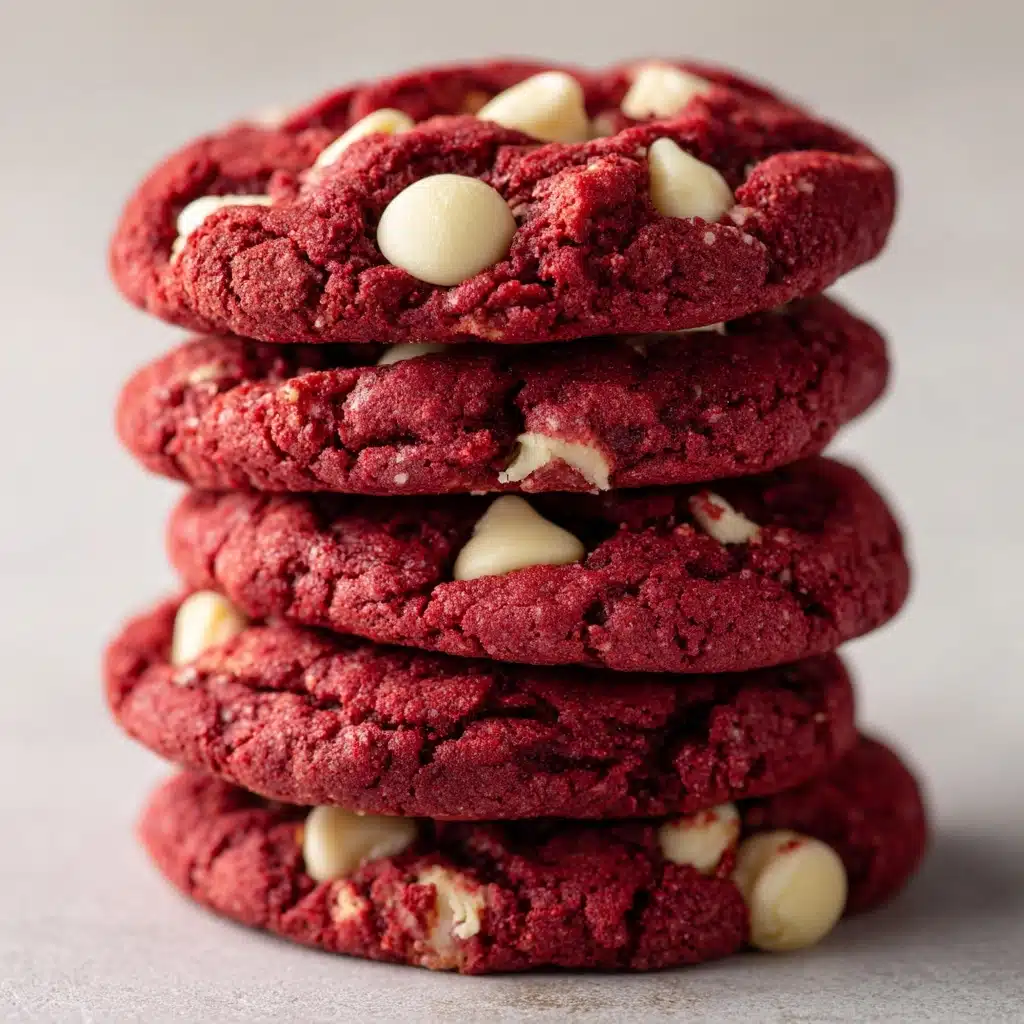
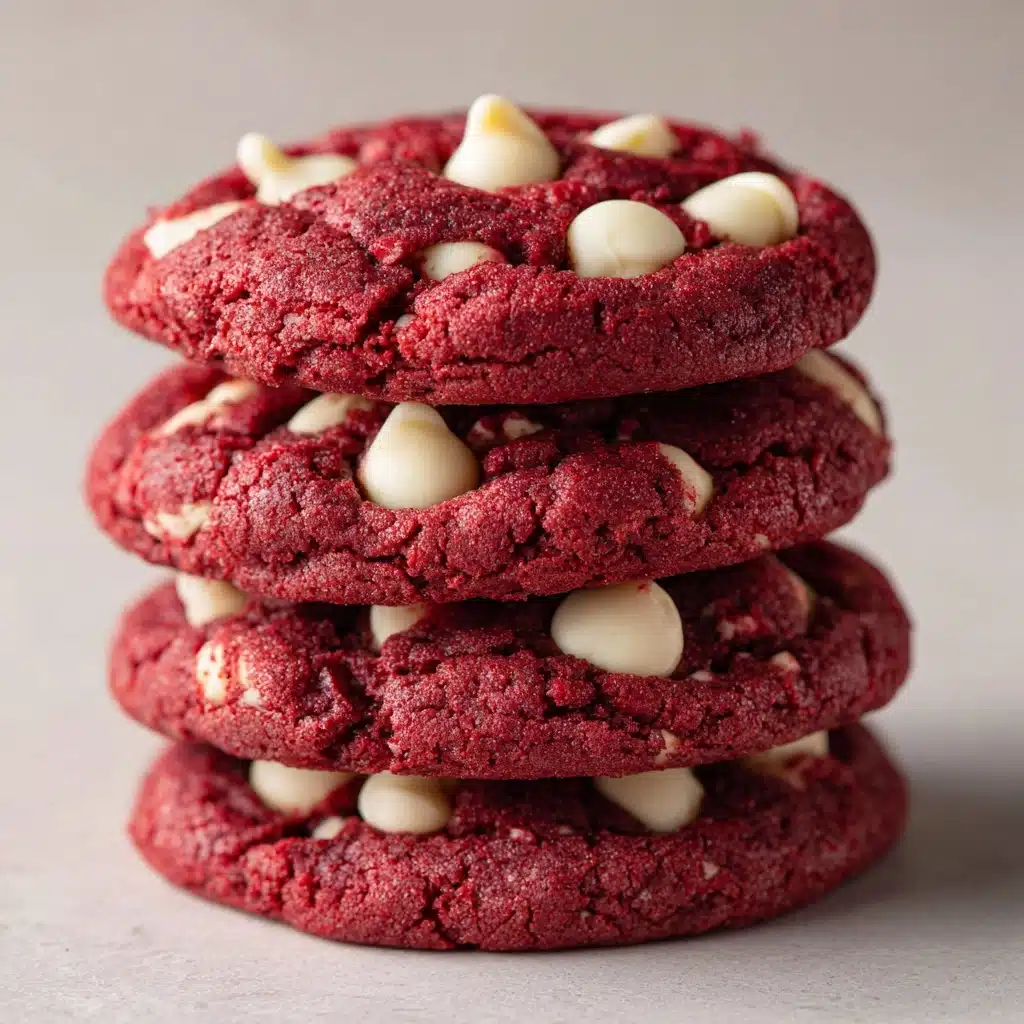
Red Velvet Cookies Recipe
If you’ve ever found yourself craving that classic tangy richness of red velvet cake but want something a little more portable (and honestly, even more irresistible), Red Velvet Cookies are about to be your new obsession. These gorgeous, soft-baked cookies are everything you love about the iconic cake, packed into a chewy treat that’s perfect for sharing, gifting, or keeping all to yourself. The subtle cocoa flavor, creamy white chocolate chips, and striking red color make them a showstopper on any dessert platter. Let’s take a deep dive into how to whip up a batch of these truly delightful Red Velvet Cookies!
Ingredients You’ll Need
The beauty of Red Velvet Cookies is how their magic comes from a few essential, easy-to-find ingredients. Each one plays a starring role, whether it’s flavor, color, or melt-in-your-mouth texture — and together, they create something unforgettable.
- All-purpose flour: This gives the cookies structure and that classic chewy bite.
- Unsweetened cocoa powder: Just a hint gives the cookies their signature subtle chocolate flavor.
- Cornstarch: Makes for softer, pillowy cookies by tenderizing the dough.
- Baking soda: Adds lift, helping the cookies puff up just the right amount as they bake.
- Salt: A pinch enhances the cocoa and balances sweetness.
- Unsalted butter, softened: Key for richness and those perfectly crisp edges.
- Granulated sugar: Adds sweetness and helps with crispness.
- Packed brown sugar: Brings moisture and a wonderful hint of caramel flavor.
- Large egg: Binds everything together and adds richness.
- Red food coloring: Delivers that bold, classic “red velvet” hue—don’t skip it!
- Vanilla extract: Rounds out the flavor and enhances the chocolate notes.
- White chocolate chips: Creamy, sweet pops that contrast beautifully with the tender cocoa cookie.
How to Make Red Velvet Cookies
Step 1: Prep Your Baking Sheets and Oven
Start by preheating your oven to 350°F (175°C) and line two baking sheets with parchment paper. This not only helps prevent sticking but also makes for super easy cleanup later. It’s a tiny step that makes a big difference, especially when you’re eager to enjoy your Red Velvet Cookies straight out of the oven!
Step 2: Mix the Dry Ingredients
Grab a medium bowl and whisk together your flour, cocoa powder, cornstarch, baking soda, and salt. Mixing these dry ingredients first ensures the cocoa and leaveners are distributed evenly, so every cookie bakes up with the same perfect texture and flavor.
Step 3: Cream the Butter and Sugars
In a large mixing bowl, use a hand mixer or stand mixer to cream together the softened butter, granulated sugar, and brown sugar. Beat on medium speed for about 2 minutes, until the mixture is light, fluffy, and a little paler in color. This step adds air to the dough, giving the cookies their soft, chewy centers.
Step 4: Add Egg, Red Food Coloring, and Vanilla
Beat in the egg, red food coloring, and vanilla extract until everything looks smooth and uniformly red. The splash of red food coloring is the secret behind their dazzling appearance, instantly making these cookies festive and fun.
Step 5: Combine Wet and Dry Mixes
With your mixer on low speed, gradually add the dry ingredients to the wet. Mix just until combined—overmixing can make the cookies tough. It’s okay if there are a few floury streaks left, as you’ll stir more in the next step.
Step 6: Fold in the White Chocolate Chips
Switch to a spatula and gently fold in the white chocolate chips. Make sure they’re evenly distributed for maximum creamy bites in every cookie. Now your Red Velvet Cookies dough is ready for action!
Step 7: Portion and Bake
Scoop out tablespoon-sized portions and place them on your prepared baking sheets, leaving about 2 inches between each. Bake for 9 to 11 minutes, or until the edges are set and the centers look just a touch soft—they’ll continue to firm up as they cool.
Step 8: Cool and (Optional) Drizzle
Let the cookies rest on the baking sheet for 5 minutes before transferring them to a wire rack to finish cooling. For a little extra wow-factor, drizzle the cooled cookies with melted white chocolate. It’s a decadent touch that looks stunning—especially for holidays or special occasions.
How to Serve Red Velvet Cookies
Garnishes
These cookies are fantastic on their own, but a little garnish goes a long way. Try a dusting of powdered sugar for a snow-kissed look, a drizzle of melted white chocolate, or even a sprinkle of festive sprinkles if you’re making them for a party. The contrast between the rich red color and any white or pastel topping really makes your Red Velvet Cookies pop!
Side Dishes
A cold glass of milk is the classic pairing, making every bite extra luscious. For grown-up gatherings, try serving the cookies with a hot cup of coffee, a vanilla milkshake, or even a scoop of creamy vanilla or cheesecake ice cream. The subtle cocoa and white chocolate in the cookies work with so many different sides.
Creative Ways to Present
When it comes to presentation, let your creativity shine! Stack the cookies in clear cellophane bags tied with a ribbon for sweet edible gifts, or showcase them on a pretty cake stand at your next brunch or holiday table. You can even sandwich two cookies with a schmear of cream cheese frosting for a Red Velvet Cookies “whoopie pie” experience that’s truly next-level.
Make Ahead and Storage
Storing Leftovers
Keep any leftover cookies fresh by storing them in an airtight container at room temperature. They’ll stay soft and delicious for about three days—although they tend to disappear long before then in my kitchen!
Freezing
Red Velvet Cookies freeze beautifully, either as scooped dough or baked cookies. For dough, scoop portions onto a tray and freeze until solid, then transfer to a zip-top freezer bag for up to three months. When ready to bake, add a minute or two to the baking time. Baked cookies can also be frozen; just thaw at room temperature whenever the craving strikes.
Reheating
If you love a slightly warm cookie (who doesn’t?), pop your Red Velvet Cookies in the microwave for about 10–15 seconds. They’ll come out gooey and melt-in-your-mouth—just like they’re fresh from the oven!
FAQs
Can I use natural cocoa powder instead of Dutch-process?
Yes, you can use natural cocoa powder as suggested in the ingredient list. It offers a subtle chocolate flavor without overwhelming the red color, which is traditional for Red Velvet Cookies.
What kind of food coloring works best?
A liquid or gel red food coloring both work well. Gel tends to provide a deeper hue with less liquid, so you get vivid Red Velvet Cookies without thinning out your dough.
Can I add nuts or other mix-ins?
Absolutely! Chopped pecans or walnuts are fantastic if you like a bit of crunch in your cookies. Just keep mix-ins to about 1 cup total so the dough holds together nicely.
Why did my cookies turn out cakey?
Overmixing the dough or adding too much flour can lead to a cakier texture. For chewy Red Velvet Cookies, measure dry ingredients carefully and stir just until combined.
Do I have to chill the dough?
Chilling isn’t required, but if you want thicker, puffier cookies, chill the dough for up to 24 hours. It makes the flavors even richer too!
Final Thoughts
I am truly excited for you to give these Red Velvet Cookies a try—they’re the kind of treat that brings smiles with every bite. No matter the occasion, their vibrant look and irresistible flavor make them a favorite, and I can’t wait to hear how they turn out in your kitchen. Happy baking!
Print
Red Velvet Cookies Recipe
- Total Time: 25 minutes
- Yield: 20 cookies 1x
- Diet: Vegetarian
Description
Indulge in the rich, chocolatey goodness of these chewy Red Velvet Cookies studded with white chocolate chips. Perfect for holiday gatherings or a sweet treat any time of year.
Ingredients
Dry Ingredients:
- 1 1/4 cups all-purpose flour
- 1/4 cup unsweetened cocoa powder
- 1 teaspoon cornstarch
- 1/2 teaspoon baking soda
- 1/4 teaspoon salt
Wet Ingredients:
- 1/2 cup unsalted butter, softened
- 1/2 cup granulated sugar
- 1/2 cup packed brown sugar
- 1 large egg
- 1 tablespoon red food coloring
- 1 teaspoon vanilla extract
Additional Ingredient:
- 1 cup white chocolate chips
Instructions
- Preheat the Oven: Preheat the oven to 350°F (175°C) and line two baking sheets with parchment paper.
- Prepare Dry Ingredients: In a medium bowl, whisk together flour, cocoa powder, cornstarch, baking soda, and salt.
- Cream Butter and Sugars: In a large mixing bowl, cream butter, granulated sugar, and brown sugar until light and fluffy, about 2 minutes.
- Combine Wet Ingredients: Beat in egg, red food coloring, and vanilla until combined.
- Blend the Batter: Gradually mix in the dry ingredients until just incorporated. Fold in white chocolate chips.
- Bake the Cookies: Scoop tablespoon-sized portions of dough onto prepared baking sheets, spacing 2 inches apart. Bake for 9–11 minutes until edges are set and centers are slightly soft.
- Cool and Serve: Cool on the baking sheet for 5 minutes before transferring to a wire rack.
Notes
- For extra indulgence, drizzle cooled cookies with melted white chocolate.
- The dough can be chilled for up to 24 hours before baking for a thicker texture.
- Prep Time: 15 minutes
- Cook Time: 10 minutes
- Category: Dessert
- Method: Baking
- Cuisine: American
Nutrition
- Serving Size: 1 cookie
- Calories: 140
- Sugar: 12 g
- Sodium: 90 mg
- Fat: 7 g
- Saturated Fat: 4 g
- Unsaturated Fat: 2 g
- Trans Fat: 0 g
- Carbohydrates: 18 g
- Fiber: 1 g
- Protein: 2 g
- Cholesterol: 20 mg


