Rocky Road Fudge Recipe
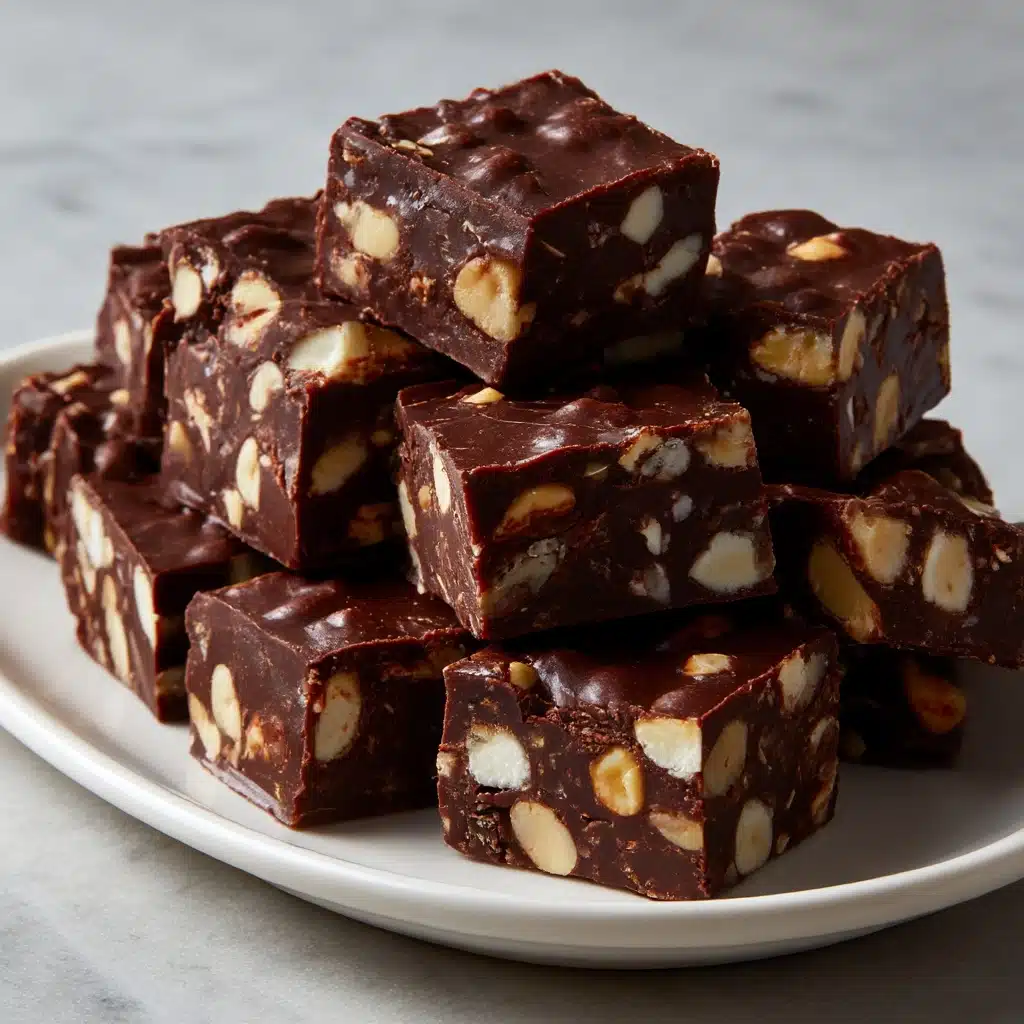
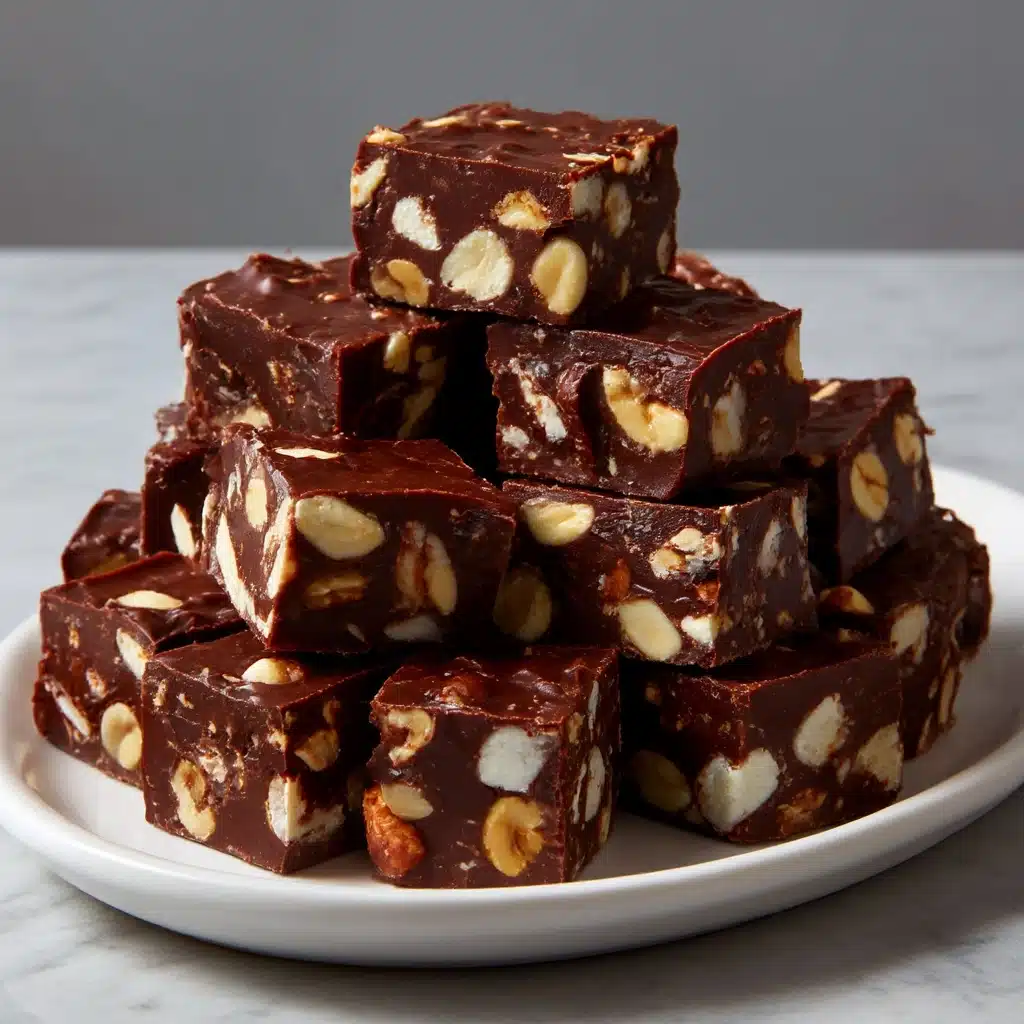
If you are searching for the ultimate sweet treat that pairs the classic flavors of chocolate, nuts, and marshmallows, look no further than Rocky Road Fudge. This fudge is every bit as dreamy as it sounds: delightfully creamy, irresistibly chocolatey, and packed with pops of oozy marshmallow and crunchy nuts in every bite. Whether you’re making it for a party, gifting homemade goodies, or just treating yourself to a chunk of nostalgia, this Rocky Road Fudge is guaranteed to bring out smiles and spark a little joy.
Ingredients You’ll Need
The magic of Rocky Road Fudge lies in its simplicity, yet each ingredient is carefully chosen to create the perfect mix of smooth, sweet, chewy, and crunchy. Gather these pantry staples and get ready for the most rewarding few minutes you’ll spend in your kitchen!
- Semi-sweet chocolate chips: Essential for that rich, deep chocolate flavor and silky texture—use a good-quality brand for best results.
- Sweetened condensed milk: Creates a luscious, creamy base that makes this fudge ultra-smooth and easy to set without any fuss.
- Unsalted butter: Adds a touch of richness and helps everything come together beautifully.
- Vanilla extract: A splash of vanilla lifts the chocolate flavors and adds a warm, rounded finish.
- Mini marshmallows: The chewy, gooey heart of classic Rocky Road Fudge—these melt just enough to become pockets of pure happiness.
- Chopped walnuts or almonds: For that perfect crunch and nutty depth; customize with your favorite nut or leave them out for a nut-free version.
How to Make Rocky Road Fudge
Step 1: Prepare your pan
Start by lining an 8×8-inch baking pan with parchment paper, leaving some overhang on the sides. This not only prevents sticking but also makes it so much easier to lift out the fudge later. Trust me, you’ll be grateful for this tiny bit of prep once it’s time to slice!
Step 2: Melt chocolate, condensed milk, and butter
In a medium saucepan over low heat, combine your semi-sweet chocolate chips, sweetened condensed milk, and butter. Stir gently and continuously—patience and low heat are key here to prevent burning. After a few minutes, the mixture will become glossy, completely smooth, and smell absolutely heavenly.
Step 3: Add vanilla for flavor
Once everything is melted, take the saucepan off the heat and stir in the vanilla extract. It’s just a small ingredient, but it makes the chocolate taste deeper and more complex, adding that special homemade touch to your Rocky Road Fudge.
Step 4: Fold in marshmallows and nuts
Next, gently fold in your mini marshmallows and chopped walnuts or almonds. Work quickly and carefully so you don’t completely melt the marshmallows—they should stay whole and give you gorgeous, creamy pockets throughout the fudge. The nuts add wonderful texture and nutty flavor that balances all the sweetness.
Step 5: Spread and chill
Pour the mixture into your prepared pan and spread it evenly with a spatula. Try to smooth the top as much as possible, pressing gently to make sure you’ve filled the corners. Now, pop the pan in the fridge and let it chill for at least 2 hours, until completely firm. As tempting as it is, don’t rush this step!
Step 6: Slice into bite-sized squares
Once your Rocky Road Fudge is set, grab the parchment overhang to lift the whole slab out of the pan. Place it on a cutting board and use a sharp knife to slice it into adorable bite-sized squares. Each piece will reveal gorgeous layers and pops of marshmallow and nuts!
How to Serve Rocky Road Fudge
Garnishes
A sprinkle of extra mini marshmallows or chopped nuts on top just before the fudge sets can add a festive look and extra crunch. For a sparkly finish, a pinch of flaky sea salt or colorful sprinkles will make your Rocky Road Fudge even more special—especially for holidays and birthdays.
Side Dishes
Pair your Rocky Road Fudge with a hot cup of coffee or a cold glass of milk for the ultimate comfort experience. If you’re serving at a party, a platter with fresh berries, citrus slices, or even pretzels balances the richness and lets guests mix and match.
Creative Ways to Present
Turn this fudge into adorable edible gifts by wrapping individual squares in wax paper and tucking them into a cute tin or gift bag. For dessert platters, arrange Rocky Road Fudge with a mix of other sweets—brownies, cookies, fruit—for a crowd-pleasing medley. You can even skewer cubes on lollipop sticks for Rocky Road fudge-pops at parties!
Make Ahead and Storage
Storing Leftovers
Store leftover Rocky Road Fudge in an airtight container in the refrigerator. It stays fresh, fudgy, and delicious for up to a week—if it doesn’t disappear sooner! Just make sure to separate layers with parchment or wax paper to keep them from sticking together.
Freezing
Rocky Road Fudge freezes beautifully. Simply wrap the squares in plastic wrap and place them in a freezer-safe bag or container. Freeze for up to 2 months—when a chocolate craving hits, all you have to do is thaw in the fridge or at room temperature.
Reheating
This fudge is meant to be enjoyed cold or at room temp, so no reheating is needed. If you prefer it a little softer, let it sit out for a few minutes. If you find it’s too crumbly straight from the fridge, just let it warm slightly and it’ll be perfectly creamy again.
FAQs
Can I use different types of chocolate in my Rocky Road Fudge?
Absolutely! While semi-sweet chocolate chips give the classic taste, try milk chocolate for extra sweetness or dark chocolate for a deeper, more intense flavor. You can even mix two types for a unique twist.
What can I substitute for nuts to make this nut-free?
Leave out the nuts completely, or swap in crispy rice cereal or seeds, like pumpkin or sunflower seeds. You’ll still get that delightful crunch without any allergens.
How do I make Rocky Road Fudge look festive for holidays?
Use colored mini marshmallows or swirl in a bit of white chocolate. Top with rainbow sprinkles, crushed peppermint, or drizzle with contrasting chocolate for an eye-catching holiday touch.
Can I double this recipe for a crowd?
Definitely—just use a 9×13-inch pan and double all your ingredients for a big batch of Rocky Road Fudge. Be sure to allow a little extra time to chill so the thicker layer sets completely.
What’s the best way to cut clean, neat squares?
Chill your fudge thoroughly, then use a large sharp knife. For the neatest cuts, dip the knife in hot water, wipe it dry, and slice—wiping between cuts. This helps keep the fudge from sticking to the blade and makes those edges extra tidy!
Final Thoughts
Once you try homemade Rocky Road Fudge, it’s hard to go back to anything else! It’s wonderfully easy to make, endlessly customizable, and guaranteed to make any occasion brighter. I hope you’ll scoop up your ingredients and treat yourself (and your loved ones) to this chocolatey, marshmallow-packed delight—happy fudge-making!
Print
Rocky Road Fudge Recipe
- Total Time: 2 hours 15 minutes
- Yield: 36 pieces 1x
- Diet: Vegetarian
Description
Indulge in the rich and decadent flavors of this Rocky Road Fudge. Creamy chocolate fudge studded with marshmallows and nuts, this no-bake dessert is a crowd-pleaser!
Ingredients
Ingredients:
- 3 cups semi-sweet chocolate chips
- 1 (14 oz) can sweetened condensed milk
- 2 tbsp unsalted butter
- 1 tsp vanilla extract
- 1 ½ cups mini marshmallows
- 1 cup chopped walnuts or almonds
Instructions
- Prepare the Pan: Line an 8×8-inch baking pan with parchment paper.
- Melt Ingredients: In a saucepan over low heat, melt chocolate chips, condensed milk, and butter until smooth.
- Add Flavor: Remove from heat, stir in vanilla.
- Combine: Fold in marshmallows and nuts.
- Set: Spread mixture in the pan, refrigerate for 2 hours until firm.
- Serve: Cut into squares and enjoy!
Notes
- Experiment with different nuts or marshmallow colors.
- To make nut-free, simply omit nuts.
- Prep Time: 10 minutes
- Cook Time: 5 minutes
- Category: Dessert
- Method: No-Bake
- Cuisine: American
Nutrition
- Serving Size: 1 piece
- Calories: 130
- Sugar: 15g
- Sodium: 25mg
- Fat: 7g
- Saturated Fat: 3.5g
- Unsaturated Fat: 3g
- Trans Fat: 0g
- Carbohydrates: 17g
- Fiber: 1g
- Protein: 2g
- Cholesterol: 5mg


