If you’re searching for a dessert that feels like a warm hug and looks absolutely stunning without a hint of oven time, you’re going to adore this Marry Me No Bake Raspberry Chocolate Mousse Cups Recipe. It’s everything you want in a special treat — silky chocolate mousse layered with fresh, vibrant raspberries, all nestled into charming little cups that say “I care” with every bite. Creamy, fruity, and just sweet enough, this recipe is straightforward enough for weeknight magic yet elegant enough to impress on any occasion.
Ingredients You’ll Need
The magic of this Marry Me No Bake Raspberry Chocolate Mousse Cups Recipe starts with simple, wholesome ingredients that come together beautifully to create luxurious textures and flavors. Each one plays a vital role whether it’s the richness of the dark chocolate or the bright pop of fresh raspberries.
- 1 cup heavy cream: The foundation for that airy, fluffy mousse texture that melts in your mouth.
- 1 cup dark chocolate chips: Provides deep, intense chocolate flavor and smoothness when melted.
- 1 teaspoon vanilla extract: Adds warmth and rounds out the richness of the chocolate.
- 1 pinch of salt: Enhances all the flavors and balances the sweetness perfectly.
- 1 cup fresh raspberries (plus extra for garnish): Brings natural tartness and a gorgeous burst of color.
- 2 tablespoons sweetener (honey, maple syrup, or stevia): Gives just enough sweetness to complement the chocolate and raspberries without overpowering.
- 4 serving cups for presentation: Perfect little vessels to show off the beautiful layers and invite indulgence.
How to Make Marry Me No Bake Raspberry Chocolate Mousse Cups Recipe
Step 1: Melt the Chocolate
Start by melting the dark chocolate chips gently in a microwave-safe bowl. Heat them in 30-second increments and be sure to stir between each to achieve a perfectly smooth, glossy chocolate. Let it cool just enough so it won’t melt the whipped cream in the next step — this little pause sets the stage for a luscious mousse.
Step 2: Whip the Cream
Next, whip the heavy cream until soft peaks form. This means the cream should be fluffy and hold a gentle shape, but not too stiff. Whipping the cream is what makes the mousse irresistibly light and airy — like a cloud of chocolate delight ready to meld with the raspberries.
Step 3: Combine Ingredients
Once your chocolate is at room temperature, carefully fold it into the whipped cream along with the vanilla extract and a tiny pinch of salt. Folding gently is key here to keep that fluffy texture intact and avoid deflating your mousse’s delicate airiness. This blending step is where everything truly starts to shine.
Step 4: Prepare the Raspberries
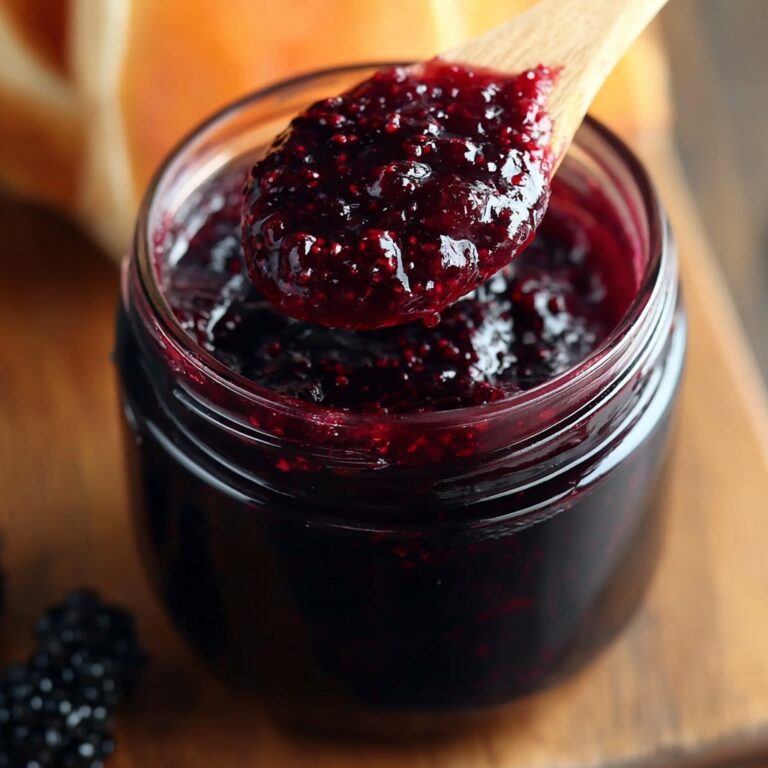
Take half your fresh raspberries and mash them lightly in a bowl with your choice of sweetener. This mixture should stay somewhat chunky to retain that natural fruity texture and create a delicious tart contrast to the rich chocolate. It’s the perfect way to layer in both flavor and visual interest.
Step 5: Layer the Cups
With everything ready, start assembling your cups. Alternate dollops of the chocolate mousse and the mashed raspberry mixture, finishing with a top layer of mousse. This layering not only looks beautiful but guarantees each spoonful has a lovely blend of creamy and fruity.
Step 6: Chill
Cover each cup and pop them into the refrigerator for at least 1 to 2 hours. The chilling time is critical because it allows the mousse to set perfectly while letting the flavors meld sweetly together, creating that decadent, melt-in-your-mouth experience.
Step 7: Garnish
Just before serving, adorn your mousse cups with fresh raspberries and, if you like, a swirl of whipped cream. These little finishing touches elevate the dessert from delightful to outright unforgettable.
How to Serve Marry Me No Bake Raspberry Chocolate Mousse Cups Recipe
Garnishes
Fresh raspberries and a dollop of whipped cream are classic garnishes that bring color, freshness, and a hint of creaminess to balance the rich mousse. You could also sprinkle a few chocolate shavings or crushed nuts for an added texture contrast that feels decadent.
Side Dishes
These mousse cups shine beautifully on their own but pair wonderfully with light sides like a crisp mint sprig, a citrusy sorbet, or even a simple biscotti. These accompaniments add crunch or a palate-cleansing freshness, complementing the creamy, chocolatey goodness.
Creative Ways to Present
For an extra wow factor, serve these in elegant glass jars, mini trifle bowls, or even hollowed-out chocolate cups. Layering in clear containers shows off the gorgeous raspberry and mousse stripes, making it nearly impossible to resist diving in.
Make Ahead and Storage
Storing Leftovers
Any leftover mousse cups should be tightly covered and stored in the refrigerator. They keep beautifully for up to three days, allowing you to enjoy those luscious layers without sacrificing texture or flavor.
Freezing
While this recipe is best enjoyed fresh, you can freeze the mousse in airtight containers for up to a month. Thaw overnight in the refrigerator for a creamy consistency; just know the texture might be slightly altered as whipped cream doesn’t freeze perfectly.
Reheating
Since this is a no-bake, chilled dessert, reheating isn’t recommended. It’s best served cold to preserve the mousse’s light, airy texture and the raspberries’ fresh brightness.
FAQs
Can I use milk chocolate instead of dark chocolate?
Absolutely! Milk chocolate will give a sweeter, creamier flavor, but keep in mind it might make the mousse a bit sweeter overall. Adjust your sweetener accordingly to balance the taste.
What if I don’t have fresh raspberries?
Frozen raspberries can be a great substitute. Just thaw them and drain any excess liquid before using to keep your mousse from becoming watery.
Is there a dairy-free option for this recipe?
You can swap the heavy cream for a coconut cream or another plant-based alternative, and use dairy-free chocolate chips to keep this dessert vegan-friendly without sacrificing creaminess.
How long does it take to whip the cream?
Typically, whipping the cream to soft peaks takes about 3 to 5 minutes with a hand mixer on medium speed, depending on your equipment.
Can I make this dessert in larger batches?
Yes, this recipe scales well. Just multiply the ingredients accordingly and assemble in larger serving dishes or more individual cups for an impressive spread.
Final Thoughts
This Marry Me No Bake Raspberry Chocolate Mousse Cups Recipe is not only a feast for your taste buds but also a celebration of how simple ingredients can come together to create something truly special. Whether you’re aiming to impress a loved one or just craving an indulgent treat, these mousse cups are guaranteed to bring smiles all around. Go ahead, make it your new favorite dessert — you won’t regret a single bite!
Print
Marry Me No Bake Raspberry Chocolate Mousse Cups Recipe
- Prep Time: 20 minutes
- Cook Time: 0 minutes
- Total Time: 1 hour 30 minutes
- Yield: 4 servings
- Category: Dessert
- Method: No-Cook
- Cuisine: American
Description
Indulge in these delightful Marry Me No Bake Raspberry Chocolate Mousse Cups, a luscious and creamy dessert that combines rich dark chocolate mousse with sweet and tangy raspberries. Ready in just over an hour, this easy-to-make dessert requires no baking and is perfect for impressing guests or treating yourself to a decadent yet light finish to any meal.
Ingredients
Chocolate Mousse
- 1 cup heavy cream
- 1 cup dark chocolate chips
- 1 teaspoon vanilla extract
- 1 pinch of salt
Raspberry Layer
- 1 cup fresh raspberries (plus extra for garnish)
- 2 tablespoons sweetener (honey, maple syrup, or stevia)
Presentation
- 4 serving cups for presentation
Instructions
- Melt the Chocolate: In a microwave-safe bowl, melt the dark chocolate chips in 30-second increments, stirring in between each until smooth and fully melted. Allow the chocolate to cool slightly to avoid melting the whipped cream later.
- Whip the Cream: Using a hand mixer, whip the heavy cream in a separate bowl until soft peaks form, capturing air to create a light and fluffy texture.
- Combine Ingredients: Once the melted chocolate has cooled to room temperature, gently fold it into the whipped cream together with the vanilla extract and a pinch of salt. Take care to fold softly to retain the mousse’s airy texture by not deflating the whipped cream.
- Prepare the Raspberries: Mash half of the fresh raspberries in a small bowl and stir in the sweetener of choice until slightly chunky, balancing sweetness and tanginess.
- Layer the Cups: In each of the serving cups, create layers by spooning some of the chocolate mousse, followed by the mashed raspberry mixture, then a final layer of mousse on top. This layering enhances both the visual appeal and flavor combination.
- Chill: Cover the cups and refrigerate for at least 1 to 2 hours. This chilling time allows the mousse to set properly and the flavors to blend harmoniously.
- Garnish: Just before serving, garnish each cup with fresh whole raspberries and optionally add a small dollop of whipped cream for an elegant touch and extra creaminess.
Notes
- Choose a high-quality dark chocolate with at least 60% cocoa for a richer flavor.
- For a sweeter version, you can increase the sweetener slightly based on your preference.
- If you prefer vegan or dairy-free, substitute heavy cream with coconut cream and use dairy-free chocolate chips.
- Ensure the melted chocolate is cool before folding to prevent curdling or deflating the mousse.
- Use fresh ripe raspberries for the best flavor and texture.
- These mousse cups can be made a day ahead and stored covered in the refrigerator.

