
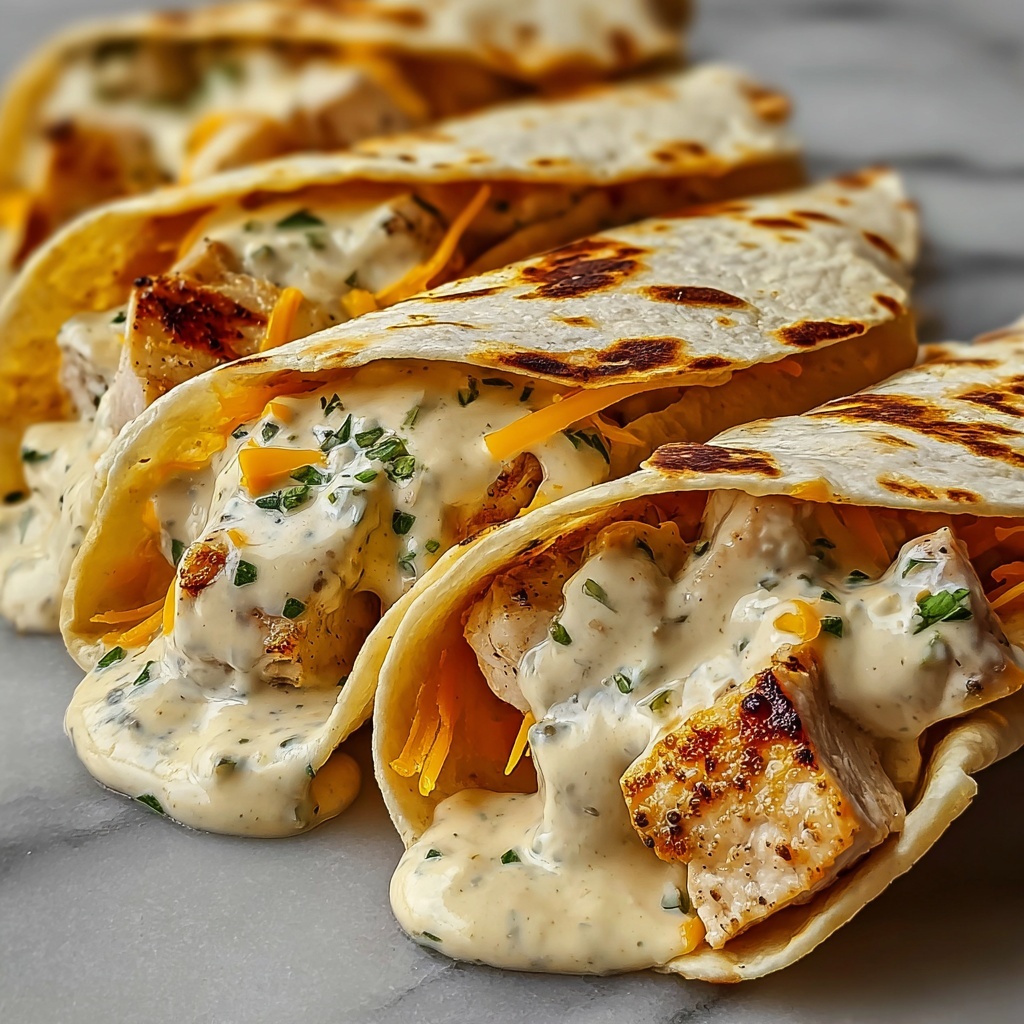
If you are craving a meal that delivers a perfect harmony of melty cheese, bold garlic flavors, and tender chicken wrapped up in a warm, crispy tortilla, then this Cheesy Garlic Chicken Wraps Recipe is exactly what you need in your life. It’s quick to prepare, packed with delicious textures and flavors, and makes the ideal comfort food that feels both indulgent and satisfying. Whether you’re making lunch for the family or hosting friends for a casual get-together, these wraps are guaranteed to disappear fast and leave everyone asking for seconds.
Ingredients You’ll Need
These ingredients are refreshingly simple yet come together to create an irresistible mesh of flavors and textures. Each component plays a crucial role, from the juicy seasoned chicken to the creamy garlic sauce that ties everything together, making this dish shine.
- 2 large chicken breasts, diced: Provides the hearty protein base that absorbs all the wonderful seasoning.
- 1 tablespoon olive oil: Helps to cook the chicken evenly while adding a subtle fruity richness.
- 2 teaspoons garlic powder: Infuses the chicken with a deep, aromatic garlicky punch.
- 1 teaspoon onion powder: Adds a sweet and savory undertone balancing the dish.
- 1 teaspoon paprika: Brings a mild smoky flavor and a vibrant color to the chicken.
- Salt and pepper, to taste: Essential seasonings to elevate the overall flavor harmoniously.
- 1 cup shredded cheddar cheese: Offers a sharp, tangy melt that creates luscious gooeyness.
- ½ cup shredded mozzarella cheese: Provides a milder, stretchy meltiness that complements cheddar perfectly.
- 4 large flour tortillas: The soft yet sturdy wraps that hold all the delicious fillings together.
- ½ cup creamy garlic sauce: Adds extra creaminess and amplifies the garlic flavor with every bite.
- Fresh parsley, chopped (for garnish): Adds a fresh, bright finish and lovely color contrast.
How to Make Cheesy Garlic Chicken Wraps Recipe
Step 1: Season the Chicken
Begin by placing the diced chicken in a bowl, then drizzle with olive oil. Sprinkle garlic powder, onion powder, paprika, salt, and pepper over the chicken. Toss everything together well so each piece is fully coated with the flavorful seasonings. This step is key to infusing the chicken with aromatic, savory notes that will carry through the whole wrap.
Step 2: Cook the Chicken
Heat a non-stick pan over medium heat, then add the seasoned chicken. Cook it for about 6 to 8 minutes, stirring occasionally. You want the chicken to develop a beautiful golden color on the outside while cooking fully through without drying out. Once done, remove from heat and let the chicken cool slightly to prevent the tortillas from becoming soggy when assembled.
Step 3: Prepare the Tortillas
Lay each flour tortilla flat on your workspace. Spread a generous layer of creamy garlic sauce across the surface, which will add moisture and an extra hit of flavor that complements the seasoned chicken perfectly. This simple step sets the stage for a scrumptious wrap.
Step 4: Assemble the Wraps
Divide the cooked chicken evenly among the tortillas, placing it right over the garlic sauce. Follow with a generous sprinkle of both shredded cheddar and mozzarella cheese, ensuring a balanced mix for that perfect cheesy pull. Then carefully fold each tortilla over the filling, creating a snug and neat wrap ready to be grilled.
Step 5: Grill the Wraps
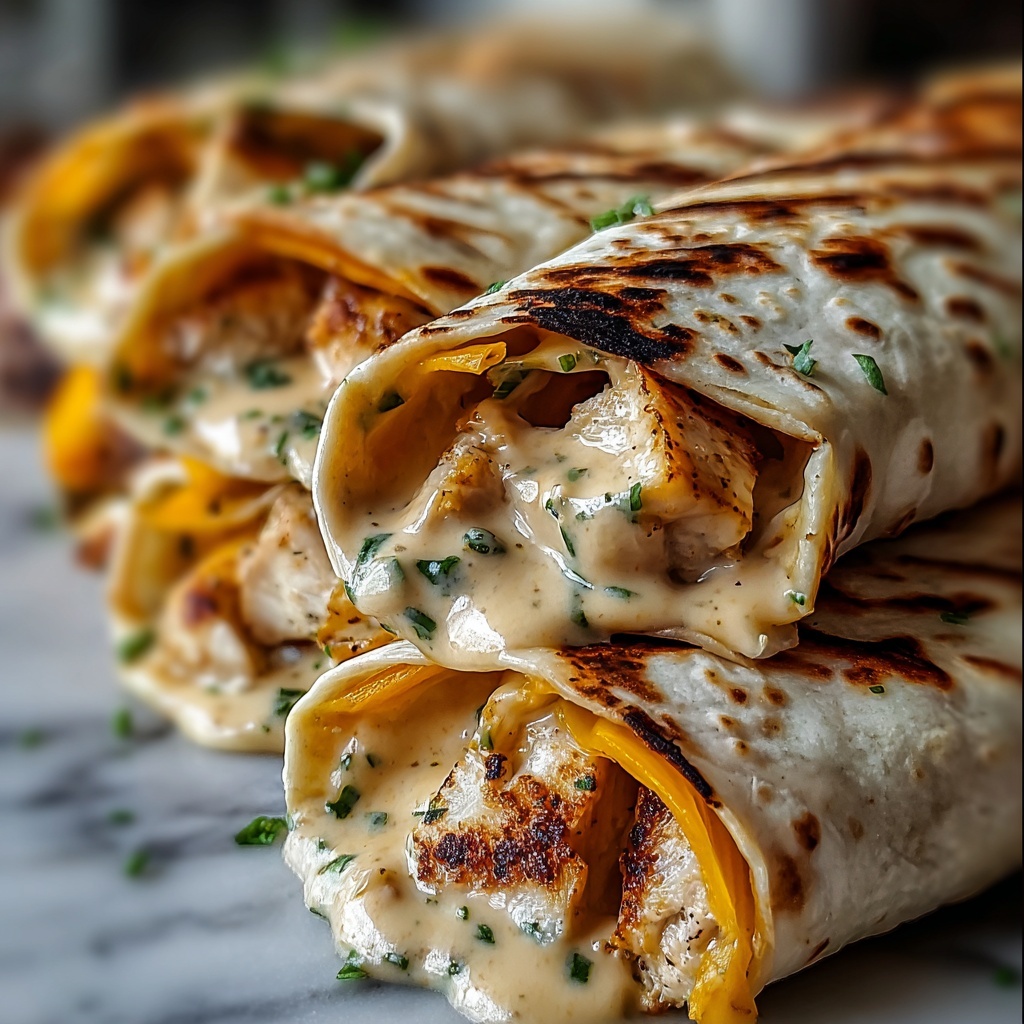
Return the same pan to medium heat and place the wraps seam-side down. Grill each side for 2 to 3 minutes until the tortillas are golden and crispy, and the cheese inside is melted beyond delicious. This step creates a lovely crunchy exterior while the inside remains warm and oozy. Once grilled, slice each wrap in half and garnish with fresh chopped parsley for a vibrant, fresh touch.
How to Serve Cheesy Garlic Chicken Wraps Recipe
Garnishes
Fresh parsley is the perfect garnish for this dish, adding a pop of color and a hint of herbal brightness that cuts through the richness. You can also sprinkle some extra shredded cheese or a light drizzle of garlic sauce on the side for dipping to elevate the presentation and flavor.
Side Dishes
These wraps pair beautifully with a crisp green salad, tangy coleslaw, or even some roasted vegetables for a wholesome meal. If you want to keep the comfort food vibe going, crispy sweet potato fries or classic potato chips are an excellent match that offer satisfying crunch alongside the soft, gooey wraps.
Creative Ways to Present
For a party or casual get-together, consider cutting the wraps into bite-sized pinwheels and serving them on a platter with small dipping bowls of extra garlic sauce. This makes them easy finger food without sacrificing any of their mouthwatering flavor. You can also wrap each one individually in parchment paper and tie with twine for a fun, rustic presentation.
Make Ahead and Storage
Storing Leftovers
If you happen to have any leftovers, wrap them tightly in foil or place in an airtight container. Stored properly, they will keep well in the refrigerator for up to 3 days, maintaining their flavors and texture surprisingly well.
Freezing
Cheesy Garlic Chicken Wraps Recipe leftovers freeze wonderfully. Wrap each individually in plastic wrap followed by aluminum foil, or place them in a freezer-safe container. They can be frozen for up to 2 months, making them a convenient grab-and-go meal for busy days.
Reheating
To reheat, unwrap the frozen or refrigerated wraps and place them on a baking sheet. Warm in a preheated oven at 350°F (175°C) for about 10 to 15 minutes, or until heated through and the tortillas regain their crispness. Avoid microwaving as it can make the wraps soggy, which takes away from that delightful crispy texture.
FAQs
Can I use other types of cheese in this recipe?
Absolutely! While cheddar and mozzarella provide a great balance of sharpness and meltiness, feel free to experiment with cheeses like Monterey Jack, provolone, or pepper jack for a little spice. Just make sure to use cheeses that melt well to keep that gooey texture.
What if I don’t have creamy garlic sauce on hand?
No worries! You can easily make a quick substitute by mixing mayonnaise or sour cream with minced garlic, a squeeze of lemon, and some salt. This will keep the rich garlic flavor that makes these wraps so special.
Is it possible to make this recipe gluten-free?
Yes! Simply swap the flour tortillas for your favorite gluten-free tortilla brand. Just be sure to check all ingredient labels to keep everything gluten-free, and you’ll have a delicious adaptation of the Cheesy Garlic Chicken Wraps Recipe.
Can I prepare these wraps for a crowd?
Definitely! This recipe scales up easily. You can double or triple the ingredients to feed more people. Grilling the wraps in a large pan or on a griddle makes the process quick and efficient for gatherings.
What are some good dipping sauces to serve with these wraps?
Besides the creamy garlic sauce, ranch dressing, salsa, or a spicy chipotle mayo make excellent companions. These dips add extra flavor layers, allowing your guests to customize each bite.
Final Thoughts
This Cheesy Garlic Chicken Wraps Recipe is truly a keeper—simple enough to make on a weeknight but impressive enough to serve to friends and family. The way the garlic and cheese meld with tender chicken, all wrapped up in a golden crispy tortilla, makes every bite pure joy. I encourage you to try making this recipe soon; I promise it will become one of your go-to meals that’s as comforting as it is delicious.
Print
Cheesy Garlic Chicken Wraps Recipe
- Prep Time: 10 minutes
- Cook Time: 15 minutes
- Total Time: 25 minutes
- Yield: 4 servings
- Category: Lunch
- Method: Stovetop
- Cuisine: American
Description
Cheesy Garlic Chicken Wraps are a quick and flavorful meal featuring tender, seasoned chicken cooked on the stovetop and wrapped in flour tortillas with creamy garlic sauce and melted cheddar and mozzarella cheese. Perfect for a satisfying lunch or dinner, these wraps combine savory spices with gooey cheese and a hint of fresh parsley garnish.
Ingredients
For the Chicken
- 2 large chicken breasts, diced
- 1 tablespoon olive oil
- 2 teaspoons garlic powder
- 1 teaspoon onion powder
- 1 teaspoon paprika
- Salt and pepper, to taste
For the Wraps
- 1 cup shredded cheddar cheese
- ½ cup shredded mozzarella cheese
- 4 large flour tortillas
- ½ cup creamy garlic sauce
- Fresh parsley, chopped (for garnish)
Instructions
- Season the Chicken: In a bowl, thoroughly mix the diced chicken with olive oil, garlic powder, onion powder, paprika, salt, and pepper, ensuring each piece is well coated with the seasonings.
- Cook the Chicken: Heat a non-stick pan over medium heat. Add the seasoned chicken and cook for 6-8 minutes, stirring occasionally until the chicken is golden brown and completely cooked through. Remove from heat and let it cool slightly to make handling easier.
- Prepare the Tortillas: Lay the flour tortillas flat on a clean surface. Spread a generous layer of creamy garlic sauce evenly over each tortilla to add extra flavor.
- Add Chicken and Cheese: Distribute the cooked chicken evenly over each tortilla, then sprinkle the shredded cheddar and mozzarella cheeses on top, allowing the cheese to cover the filling for a flavorful melt.
- Fold the Wraps: Carefully fold each tortilla over the filling to form a compact wrap, making sure the ingredients are enclosed.
- Grill the Wraps: Using the same non-stick pan, grill each wrap over medium heat for 2-3 minutes on each side until the cheese melts inside and the tortillas turn golden and crispy.
- Serve: Remove the wraps from the pan and slice them in half. Garnish with chopped fresh parsley, if desired, and serve immediately while warm and melty.
Notes
- You can substitute the chicken breasts with boneless, skinless chicken thighs for a juicier texture.
- If you prefer a spicier wrap, add a pinch of cayenne pepper or some chopped jalapeños to the chicken seasoning.
- To make the wraps gluten-free, use gluten-free tortillas instead of flour tortillas.
- The creamy garlic sauce can be replaced with ranch or a yogurt-based garlic dressing for a different flavor profile.
- For meal prep, assemble wraps without grilling and store them separately; grill just before serving for optimal crispiness.
