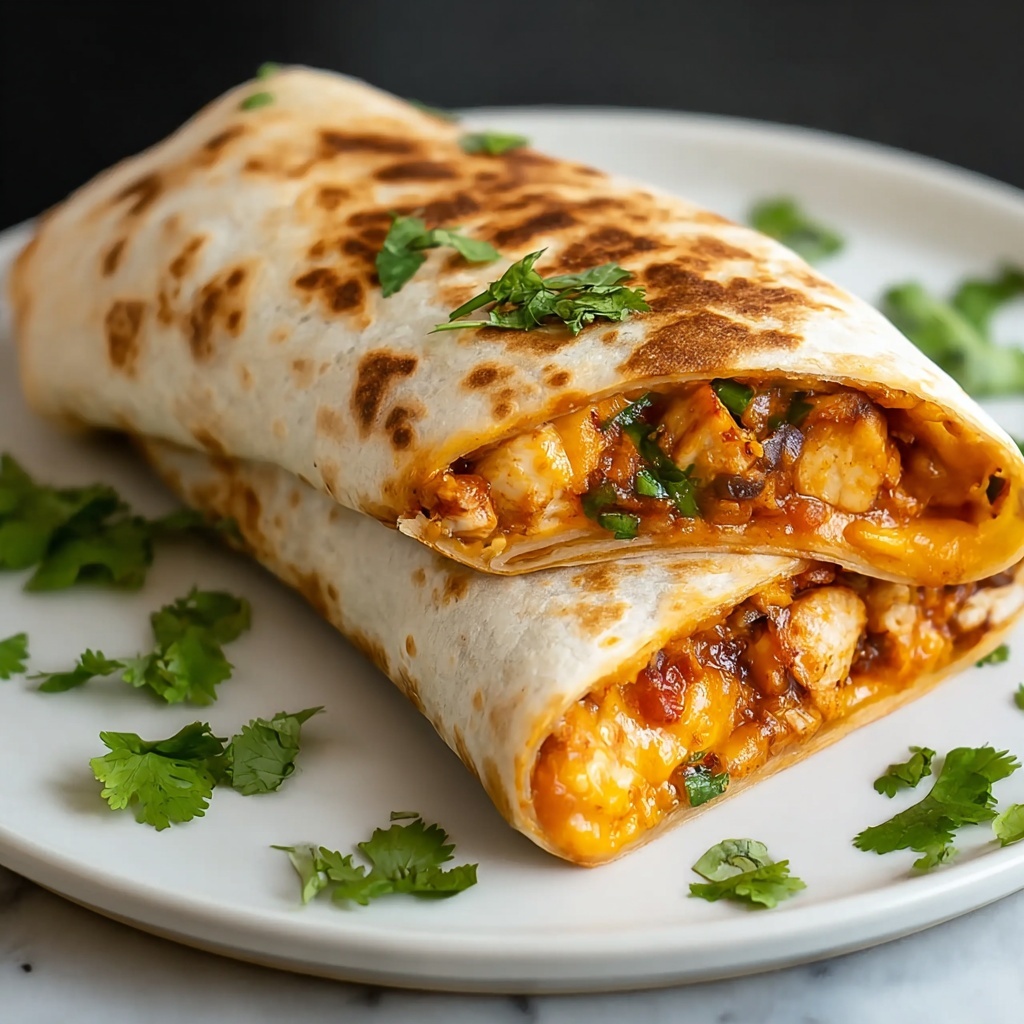
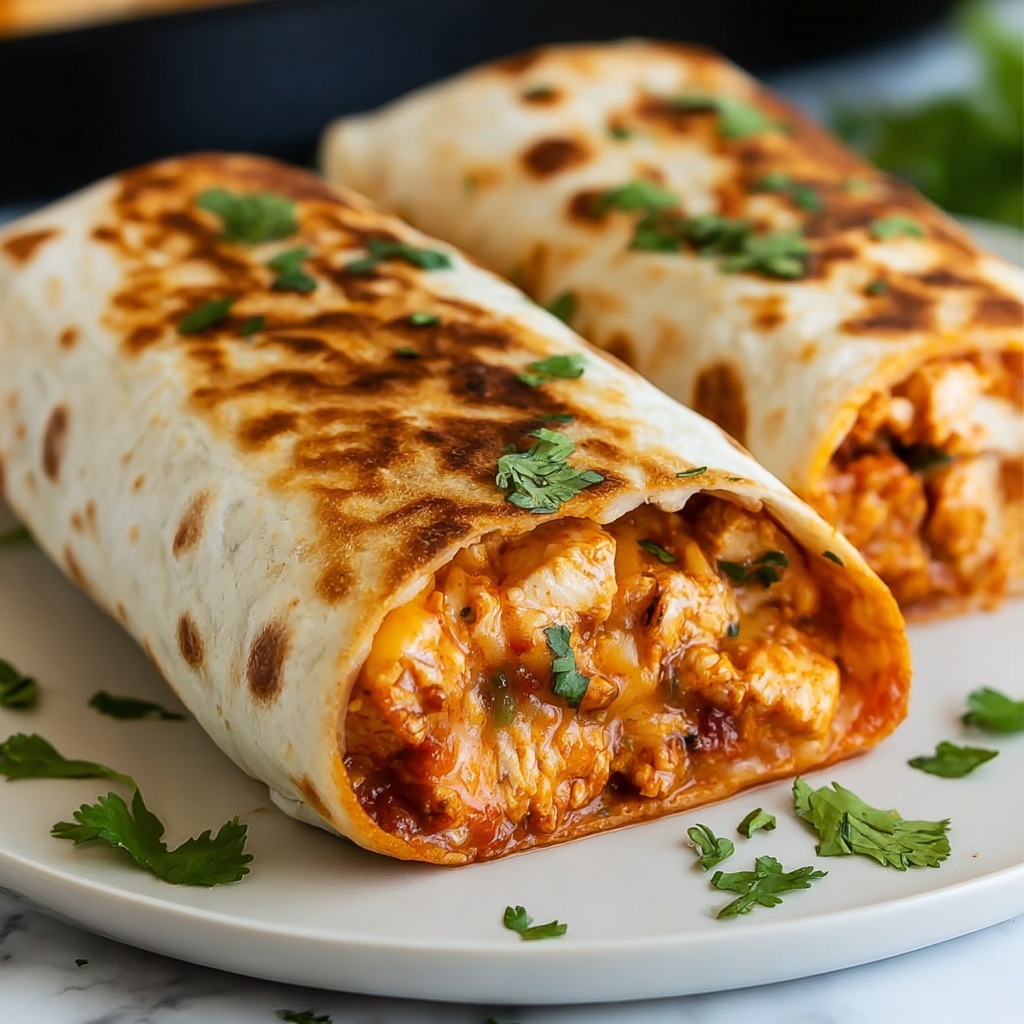
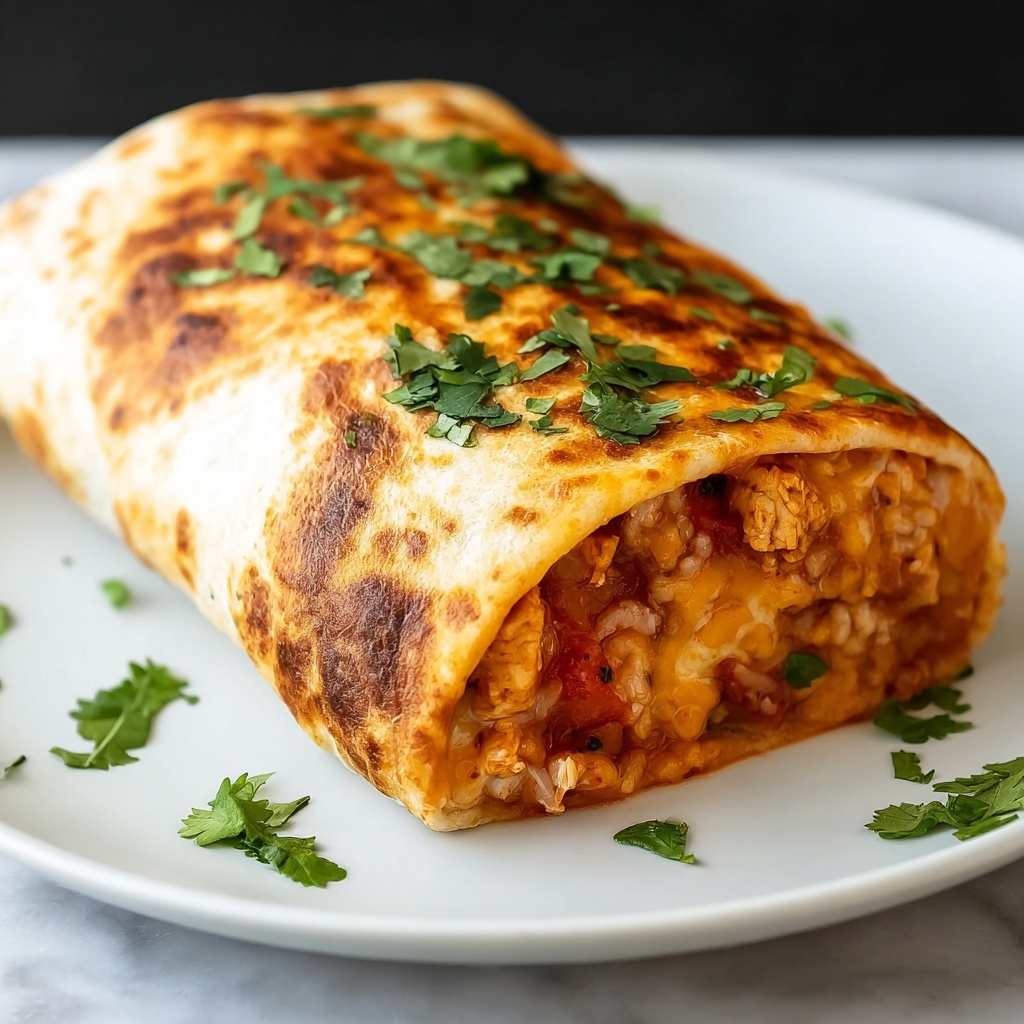
If you are craving a deliciously crispy and comforting dish that feels like a warm embrace, then you are going to love this Baked Chicken Chimichangas Recipe. These golden pockets of flavor combine tender, seasoned chicken, hearty black beans, and zesty salsa all wrapped in a soft flour tortilla and baked until perfectly crispy without the fuss of frying. Easy to customize and big on taste, this recipe brings a fiesta of flavors to your table that is sure to become a favorite go-to for weeknights or casual gatherings alike.
Ingredients You’ll Need
These ingredients are simple yet essential, each playing a special role in balancing the hearty, spicy, and cheesy elements that make baked chicken chimichangas so irresistible. From the tender shredded chicken to the smoky spices, every item works together to create a mouthwatering experience.
- 2 cups cooked, shredded chicken: Provides the main protein and a tender, juicy base for the filling.
- 1 can (15 oz) black beans, drained and rinsed: Adds fiber, a creamy texture, and earthy flavor.
- 1 cup salsa: Brings tang, moisture, and a burst of zesty tomato and chili vibrance.
- 1 tsp ground cumin: Infuses a warm, smoky depth to the seasoning.
- 1 tsp chili powder: Adds a gentle heat and rich complexity to the filling.
- 1/2 tsp garlic powder: Offers a subtle punch of savory garlic flavor without overpowering the other spices.
- 1/2 cup shredded cheddar cheese: Melts beautifully inside, giving creamy richness and a golden finish.
- 6 (8-inch) flour tortillas: The soft yet sturdy vessel that holds all the delicious fillings together while crisping up perfectly in the oven.
How to Make Baked Chicken Chimichangas Recipe
Step 1: Preheat the Oven
Begin by preheating your oven to 400°F (200°C). This high temperature is key to achieving that irresistible crispy exterior while keeping the filling hot and juicy.
Step 2: Mix the Filling
In a large bowl, combine the shredded chicken, drained black beans, salsa, ground cumin, chili powder, and garlic powder. Stir everything together until the spices evenly coat the ingredients and the mixture comes alive with vibrant color and mouthwatering aroma.
Step 3: Assemble the Chimichangas
Lay each tortilla flat, then spoon a generous portion of the chicken mixture onto the center. Don’t forget to sprinkle a little shredded cheddar cheese on top of the filling for that creamy, cheesy surprise. Next, carefully roll up each tortilla, tucking in the sides to seal in all the delicious filling before placing them seam-side down on a baking sheet prepared for baking.
Step 4: Bake to Golden Perfection
Slide the baking sheet into the oven and bake for 20-25 minutes, or until the chimichangas turn a beautiful golden brown and achieve a crispy texture on the outside. Keep an eye on them toward the end to ensure they don’t get too dark—perfectly crisp and warm is the goal here.
Step 5: Serve and Enjoy!
Once baked, carefully remove the chimichangas from the oven. Let them cool for a moment before serving to allow the filling to settle just right. They’re now ready to be enjoyed alongside your favorite toppings and sides.
How to Serve Baked Chicken Chimichangas Recipe
Garnishes
Simple garnishes like dollops of sour cream, fresh guacamole, or a spoonful of extra salsa add cool creaminess and fresh zest that perfectly contrast the warm, spicy filling. A sprinkle of chopped cilantro or a squeeze of lime can also brighten each bite in the most delightful way.
Side Dishes
Complement your baked chicken chimichangas with sides such as Mexican rice, a crisp green salad, or charred corn salad. These options bring a variety of textures and flavors, making your meal feel complete and extra satisfying.
Creative Ways to Present
For a fun twist, cut the chimichangas in half and arrange them on a platter as finger-food appetizers, perfect for sharing at gatherings. You can also drizzle a chipotle crema or a mild queso sauce on top for a decadent finish that will wow your family and friends.
Make Ahead and Storage
Storing Leftovers
If you have leftovers, store them in an airtight container in the refrigerator for up to 3 days. This way, you can quickly reheat and enjoy the warm flavors again without compromising the texture too much.
Freezing
Baked chicken chimichangas freeze wonderfully! Wrap each chimichanga tightly in plastic wrap and then place them in a zip-top freezer bag. They keep well for up to 2 months and make an easy ready-to-bake meal whenever hunger strikes.
Reheating
To reheat, place frozen or refrigerated chimichangas on a baking sheet and warm them in a 350°F oven until heated through and crispy again, about 15-20 minutes. Avoid the microwave if possible to maintain that satisfying crunch on the outside.
FAQs
Can I use different types of beans?
Absolutely! While black beans are classic and delicious in this recipe, pinto beans or kidney beans work just as well and can add a different flavor and texture profile depending on your preference.
Is it possible to make these gluten-free?
Yes! Simply swap the flour tortillas for your favorite gluten-free tortillas, and the recipe remains just as tasty and enjoyable. Just watch the baking time as some gluten-free tortillas may crisp up faster.
Can these be made ahead for a party?
Definitely. You can assemble the chimichangas and refrigerate them uncovered for a few hours before baking, or freeze them fully prepped and bake them fresh when your guests arrive for a crowd-pleasing dish.
What can I add to make them spicier?
To turn up the heat, add diced jalapeños or a pinch of cayenne pepper to the filling, or serve with a hot salsa or spicy crema. It’s an easy way to customize the spice level to your liking!
Can I use rotisserie chicken for this recipe?
Absolutely! Using rotisserie chicken not only saves time but also adds incredible flavor depth. Just shred the meat and you’re good to go for this baked chicken chimichangas recipe.
Final Thoughts
I truly hope you enjoy making and sharing this Baked Chicken Chimichangas Recipe as much as I do. It’s one of those meals that feels like a special celebration of simple ingredients transformed into something crispy, flavorful, and utterly comforting. So go ahead, roll up your sleeves and bring a little fiesta to your kitchen tonight!
Print
Baked Chicken Chimichangas Recipe
- Prep Time: 10 minutes
- Cook Time: 25 minutes
- Total Time: 35 minutes
- Yield: 6 servings
- Category: Main Dish
- Method: Baking
- Cuisine: Mexican
Description
These Baked Chicken Chimichangas are a delicious, healthier twist on the classic deep-fried favorite. Loaded with shredded chicken, black beans, and spices, then wrapped in flour tortillas and baked to golden perfection, they offer a satisfying crunch without the extra oil. Perfect for a quick weeknight dinner or a flavorful party snack.
Ingredients
Filling
- 2 cups cooked, shredded chicken
- 1 can (15 oz) black beans, drained and rinsed
- 1 cup salsa
- 1 tsp ground cumin
- 1 tsp chili powder
- 1/2 tsp garlic powder
Assembly
- 1/2 cup shredded cheddar cheese
- 6 (8-inch) flour tortillas
Instructions
- Preheat the oven: Set your oven to 400°F (200°C) to prepare for baking the chimichangas to a crispy golden finish.
- Mix the filling: In a large bowl, thoroughly combine the shredded chicken, black beans, salsa, ground cumin, chili powder, and garlic powder to create a flavorful filling.
- Assemble the chimichangas: Spoon an even amount of chicken mixture onto the center of each tortilla, then sprinkle cheddar cheese on top to add creamy richness.
- Roll the tortillas: Carefully fold in the sides of each tortilla and roll it up tightly, making sure the filling is enclosed. Place each rolled chimichanga seam-side down on a baking sheet to keep them sealed while baking.
- Bake until crispy: Bake the chimichangas in the preheated oven for 20 to 25 minutes, or until they turn golden brown and crispy on the outside.
- Serve and enjoy: Serve hot with extra salsa, sour cream, or guacamole for dipping to complement the flavors.
Notes
- For extra crispiness, brush the tortillas lightly with oil before baking.
- Can be made ahead and refrigerated; just bake before serving for fresh crispiness.
- Use corn tortillas for a gluten-free variation, but they may be trickier to roll.
- Leftover chimichangas can be reheated in the oven to maintain crispiness instead of microwaving.
- Add diced jalapeños or hot sauce to the filling for additional heat if desired.

