If you’re craving a dessert that feels like a warm hug on a plate, this Rich & Creamy Buttermilk Pie Recipe is exactly that. This classic Southern treasure features a delicate balance of tangy buttermilk and sweet vanilla-infused custard, all nestled in a buttery, flaky crust. The silky filling is luscious yet light enough to enjoy anytime, making it an irresistible standout at any dinner table or gathering. Once you try this pie, it will quickly become one of your most cherished desserts!
Ingredients You’ll Need
The magic behind this Rich & Creamy Buttermilk Pie Recipe lies in its simple, wholesome ingredients. Each one plays a crucial role — from creating creamy texture to developing that rich flavor and golden hue that makes the pie so inviting.
- Granulated sugar: Provides essential sweetness and helps create that smooth custard texture.
- All-purpose flour: Acts as a gentle thickener to give the filling structure without heaviness.
- Salt: Balances flavors and enhances the natural sweetness of the pie.
- Eggs and egg yolk: These give the pie its creamy body and help it set perfectly.
- Unsalted butter, melted: Adds a rich, velvety depth to the filling and keeps it moist.
- Pure vanilla extract: Infuses classic warmth and enhances all the other flavors.
- Lemon extract: Offers a subtle zing that brightens the custard without overpowering it.
- Coconut extract: Delivers a whisper of tropical sweetness for added complexity.
- Buttermilk, warm: The star ingredient — its tanginess provides a refreshing contrast to the sugar and butter.
- Unbaked pie shell: A flaky foundation that crisps up beautifully to cradle the luscious filling.
How to Make Rich & Creamy Buttermilk Pie Recipe
Step 1: Prepare the Oven
Begin by preheating your oven to 350°F (175°C). This step is crucial because starting in a fully heated environment helps the crust bake evenly and the filling set gently without cracking.
Step 2: Combine Dry Ingredients
In a large bowl, whisk together the granulated sugar, flour, and salt. For the smoothest texture, I recommend sifting them together before combining. This ensures there are no lumps and that the flour is evenly distributed.
Step 3: Beat the Eggs
In a separate bowl, thoroughly whisk the eggs and egg yolk together until the mixture is uniform in color and texture. This ensures a silky custard without streaks or uneven baking.
Step 4: Mix Dry and Wet Ingredients
Slowly incorporate the dry mixture into the beaten eggs, whisking continuously to prevent lumps from forming. By combining these gently, your filling will be velvety smooth.
Step 5: Add Butter and Extracts
Whisk in the melted butter, vanilla extract, lemon extract, and coconut extract. These ingredients build layers of flavor that make this pie truly special and memorable.
Step 6: Add Buttermilk
Finally, slowly stir in the warm buttermilk. The warmth helps everything blend together seamlessly. If you notice bubbles pop up on the surface, just let the mixture sit for a minute before moving on to pour into your pie shell.
Step 7: Fill the Pie Shell and Bake
Pour your luscious filling into the chilled, unbaked 9-inch pie shell. Pop the pie onto the lower rack of your oven and bake for 25 minutes. Then move it to the middle rack and bake for another 25 minutes or until the edges look set but the center still jiggles slightly. This gentle bake keeps the custard creamy.
Step 8: Cool and Chill
Remove the pie and place it on a wire rack. Let it cool for 2-3 hours until it’s no longer hot to the touch. After that, refrigerate the pie for at least 2 more hours. The chilling step is what perfects the texture and makes slicing neat and satisfying.
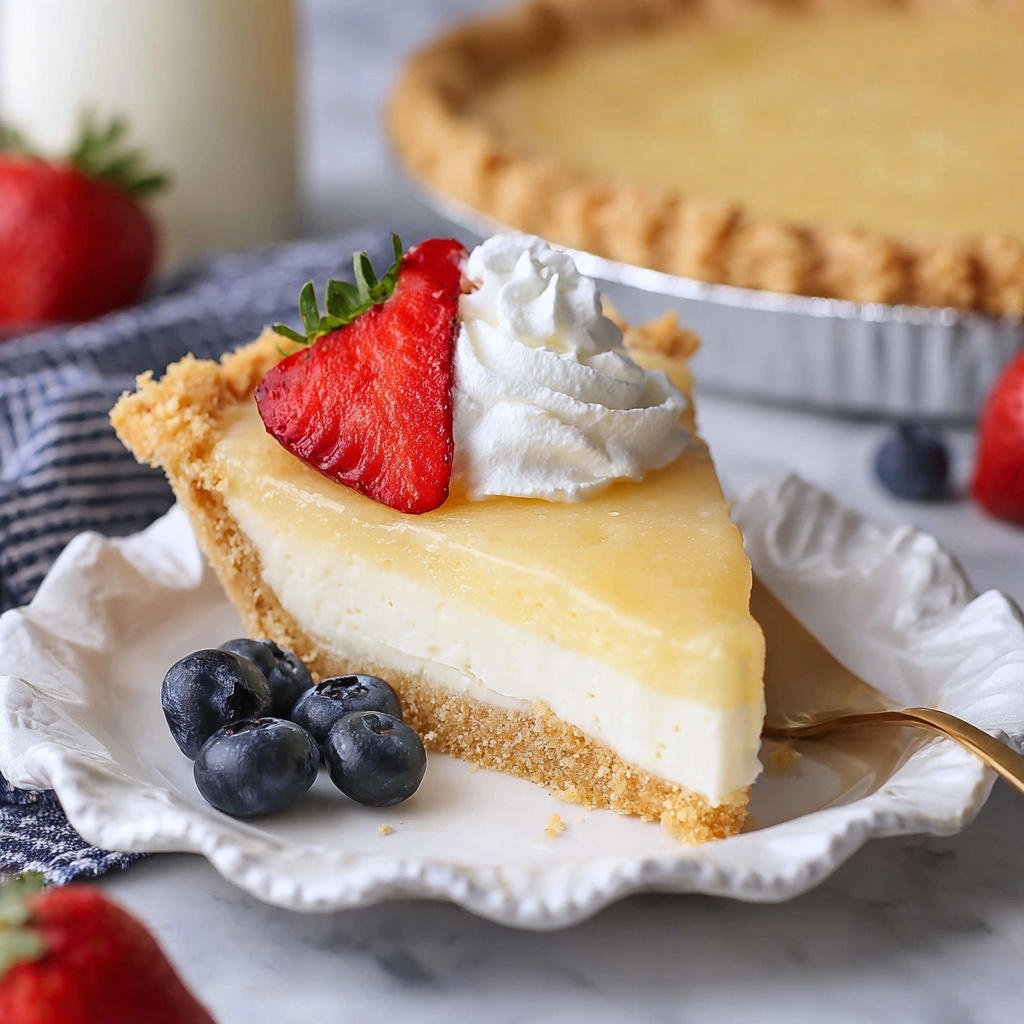
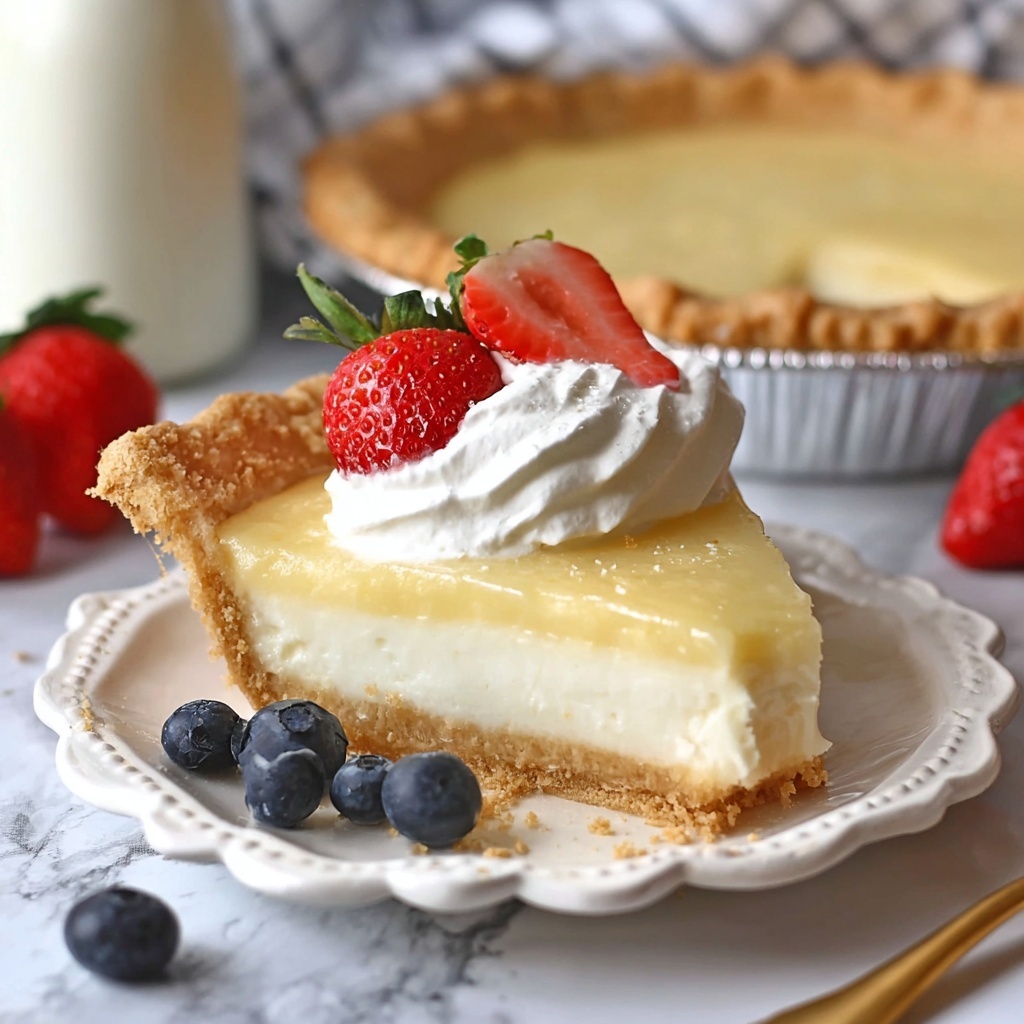
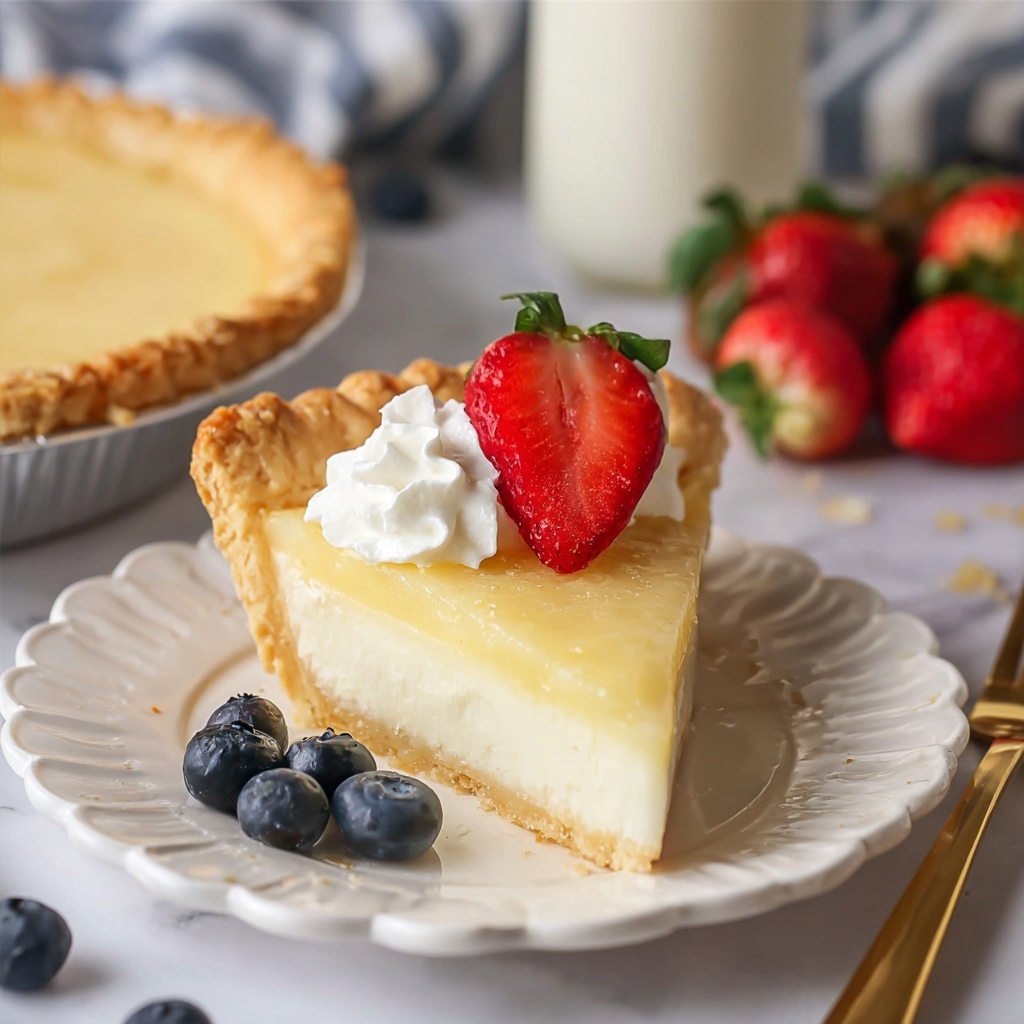
Step 9: Garnish and Serve
Serve your Rich & Creamy Buttermilk Pie Recipe chilled or at room temperature, either plain or with a generous dollop of whipped cream and fresh berries for an extra touch of elegance and freshness.
How to Serve Rich & Creamy Buttermilk Pie Recipe
Garnishes
The beauty of this pie is its versatility when it comes to garnishes. Whipped cream adds a light, airy contrast, while fresh berries like raspberries or blueberries bring a pop of color and a tart bite that balances the richness.
Side Dishes
Pair this pie with a simple cup of hot coffee or a chilled glass of milk for a comforting experience. For gatherings, complement with a fresh green salad or light fruit salad to balance the indulgence.
Creative Ways to Present
Try individual servings in mini tart shells topped with edible flowers for a charming touch at parties. You can also dust the top with a pinch of cinnamon or nutmeg to give your pie an inviting aroma and festive flair.
Make Ahead and Storage
Storing Leftovers
Wrap leftover pie tightly with plastic wrap or store it in an airtight container in the refrigerator. It will stay fresh and creamy for up to 3 days, making it perfect to enjoy as a treat the next day.
Freezing
While this pie is best enjoyed fresh, you can freeze it without the crust to avoid sogginess. Freeze the filling in an airtight container for up to 1 month, then thaw overnight in the fridge. For best texture, bake and chill fresh crust separately.
Reheating
To gently reheat slices, warm them in a low oven at 300°F (150°C) for 10 minutes or until just warmed through, or enjoy straight from the fridge for that classic cool, creamy bite.
FAQs
Can I use regular milk instead of buttermilk?
While you can substitute regular milk mixed with a little lemon juice or vinegar to mimic buttermilk, the signature tang and richness from real buttermilk make this pie truly shine. For best results, stick to buttermilk.
Is it necessary to use all three extracts?
The vanilla is essential, but lemon and coconut extracts can be adjusted according to your taste. They add subtle complexity but aren’t mandatory if you don’t have them on hand.
Can I make this pie gluten-free?
Yes! Use a gluten-free pie crust and replace the all-purpose flour in the filling with a gluten-free flour blend that measures cup for cup. Just be mindful of baking times as they may vary slightly.
Why does the center of my pie jiggle?
A slightly jiggly center after baking is perfect for this pie. It will continue to set as it cools and chills in the fridge, resulting in its signature creamy texture.
How long can I keep this pie at room temperature?
This pie contains eggs and dairy, so it’s safest to keep it refrigerated and only leave it out for about 2 hours before serving to prevent spoilage.
Final Thoughts
This Rich & Creamy Buttermilk Pie Recipe is a timeless delight that brings comfort and joy with every forkful. Whether you’re baking for a holiday, a family gathering, or simply treating yourself, this pie promises luscious texture and vibrant flavor that will keep everyone coming back for more. Trust me, once you make it, it will earn a permanent spot in your recipe collection!
Print
Rich & Creamy Buttermilk Pie Recipe
- Prep Time: 20 minutes
- Cook Time: 50 minutes
- Total Time: 3 hours 10 minutes
- Yield: 8 servings
- Category: Dessert
- Method: Baking
- Cuisine: American Southern
Description
This Rich & Creamy Buttermilk Pie combines a silky custard filling made with buttermilk, eggs, and a blend of fragrant extracts poured into a flaky 9-inch pie shell. Baked to perfection, this classic Southern dessert features a smooth, lightly tangy filling with hints of vanilla, lemon, and coconut, ideal for an elegant yet simple homemade treat.
Ingredients
Pie Filling
- 1½ cups granulated sugar
- ¼ cup all-purpose flour
- ¼ teaspoon salt
- 2 eggs, room temperature
- 1 egg yolk, room temperature
- 5 tablespoons unsalted butter, melted
- 1½ teaspoons pure vanilla extract
- ¼ teaspoon lemon extract (adjust to taste)
- ⅛ teaspoon coconut extract (adjust to taste)
- 1 cup buttermilk, warm
Pie Crust
- 1 (9-inch) unbaked pie shell, chilled
Instructions
- Prepare the Oven: Preheat your oven to 350°F (175°C) to ensure the pie bakes evenly in a hot environment.
- Combine Dry Ingredients: In a large bowl, whisk together the granulated sugar, all-purpose flour, and salt. For an extra-smooth filling, sift these ingredients together. Set aside.
- Beat the Eggs: In another large bowl, whisk the eggs and egg yolk until the mixture is completely uniform in color and well combined.
- Mix Dry and Wet Ingredients: Gradually whisk the dry ingredients into the egg mixture. Continue whisking until the batter is smooth and free of lumps.
- Add Butter and Extracts: Whisk in the melted butter, vanilla extract, lemon extract, and coconut extract until everything is thoroughly incorporated.
- Add Buttermilk: Slowly stir in the warm buttermilk, mixing until the batter is smooth and no streaks remain. If the mixture develops bubbles on top, let it settle for a few moments before proceeding.
- Fill the Pie Shell: Pour the prepared batter into the chilled, unbaked 9-inch pie shell.
- Bake the Pie: Place the pie on the lower oven rack and bake for 25 minutes. Once that time is up, move the pie to the middle rack and bake for another 25 minutes, or until the edges are set and the center is just slightly jiggly.
- Cool the Pie: Remove the pie from the oven and transfer it to a cooling rack. Allow it to cool for 2-3 hours, or until the bottom of the pan is no longer hot to the touch.
- Chill Before Serving: Once cooled, refrigerate the pie for at least 2 more hours to let it fully set before slicing and serving.
- Garnish and Serve: Serve the pie cold or at room temperature, plain or topped with whipped cream and fresh berries as desired.
Notes
- Use room temperature eggs for a smoother filling texture.
- Warm the buttermilk slightly to prevent curdling when combined with eggs.
- Sifting dry ingredients helps avoid lumps in the custard mixture.
- Adjust the lemon and coconut extracts to taste for personalized flavor.
- Chilling the pie after baking ensures it sets properly and slices cleanly.
- This pie is best served chilled or at room temperature with optional toppings like whipped cream or berries.


