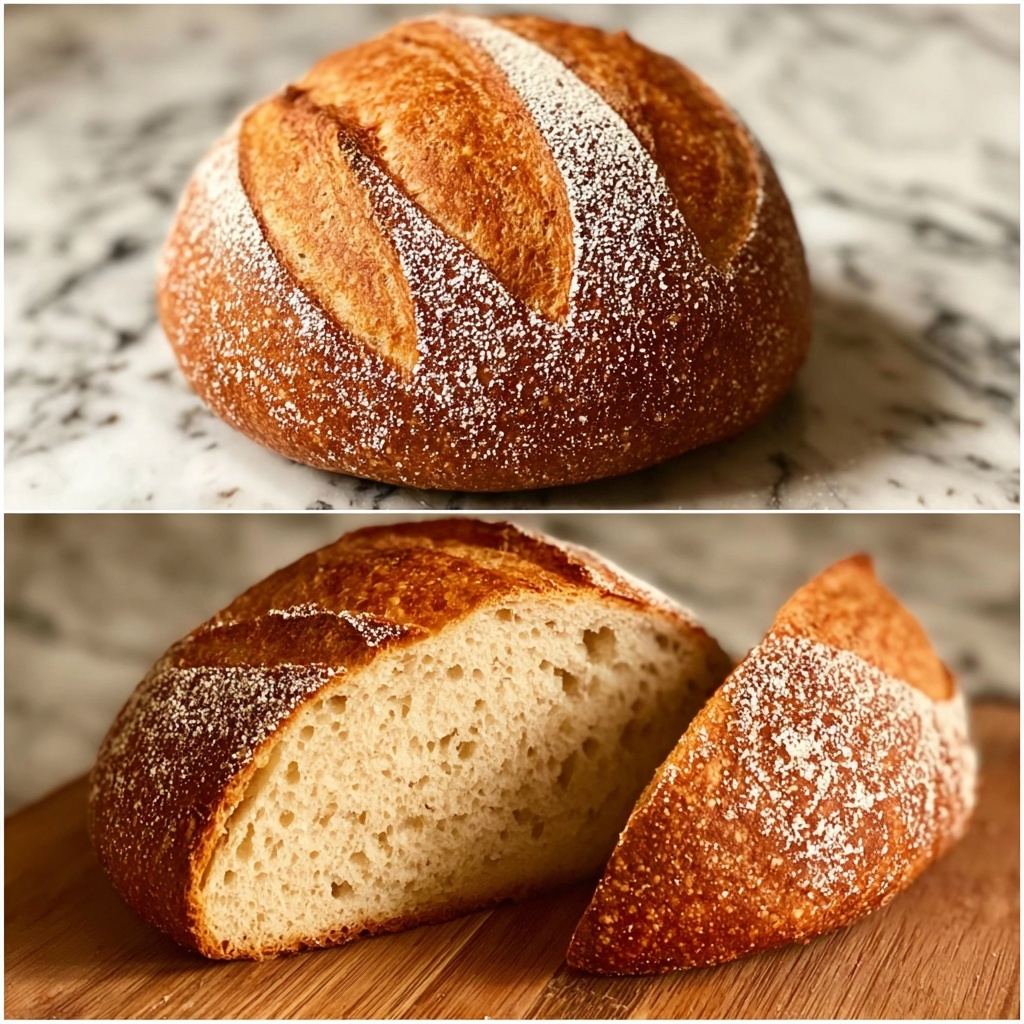
If you’ve ever dreamed of filling your home with the irresistible aroma of freshly baked bread, this Homemade Sourdough Bread Recipe is your perfect gateway. This classic sourdough loaf, with its crisp golden crust and pleasantly tangy crumb, brings together simple ingredients and time-tested techniques to create a bread that’s both nourishing and deeply satisfying. Whether you’re a seasoned baker or just starting out, this recipe invites you to slow down, enjoy the process, and savor every bite of your very own artisanal masterpiece right from your oven.
Ingredients You’ll Need
The beauty of this Homemade Sourdough Bread Recipe lies in its simplicity. Each ingredient plays a crucial role in developing the bread’s flavor, texture, and beautiful appearance. Using just flour, water, salt, and your vibrant sourdough starter ensures you get that authentic tang and chewy crust that makes sourdough so special.
- Bread Flour: 500 grams (about 4 cups) – This high-protein flour provides the necessary gluten structure to give your loaf strength and a satisfying chew.
- Water: 350 grams (about 1.5 cups) – Lukewarm water hydrates the flour and activates the yeast in your starter, setting the fermentation process in motion.
- Salt: 10 grams (about 1.5 teaspoons) – Not only does salt enhance flavor, but it also helps control yeast activity, ensuring a balanced rise.
- Sourdough Starter: 100 grams (about 1/2 cup) – The living culture that brings that signature tang and natural leavening power to your bread. Make sure it’s bubbly and active for best results.
How to Make Homemade Sourdough Bread Recipe
Step 1: Prepare Your Sourdough Starter
The foundation of any great sourdough bread is a lively, well-fed starter. Feed your starter with equal parts flour and water about 4 to 6 hours before baking. You’ll want it bubbly and active, which signals that it’s ready to bring your dough to life.
Step 2: Combine Dry and Wet Ingredients
In a large mixing bowl, whisk together the bread flour and salt to ensure even distribution. In a separate bowl, blend the lukewarm water with your ready starter until it’s well combined and bubbly. Pour the wet mixture into the dry ingredients and mix thoroughly until a shaggy dough forms.
Step 3: Knead the Dough
Now comes the fun part — kneading! Work the dough for roughly 10 minutes until it becomes smooth and elastic. If you prefer a gentler approach, try the stretch and fold method to develop gluten without overworking the dough.
Step 4: Bulk Fermentation with Stretch and Folds
Place your dough in a greased bowl, cover it, and allow it to rise for 4 to 6 hours. During the first 2 hours, perform the stretch and fold technique every 30 minutes to strengthen the dough and improve its texture. You’ll see the dough nearly double in size, developing wonderful flavor along the way.
Step 5: Shape and Rest
Gently shape the dough into a round loaf and let it rest uncovered for 15 to 20 minutes. This step allows the gluten to relax, making the final shaping easier and creating a loaf with a beautiful crumb structure.
Step 6: Final Proofing
After the rest, reshape the dough again and place it seam-side up in a floured proofing basket. Cover it and let it rise for 1 to 2 hours at room temperature. For greater depth of flavor, you can refrigerate it overnight, slowing the fermentation process.
Step 7: Bake to Perfection
Preheat your oven to 450°F (230°C) with a Dutch oven inside. Carefully transfer the loaf into the hot Dutch oven, cover it, and bake for 30 minutes. Then remove the lid and bake an additional 15 to 20 minutes until the crust turns a gorgeous golden brown and the loaf sounds hollow when tapped.
How to Serve Homemade Sourdough Bread Recipe
Garnishes
While sourdough is a star on its own, simple garnishes can elevate presentation and flavor. Try sprinkling a light dusting of flour on top before baking for a rustic look, or brush the crust with melted butter when it comes out of the oven for extra shine and richness.
Side Dishes
This Homemade Sourdough Bread Recipe pairs beautifully with an array of dishes. Think creamy soups, fresh salads, or vibrant spreads like herb butter, avocado mash, or preserved lemon hummus. Its tangy crumb complements savory and sweet flavors alike.
Creative Ways to Present
Slice your loaf thick for hearty sandwiches or thinly for crostini topped with tomato bruschetta or smoked salmon. Toasted sourdough also makes an unbeatable base for breakfast classics like eggs Benedict or smashed avocado with chili flakes.
Make Ahead and Storage
Storing Leftovers
Store your sourdough loaf wrapped in a linen cloth or in a paper bag at room temperature to maintain its crusty exterior and tender interior. Avoid plastic, which traps moisture and softens the crust. The bread is best enjoyed within 2 to 3 days.
Freezing
If you need to save your Homemade Sourdough Bread Recipe for longer, freezing is your friend. Slice the loaf beforehand, wrap slices tightly in plastic wrap or foil, place in a freezer bag, and freeze. This way, you can take out only what you need.
Reheating
To revive your bread’s crisp crust and fresh taste, sprinkle the loaf with a little water and warm it in a preheated 350°F oven for 10 to 15 minutes. This simple step makes every slice taste freshly baked.
FAQs
What is the ideal hydration level for this homemade sourdough bread recipe?
The recipe uses about 70% hydration, which is a balanced moisture level that creates a dough easy to handle, with a moderately open crumb and a chewy texture. Adjusting hydration can affect crust crispness and crumb openness.
Can I use all-purpose flour instead of bread flour?
While all-purpose flour can work, bread flour is preferred due to its higher protein content, which helps develop the gluten structure needed for that classic sourdough chewiness and rise.
How do I know when my starter is ready for baking?
Your sourdough starter should be bubbly, have a pleasant tangy aroma, and roughly double in size within a few hours after feeding. This indicates active fermentation power necessary for leavening your dough.
Is it necessary to use a Dutch oven for baking the bread?
Using a Dutch oven mimics a professional steam-injected oven environment, encouraging a crisp crust and good oven spring. However, baking on a baking stone and adding steam to your oven with a pan of water can also yield tasty results.
Why do I need to do stretch and folds during the rise?
Stretch and folds help develop gluten structure without intense kneading, improve dough strength, and promote better gas retention. This process results in a lighter, airier loaf with an ideal crumb texture.
Final Thoughts
Baking this Homemade Sourdough Bread Recipe is more than just making bread — it’s a rewarding journey into an age-old craft that fills your home with warmth and joy. With a bit of patience and love, you’ll create a loaf that’s not only delicious but also tells a story of tradition and care. I can’t wait for you to try it and savor the magic of slicing into your very own sourdough creation.
Print
Homemade Sourdough Bread Recipe
- Prep Time: 15 minutes (excluding starter feeding and fermentation)
- Cook Time: 45 minutes
- Total Time: 5 hours to overnight (includes fermentation and proofing times)
- Yield: 1 loaf (about 800 grams or 1.75 pounds)
- Category: Bread
- Method: Baking
- Cuisine: French
Description
This classic sourdough bread recipe guides you through creating a beautifully crusty, tangy loaf using a natural sourdough starter. With simple ingredients and time-honored techniques including fermentation, stretching, folding, and baking in a Dutch oven, this recipe yields a chewy crumb with a perfect golden crust.
Ingredients
Ingredients
- 500 grams Bread Flour (about 4 cups)
- 350 grams Water (about 1.5 cups, lukewarm)
- 10 grams Salt (about 1.5 teaspoons)
- 100 grams Sourdough Starter (about 1/2 cup, bubbly and active)
Instructions
- Prepare Sourdough Starter: Feed your sourdough starter with equal parts flour and water 4 to 6 hours before baking to ensure it is bubbly and active for the dough.
- Mix Ingredients: In a large mixing bowl, combine the bread flour and salt. In a separate bowl, mix the lukewarm water with the bubbly sourdough starter, then gradually combine the wet mixture with the dry ingredients.
- Knead the Dough: Knead the dough for approximately 10 minutes until smooth and elastic, or alternatively use the stretch and fold technique to develop gluten strength.
- First Rise: Place the kneaded dough in a greased bowl and cover it. Let it rise at room temperature for 4 to 6 hours until doubled in size, performing stretch and folds every 30 minutes during the first 2 hours to strengthen the dough.
- Pre-shape and Rest: Shape the dough into a round loaf and let it rest uncovered for 15 to 20 minutes to relax the gluten.
- Final Shape and Proof: Shape the dough again and place it seam-side up in a floured proofing basket. Cover and allow it to rise for 1 to 2 hours at room temperature or alternatively refrigerate it overnight for a slower fermentation and enhanced flavor.
- Preheat and Bake: Preheat your oven to 450°F (230°C) and place a Dutch oven inside to heat. Once preheated, carefully transfer the dough into the Dutch oven, cover it, and bake for 30 minutes. Then remove the lid and bake uncovered for an additional 15 to 20 minutes until the crust is deeply golden brown and crisp.
Notes
- Use bread flour for better gluten development and a chewier texture.
- Ensure your sourdough starter is active and bubbly before using for best rise.
- Performing stretch and folds helps develop structure without intensive kneading.
- Proofing times can vary depending on ambient temperature; dough should roughly double in size.
- Refrigerating the dough overnight improves flavor and makes baking more flexible.
- Handle the dough gently after proofing to retain its airiness.
- Use a Dutch oven for baking to mimic steam, which helps develop a crisp crust.


